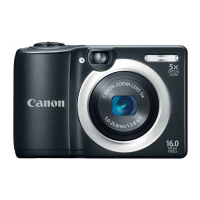
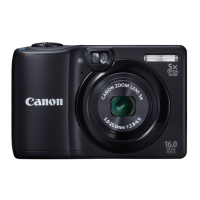
Do you have a question about the Canon POWERSHOT A1100IS and is the answer not in the manual?
Guidance on taking initial test shots and understanding manufacturer liability.
Caution against recording images that infringe copyright laws.
Instructions on focus, flash, self-timer, image settings, and viewfinder usage.
How to view, search, and play back images and movies.
Critical warnings for camera operation, handling, and power sources.
Instructions for safe handling, use, and disposal of batteries.
General warnings about CD-ROM use, impacts, lens, and environment.
Precautions regarding flash use, battery storage, and camera placement.
Steps for setting date and time upon first camera power-on.
Pressing halfway to focus and set exposure before shooting.
Pressing fully to capture the image.
Setting the mode dial to AUTO for automatic camera settings.
How the camera focuses and identifies scenes.
Steps to capture the image and post-shot feedback.
Resolving issues with screen or sound during AUTO mode.
Steps to confirm and execute image deletion.
Physical connection steps for printing.
Selecting the Easy shooting mode for simplified operation.
Basic steps for taking photos in Easy mode.
Setting the mode dial to record movies.
Steps to start, record, and stop movie capture.
Step-by-step instructions for installing transfer software.
Physical connection steps using USB cable.
Steps to start transferring images from camera to PC.
Explanation of the different shooting modes selectable via the mode dial.
How the camera conserves power while shooting.
Steps to display the Function menu.
Selecting menu items and choosing options.
Steps to display the main menu system.
Procedure to reset all camera settings to default.
Procedure to format the memory card, erasing all data.
Using scene modes to optimize settings for specific environments.
Instructions on how to turn off the flash.
How to operate the zoom lever for magnification.
Explanation of digital zoom functionality and limits.
Steps to set up and activate the self-timer.
Taking a photo using the self-timer delay.
Enabling the self-timer that detects faces.
Framing shots and initiating face detection.
How the camera shoots after detecting faces.
Introduction to using Program AE mode for manual control.
Selecting the P mode for flexible shooting.
Customizing various settings for desired results.
Steps to select macro mode for close-up photography.
Choosing the desired pixel count for images.
Choosing between Fine and Normal image quality.
Adjusting exposure compensation for brighter or darker images.
Setting the camera to capture images in rapid succession.
Steps to enable continuous shooting mode.
How to take multiple photos by holding the shutter button.
Choosing the camera's sensitivity to light.
Selecting ISO speed from Auto, Low, Medium, or High.
Choosing presets like Daylight, Cloudy, Tungsten for accurate colors.
Applying color effects like Vivid, Sepia, or Black & White.
Adjusting the time delay and number of shots.
How to lock focus and exposure to recompose shots.
Introduction to advanced functions for enhanced photography.
Explanation of the Face AiAF auto focus system.
Activating and deactivating the AF Lock feature.
Shooting after focus has been locked.
Enabling the mode to select specific faces for focus.
Choosing a specific face from detected faces for sharp focus.
Taking the picture with focus locked on the selected face.
Activating AE Lock to maintain exposure settings.
Shooting after locking the exposure.
Activating FE Lock to maintain flash exposure settings.
Shooting after locking the flash exposure.
Using i-Contrast to automatically brighten dark subjects.
Steps to find and select the i-Contrast feature.
Selecting correction levels and applying them to images.
Steps to turn on the red-eye reduction feature.
Steps to focus and lock exposure settings.
Adjusting brightness while AE Lock is active.
Marking images to prevent accidental deletion.
Procedure to confirm and execute the deletion of all images.
Steps to find the red-eye correction feature.
Selecting an image and applying the correction.
Resolving problems with camera power and battery.
Troubleshooting problems concerning the camera lens.
Resolving problems encountered during the shooting process.
Troubleshooting issues like blur, darkness, graininess, and red-eye.
Resolving problems with recording time and camera functions.
Troubleshooting issues related to movie recording and zoom.
Resolving problems with media playback and button responsiveness.
Solutions for messages related to memory card status.
Solutions for general operational and error code messages.
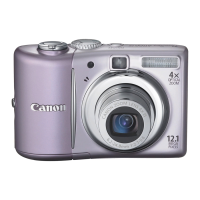
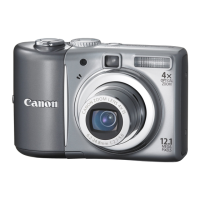
| Resolution | 12.1 Megapixels |
|---|---|
| Optical Zoom | 4x |
| Image Stabilization | Yes |
| Max Video Resolution | 640 x 480 |
| ISO Range | 80-1600 |
| Battery Type | 2 x AA |
| Type | Compact |
| Digital Zoom | 4x |
| Image Processor | DIGIC 4 |
| Aperture Range | f/2.7-5.6 |
| Shutter Speed | 15 - 1/1600 sec |
| LCD Resolution | 115, 000 dots |
| Video Frame Rate | 30 fps |
| Dimensions | 95.4 x 62.4 x 31.0 mm |
| Weight | 155 g (without battery) |
| Sensor | 1/2.3 inch CCD |
| LCD Size | 2.5" |
| Supported Flash Memory | SD/SDHC/MMC |
| Focal Length | 6.2-24.8mm (35-140mm equivalent) |