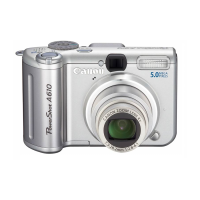
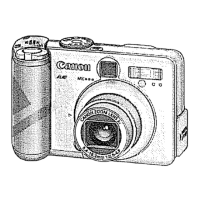
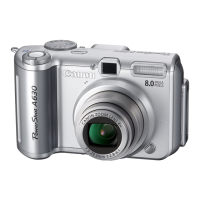
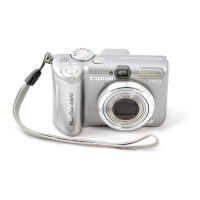
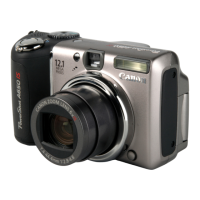
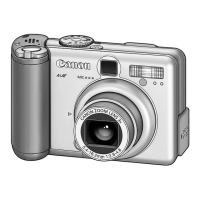
The Canon PowerShot A620 and A610 are digital cameras designed for ease of use, offering a range of features for capturing and managing images. This guide focuses on the basic operation, from initial setup to downloading images to a computer.
Function Description
The primary function of these cameras is to capture still images and movies. They are equipped with a zoom lens, a built-in flash, and an LCD monitor for framing shots, reviewing captured content, and navigating menus. The cameras offer various shooting modes, including automatic settings for simplicity, as well as specialized scene modes for specific photographic situations. Beyond capturing, the cameras facilitate immediate image review, basic editing (not explicitly detailed in this basic guide but implied by menu options), and direct printing capabilities when connected to compatible printers. Image transfer to a computer is also a core function, allowing for storage, further editing, and sharing of photos.
Usage Features
Initial Setup:
- Battery Installation: The cameras use four AA-size alkaline or NiMH batteries. To install, slide the battery cover lock, open the cover, insert the batteries with correct polarity, and then close the cover.
- Memory Card Insertion: Slide the memory card slot cover open, insert the memory card until it clicks into place, and close the cover. It's crucial to ensure correct orientation to prevent damage. To remove, push the card in until it clicks, then release. The cameras support SD and MultiMediaCards.
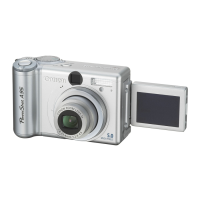
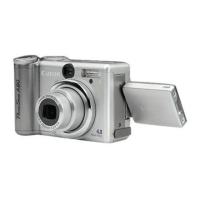
- LCD Monitor Operation: The LCD monitor is versatile. It can be opened 180 degrees from right to left. It can then be tilted forward 180 degrees towards the lens or backward 90 degrees. When tilted forward towards the lens, the image automatically flips and reverses for self-portraits or viewing from the front. This reverse display function can be turned off in the Rec. menu. When closing the LCD monitor, ensure it faces inward to protect the screen; it will automatically turn off when shut against the camera body.
- Date/Time Setting: After installing batteries, the date and time need to be set. This is done by pressing the power button, using the directional buttons to select and adjust the date/time, and confirming with the FUNC./SET button. A built-in rechargeable lithium battery maintains these settings, charging when the main batteries are in the camera. If main batteries are removed for an extended period (approx. three weeks), these settings may be lost and need to be reset.
- Display Language Setting: The display language can be set by switching to playback mode, holding down the FUNC./SET button, pressing the MENU button, and then using the directional buttons to select a language and confirming with FUNC./SET.
Basic Shooting:
- Power On/Off: Press the power button to turn the camera on. A start-up sound and image will display. Pressing it again turns the camera off. To mute all sounds (except warnings), hold the MENU button while pressing the power button.
- Mode Selection: Use the mode switch to select between shooting (camera icon) and playback (play icon). The shooting mode dial allows selection of various modes like AUTO, Creative Zone, and Image Zone.
- Focus and Shoot: Aim the camera at the subject. Press the shutter button halfway to focus; the camera will beep twice and an indicator will light green. Press the shutter button fully to shoot; the shutter sound will play, and the image will record. The indicator will blink green while the image is saved to the memory card.
- Shooting Modes (Image Zone):
- AUTO: Camera automatically selects all settings.
- Portrait: Blurs the background, making the subject stand out.
- Landscape: For spacious scenes.
- Night Scene: Captures human subjects against an evening backdrop with flash and slow shutter speed for balanced exposure.
- Night Snapshot: Reduces camera shake for people against twilight/night backgrounds, even without a tripod.
- Indoor: Prevents camera shake and maintains true color under fluorescent or tungsten lighting.
- Kids&Pets: Captures moving subjects without missing photo opportunities.
- Foliage: Shoots trees and leaves in vivid colors.
- Snow: Shoots without a blue tinge and prevents people from appearing dark against snowy backgrounds.
- Beach: Prevents people from appearing dark near water or sand where reflected sunlight is strong.
- Fireworks: Captures fireworks sharply with optimal exposure.
- Underwater: For use with Waterproof Case WP-DC90 (sold separately), uses optimal white balance to reduce bluish tones and records natural hues. Flash use is minimized.
- My Colors: Allows changing image colors with 9 modes.
- Stitch Assist: Helps shoot overlapping images for later panoramic merging on a computer.
- Movie Mode: Shoots movies. Options include Standard, Fast Frame Rate (for sports/motion), Compact (for email), and My Colors (for color effects).
- Creative Zone: Allows free selection of camera settings like exposure and aperture.
- Zoom: Use the zoom lever (wide angle/telephoto) to adjust focal length from 35mm to 140mm (35mm film equivalent).
- Flash: Press the flash button to cycle through settings: Auto with red-eye reduction, Auto, Flash on with red-eye reduction, Flash on, Flash off. Red-eye reduction can be turned on/off in the Rec. menu. For slow shutter speeds with flash (Slow Synchro), use a tripod.
- Macro (Close-ups): Press the macro button to shoot close-ups (flowers, small items). Minimum shooting distance is 1 cm (0.4 in.) at wide angle and 25 cm (9.8 in.) at telephoto. Use the LCD monitor for composition in macro mode as the viewfinder may be off-center. Flash exposure may not be optimal for subjects 1-25 cm away.
Reviewing Images:
- After shooting, the image displays on the LCD for about 2 seconds. To keep it displayed, hold the shutter button or press FUNC./SET. To stop, press the shutter button halfway.
Playback and Erasing:
- Playback: Set the mode switch to playback. Use the directional buttons to navigate through images. Holding the button down advances images faster.
- Erasing: In playback mode, select an image, press the erase button, confirm [Erase] with FUNC./SET. Erased images cannot be recovered, so exercise caution.
Menus and Settings:
- FUNC. Menu: Accessed by pressing FUNC./SET in shooting mode. Allows adjustment of common shooting functions like ISO speed, white balance, and flash settings. Use directional buttons to select items and options, then FUNC./SET to confirm.
- Rec., Play, Set up, My Camera Menus: Accessed by pressing the MENU button.
- Navigation: Use directional buttons or the zoom lever to switch between menus (Rec., Play, Set up, My Camera).
- Selection: Use directional buttons to select menu items and options. For items with ellipses (...), press FUNC./SET to open a sub-menu, then FUNC./SET again to confirm.
- Exit: Press the MENU button to exit.
Printing:
- Direct Print Connection: Connect the camera to a Direct Print compatible printer (Canon brand or PictBridge-compliant) using the interface cable. Turn on the printer.
- Printing Process: In playback mode, confirm the print icon (or similar) is displayed. Select an image using directional buttons, then press the print button. The print button will blink blue, and printing will start.
- DPOF Print Settings: Advanced print settings can be configured via the DPOF Print Settings menu.
Downloading Images to a Computer:
- Software Installation: Install the Canon Digital Camera Solution Disk software first. For Windows, run the installer and choose "Easy Installation." For Macintosh, double-click the "Canon Digital Camera Installer" icon. Restart the computer after installation.
- Camera Connection: Connect the camera's DIGITAL terminal to the computer's USB port using the supplied interface cable. Open the camera's terminal cover by slipping a fingernail under the left edge.
- Transfer Mode: Set the camera's mode switch to playback and turn on the power.
- Initiating Download (Windows): When connected, a window will appear. Select "Canon CameraWindow" and click "OK" (first time only). If it doesn't appear, launch CameraWindow from the Start menu.
- Initiating Download (Macintosh): The CameraWindow will appear. If not, click the "Canon CameraWindow" icon on the Dock.
- Download Options:
- All Images: Transfers and saves all images.
- New Images: Transfers only images not previously transferred.
- DPOF Trans. Images: Transfers images with DPOF Transfer Order settings.
- Select & Transfer: Allows viewing and selecting single images for transfer.
- Wallpaper: Transfers and saves single images as wallpaper (JPEG images become BMP on Windows).
- Process: Select the desired download option (e.g., "New Images"), then press the print button. The button will blink blue during download. The display returns to the Direct Transfer menu when complete. To cancel, press FUNC./SET.
- Image Storage: Downloaded images are typically saved to the "My Pictures" folder (Windows) or into folders organized by shooting date (both OS). Thumbnails appear in ZoomBrowser EX (Windows) or ImageBrowser (Macintosh).
- Memory Card Reader: An alternative method for image transfer, compatible with all listed operating systems.
Maintenance Features
- Battery Charging (Internal Lithium Battery): The internal lithium battery, which maintains date/time settings, charges when the main batteries are in the camera. For initial use or after extended storage, place main batteries in the camera for approximately four hours or use an AC Adapter Kit ACK600 (sold separately) to ensure it's charged.
- LCD Monitor Protection: Always close the LCD monitor with the screen facing inward when not using the camera to protect it from damage.
- Memory Card Handling: Ensure the memory card is correctly oriented during insertion to prevent damage to the camera.
- Cable Connection: Always grasp the sides of the connector when disconnecting the interface cable from the camera's DIGITAL terminal to avoid damaging the port.
- Software Updates: While not explicitly detailed as a maintenance feature, the mention of PDF manuals available on the Canon website suggests that users may need to check for updated information or software versions for optimal performance and compatibility.
- General Care: The safety precautions emphasize avoiding severe impacts, not touching damaged flash portions, and discontinuing use if the equipment emits smoke or noxious fumes. These are general maintenance guidelines to ensure the longevity and safe operation of the device.