EasyManua.ls Logo

Canon Vistura User Manual

Canon Vistura
99 pages
To Next Page IconTo Next Page
Page #1 background imageLoading...
Page #1 background image
WARNING:
TO REDUCE THE RISK OF FIRE OR ELECTRIC SHOCK, DO NOT EXPOSE
THIS PRODUCT TO RAIN OR MOISTURE.
Important Usage Instructions
Introduction
2
E
Digital Video Camcorder, VISTURA
This device complies with Part 15 of the FCC Rules. Operation is subject to the following two
conditions: (1) This device may not cause harmful interference, and (2) this device must accept any
interference received, including interference that may cause undesired operation.
Note: This equipment has been tested and found to comply with the limits for class B digital device,
pursuant to Part 15 of the FCC Rules. These limits are designed to provide reasonable protection
against harmful interference in a residential installation. This equipment generates, uses and can
radiate radio frequency energy and, if not installed and use in accordance with the instructions, may
cause harmful interference to radio communications. However, there is no guarantee that interference
will not occur in a particular installation. If this equipment does cause harmful interference to radio or
television reception, which can be determined by turning the equipment off and on, the user is
encouraged to try to correct the interference by one or more of the following measures:
• Reorient or relocate the receiving antenna.
• Increase the separation between the equipment and receiver.
• Connect the equipment into an outlet on a circuit different from that to which the receiver is connected.
• Consult the dealer or an experienced radio/TV technician for help.
Use of shielded cable is required to comply with class B limits in Subpart B of Part 15 of FCC Rules.
Do not make any changes or modifications to the equipment unless otherwise specified in the manual.
If such changes or modifications should be made, you could be required to stop operation of the
equipment.
Canon U.S.A. Inc.
One Canon Plaza, Lake Success, NY 11042, U.S.A.
Tel No. (516)328-5600
WARNING:
TO REDUCE THE RISK OF ELECTRIC SHOCK AND TO REDUCE
ANNOYING INTERFERENCE, USE THE RECOMMENDED ACCESSORIES
ONLY.
COPYRIGHT WARNING:
Unauthorized recording of copyrighted materials may infringe on the
rights of copyright owners and be contrary to copyright laws.
Important Warning
CAUTION:
TO REDUCE THE RISK OF ELECTRIC
SHOCK, DO NOT REMOVE COVER (OR
BACK). NO USER SERVICEABLE PARTS
INSIDE. REFER SERVICING TO
QUALIFIED SERVICE PERSONNEL.
The lightning flash with arrowhead
symbol, within an equilateral triangle, is
intended to alert the user to the presence
of uninsulated “dangerous voltage” within
the product’s enclosure, that may be of
sufficient magnitude to constitute a risk of
electric shock to persons.
The exclamation point, within an
equilateral triangle, is intended to alert
the user to the presence of important
operating and maintenance (servicing)
instructions in the literature
accompanying the product.
CAUTION
RISK OF ELECTRIC SHOCK
DO NOT OPEN
“Note to CATV system installer: This reminder is provided to call the CATV system installer’s attention to
Article 820-40 of the NEC that provides guidelines for proper grounding and, in particular, specifies that
the cable ground shall be connected to the grounding system of the building, as close to the point of
cable entry as practical”.

Table of Contents

Other manuals for Canon Vistura

Question and Answer IconNeed help?

Do you have a question about the Canon Vistura and is the answer not in the manual?

Canon Vistura Specifications

General IconGeneral
BrandCanon
ModelVistura
CategoryCamcorder
LanguageEnglish

Summary

Important Usage Instructions

Important Safety Instructions

Introduction

Thank You for Choosing a Canon Camcorder

Expresses gratitude and sets expectations for the camcorder's features.

Getting Started

Initial steps and recommendations for learning camcorder operations.

Introducing the VISTURA

Powering Your Camcorder

Connecting to AC Outlet

Steps to connect the camcorder to a power source for operation.

Charging and Attaching the Battery Pack

Loading and Unloading a Cassette

Cassette Handling and Protection

Protecting Tapes from Accidental Erasure

How to use the write-protect tab on cassettes to prevent accidental deletion.

Handling Cassettes

Guidelines for proper care, storage, and handling of video cassettes.

Cassette Memory

Information on the camcorder's cassette memory function.

Basic Recording Procedures

Before You Start Recording

Checklist of prerequisites before beginning the recording process.

To Record

Step-by-step instructions for initiating and conducting a recording.

When You Have Finished Recording

Changing Recording Modes (SP/LP)

Zooming Operations

Using the LCD Screen

Switching Between Displays

How to toggle between the LCD screen and the viewfinder.

Changing LCD Screen Angle

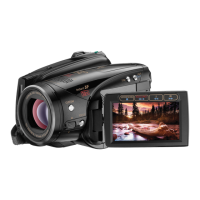
Adjusting the LCD screen for better viewing angles during shooting or playback.

About the LCD Screen

Details on the LCD screen's precision and potential dot appearances.

Monitoring Recording with LCD

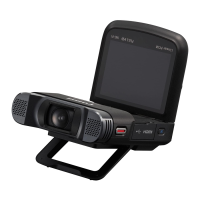
How to use the LCD to monitor yourself or the subject during recording.

Playing Back Cassettes

Other Playback Modes

Playback Pause

How to temporarily stop and resume playback of recorded video.

Fast Forward Playback

Instructions for quickly advancing through recorded content.

Rewind Playback

Instructions for quickly reversing through recorded content.

Special Playback Functions

Frame Advance and Reverse

How to play back video frame by frame forwards or in reverse.

Slow Motion Playback

Instructions for playing recorded video at reduced speeds.

Speed Playback (x2)

How to play recorded video at twice the normal speed.

Connecting for TV/VCR Playback

Using S-Video Input

Connecting the camcorder to a TV/VCR with an S-video input terminal.

Using Audio/Video Input Terminals

Connecting the camcorder to a TV/VCR using standard A/V input jacks.

Connecting When TV Lacks A/V Terminals

Connecting RF Unit/Adapter Cables

Tips for Better Video Recording

Camera Handling Techniques

Advice on holding the camera steady for improved video quality.

Using a Tripod

Guidelines for mounting and using the camera on a tripod.

Composition Basics

Principles of framing shots for more visually appealing video.

Picture Angle Selection

Choosing different shot types (long, medium, close-up) for storytelling.

Camera Movement Techniques

Guidance on using pan and tilt movements for dynamic shots.

Turning Optical Image Stabilizer On/Off

Navigating Camera Menus

Camera Menu (CAM. MENU)

Explanation of the main camera settings accessible via the menu system.

VCR Menu (VCR MENU)

Explanation of settings available when the camcorder is in VCR mode.

Edit Menu (EDIT MODE)

Accessing and using the video editing functions menu.

Set Up Menu (SET UP)

Accessing and configuring system settings via the set up menu.

Using the Wireless Controller and Tally Lamp

Inserting Batteries

How to correctly install batteries in the wireless controller.

Disabling Wireless Controller and Tally Lamp

Setting Date, Time, and Time Zone

Setting Time Zone and Daylight Saving Time

Adjusting the camera's time zone and daylight saving settings.

Setting the Clock

How to set the current date and time on the camcorder.

Setting the Display Style

Choosing how date and time information is displayed during playback.

Displaying Data Code

Taking Still Pictures (Photo Mode)

Tape Searching Functions

Photo Search

Locating specific still pictures recorded on the tape.

Date Search

Finding recorded segments based on the date they were captured.

Searching and Reviewing Recordings

Record Search

Navigating through recorded footage to find specific points for editing.

Record Review

Quickly reviewing the last few seconds of a recording to check quality.

Using Various Recording Programs

Selecting a Recording Program

How to choose from the camera's different recording modes.

Easy Recording Program

Using the simplest point-and-shoot recording mode.

Auto Recording Program

Using automatic settings for normal recording conditions.

FlexiZone Program

Utilizing FlexiZone for flexible autofocus and exposure control.

Sports Program

Optimizing settings for recording fast-action sports scenes.

Portrait Program

Enhancing subjects against softened backgrounds for portraits.

Spotlight Program

Recording subjects under focused lighting conditions.

Sand & Snow Program

Adjusting for bright backgrounds like beaches or ski resorts.

Low Light Program

Capturing video in dimly lit environments.

Digital Effects

Fade Trigger Effect

Creating gradual fades into and out of scenes.

Wipe Effect

Transitioning scenes with a wiping motion.

Scroll Effect

Displaying images moving sideways into or out of the screen.

Art Effects (Solarization)

Applying artistic effects like solarization to the image.

Black and White Recording

Recording video in monochrome.

Sepia Effect

Recording images with a sepia tint.

Strobe Effect

Creating a series of still images for a slow-motion effect.

Selecting Digital Effects

How to choose and activate various digital effects.

Reactivating Fade, Scroll, and Wipe Effects

16:9 Mode (Widescreen Recording)

Audio Recording and Settings

Selecting Audio Mode (16-bit/12-bit)

Choosing between high-quality 16-bit and multi-channel 12-bit audio recording.

Headphones and External Microphone

Connecting audio devices for monitoring and improved recording.

Wind Screen Function

Setting the Self-Timer

Flash Photography with Speedlite

Flash Charging and Operation

Information on charging the Speedlite and its operation with the camera.

Manual Focus Adjustment

FlexiZone AF for Focusing

Using FlexiZone AF to select subjects for autofocus.

Focus Lock Function

Freezing the focus at a specific point, disabling autofocus.

Manual Focus Operation

Directly adjusting the camera's focus using the focus wheel.

Manual Exposure Adjustment

FlexiZone AE for Exposure Control

Using FlexiZone AE to base exposure on a selected area.

Exposure Lock Function

Fixing the exposure level to maintain brightness in changing light.

Manual Exposure Adjustment

Fine-tuning exposure manually after locking it.

Shutter Speed Adjustment

Setting the White Balance

Returning to a Pre-Marked Tape Position

Auto Editing Function

Preparing for Auto Editing

Steps to connect camera and VCR for automated video editing.

Selecting Scenes for Editing

Marking start and end points of desired scenes from the original tape.

Previewing and Reordering Scenes

Reviewing the edited sequence and rearranging scenes.

Running the Editing Program

Executing the auto editing process to create the final video.

Preparing for Video Editing

Connecting Camera to VCR

Establishing the physical connection between the camcorder and VCR.

Setting Up Camera to Control VCR

Configuring the camera for remote VCR operation.

First-Time Editing Function Use

Setting Recorder for VCR Control

Configuring the camcorder to send correct remote signals to the VCR.

Choosing Scenes for Editing (SET Function)

Previewing and Recording Edited Scenes

Preview Function

Reviewing the programmed editing sequence before final recording.

Running the Editing Program (START Function)

Cut-In and Cut-Out Adjustments

Setting Adjustments

Adjusting cut-in/cut-out points to compensate for VCR response times.

Calculating Best Cut-In/Cut-Out Adjustments

Deleting and Clearing Editing Programs

Clearing the Whole Program (CLEAR ALL)

Erasing all programmed scenes and resetting the editing program.

Deleting Individual Scenes (DELETE)

Removing specific scenes from the editing program.

Reordering Scenes in Editing Program

Simple VCR Editing (Manual)

Preparations for Simple Editing

Steps to connect and prepare the camera and VCR for basic editing.

Basic Editing Process

Step-by-step guide for manually copying scenes to the VCR.

DV Terminal Connections and Use

Optional DK-1 Kit and Copyright Signal

DK-1 Kit for Photo Download

Using the DK-1 kit to transfer still pictures to a computer.

Understanding Copyright Signals

Information on playback and dubbing restrictions for protected tapes.

Preparing the Camera for Use

Adjusting the Viewfinder

Customizing the viewfinder for optimal viewing comfort.

Lens Cap and Grip Belt Preparation

Procedures for preparing the lens cap and securing the grip belt.

Attaching the Shoulder Strap

How to attach and adjust the shoulder strap for portability.

Battery Pack Usage and Information

Charging and Recording Times

Expected times for battery recharge and recording duration.

Checking Battery Power Level

Understanding the battery indicator and low power warnings.

Recharging the Battery Pack

Guidelines for when and how to recharge the lithium-ion battery.

Battery Pack Care and Maintenance

Battery Pack Terminal Care

Instructions for attaching terminal covers and keeping terminals clean.

Storing the Battery Pack

Proper procedures for storing battery packs for extended periods.

Installing the Backup Battery

Replacing the internal backup battery for date/time memory.

Setting the Audio Mix

Camera Maintenance and Precautions

General Cautions

Warnings regarding temperature, humidity, light sources, and magnetic fields.

Storage Guidelines

Recommendations for storing the camera when not in use.

LCD Screen Brightness Adjustment

Modifying the LCD screen's brightness level.

Viewfinder and LCD Cleaning

Methods for cleaning the viewfinder and LCD screen.

Camera Body and Lens Cleaning

Proper techniques for cleaning the camera exterior and lens.

Video Head Cleaning

Instructions for cleaning the video heads to resolve playback issues.

Using the Camera Abroad

Power Sources and Voltage Compatibility

Using the camera with different international power supplies.

TV Playback System Compatibility (NTSC)

Information on TV systems compatible with the camcorder's playback.

Condensation Prevention and Handling

Protecting Camera from Condensation

Steps to take before entering warm/humid environments to prevent moisture buildup.

Handling Condensation Detection

What to do when condensation is detected and how to resolve it.

Troubleshooting Common Issues

Recording/Playback Problems

Solutions for issues encountered during recording or playback, such as no power, display errors, or focus problems.

Miscellaneous Problems

Solutions for issues with accessories, indicators, camera malfunctions, and cable connections.

VISTURA System Diagram

Optional Accessories Overview

Power and Charging Accessories

Details on battery packs, car adapters, charge adapters, and filter rings.

Lenses, Filters, and Lighting

Tele-converters, wide-converters, filter sets, and video lights for enhanced shooting.

Audio, Cases, and Connectivity

Microphone booms, chargers, carrying cases, RF adapters, and RF units.

Flash Units and DV Capture Kit

External flash units and the kit for transferring still pictures to a computer.

Finding Your Way Around VISTURA

Camera Controls and Features

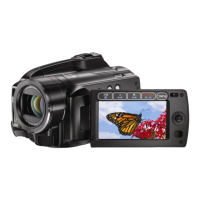
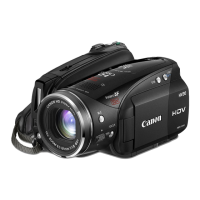
Identifies external buttons, terminals, and key camcorder components.

Wireless Controller Layout

Diagram and explanation of the wireless remote control buttons and functions.

Screen Displays and Indicators

Turning Off LCD Screen Displays

How to disable the LCD screen's information displays for cleaner playback.

Key Screen Indicators

Explanation of symbols and messages displayed on the camcorder screen, including effects and modes.

Time Code and Recording Reminders

Understanding time code recording and recording start reminders.

Caution Phrase Explanations

Interpretation of various caution messages shown on the camera display.

VISTURA Specifications

USA Limited Warranty

Canada Limited Warranty

Related product manuals