23
GB
The exclusive feature of this model is the use
of touch-control technology. Just touch the area
of the symbol and the machine will perform the
corresponding function. However, you will notice that
you must exert slight pressure to activate the controls,
just like a normal button; this is to avoid accidental
commands.
7. FIRST USE
Fill the water tank
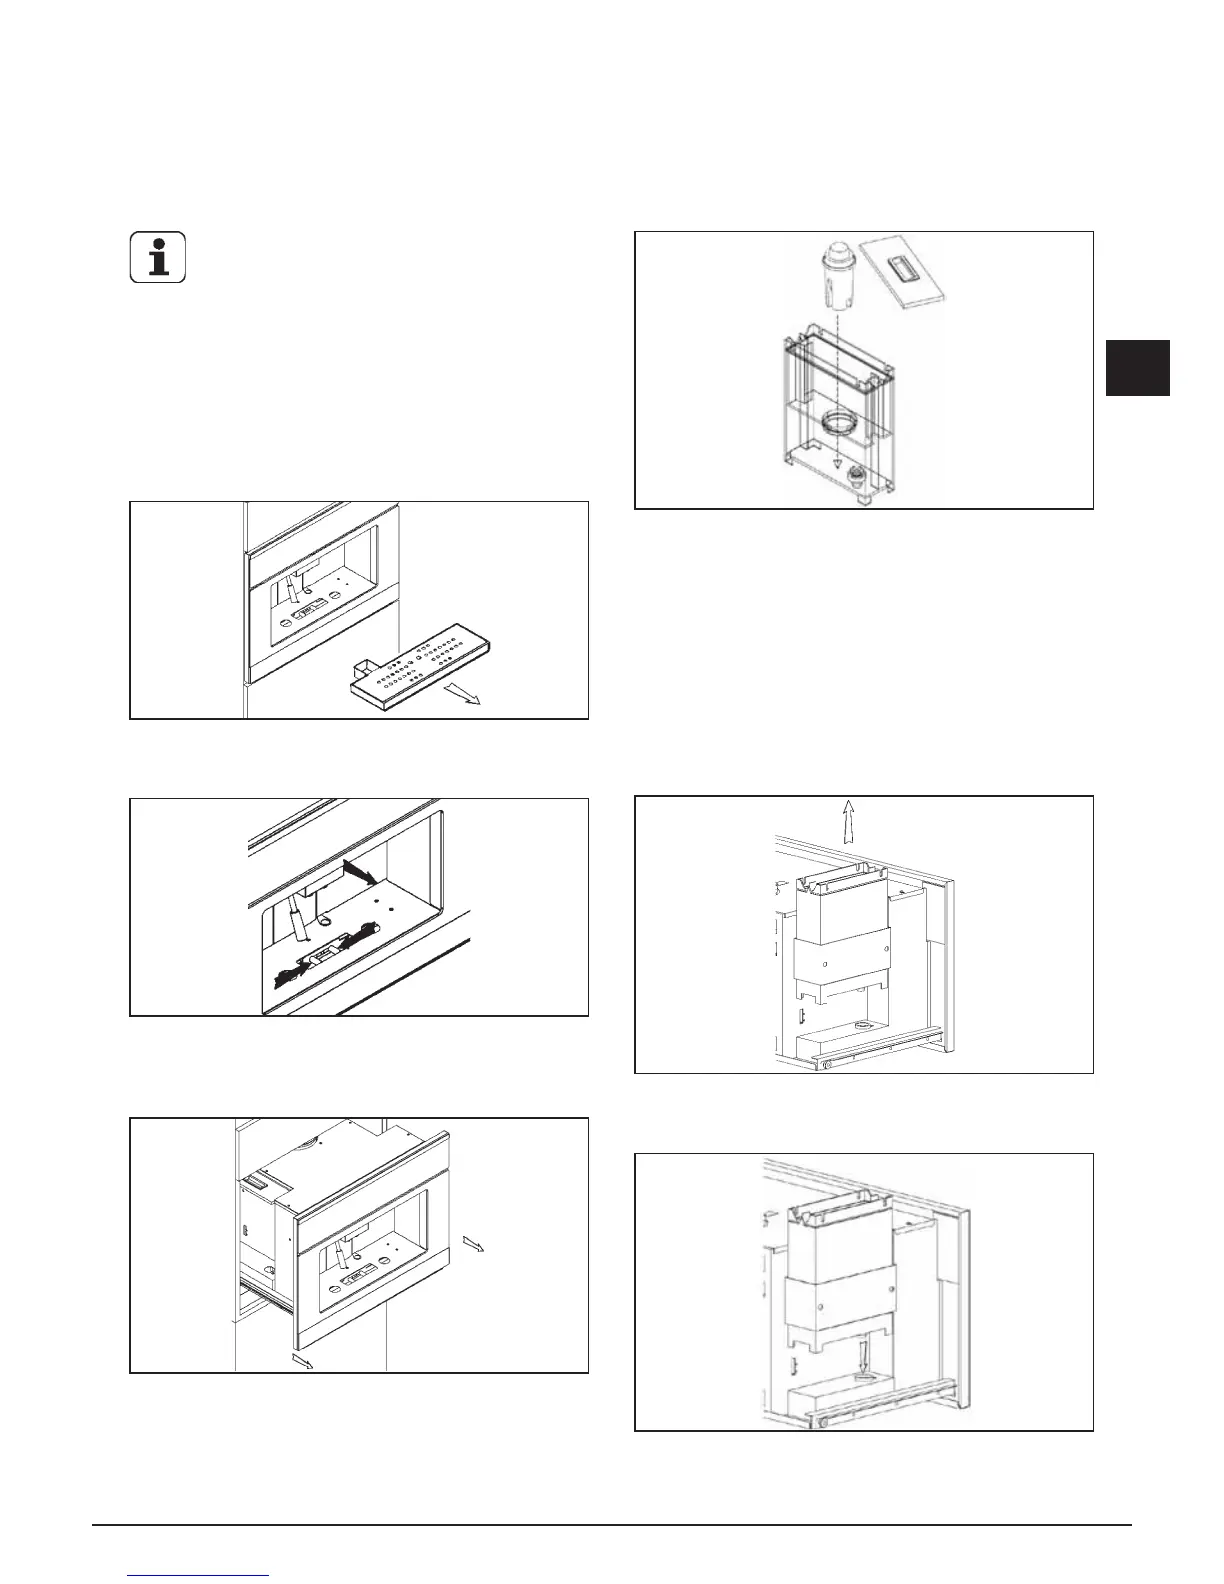
Fig. 7.1 Remove the drip basin from its seat
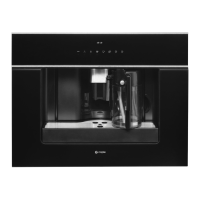
Fig. 7.2 Press the unlocking lever under the drip basin
and pull the machine towards you as shown in the gure.
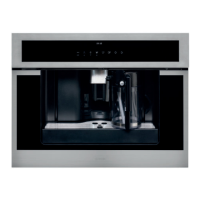
Fig. 7.3 Pull the coffeemaker out of the furniture by
sliding it on its guides.
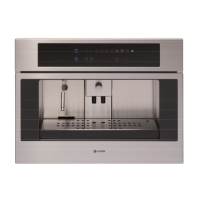
Fig.7.4 Insert the decalcifying lter in its seat.
Before lling the water tank, make sure that the
decalcifying lter was soaked in cold water for at least
20 minutes (in any case, follow the instructions on the
lter package). After soaking, insert it in its seat inside
the tank, as shown in the gure, until you hear a click.
If the machine has not been used in a long time, we
recommend changing the water in the tank.
The lter can be purchased at an appliance store, our
Service Centres or at authorised replacement parts
stores.
Fig. 7.5 Remove the water tank as shown in the gure
and ll it with drinking water (about 2.5 litres).
Fig. 7.6 Put the tank back in its seat, taking care to
match up the two connections on the bottom.