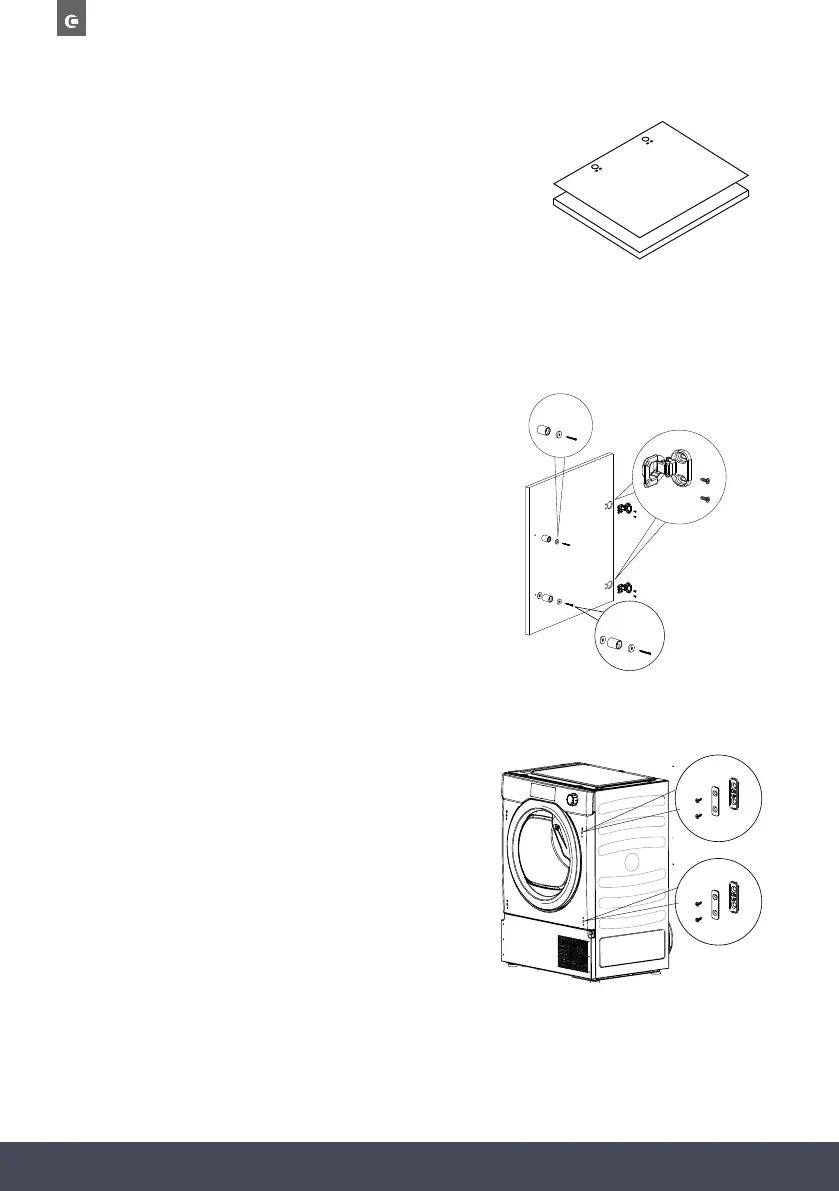
Instruction manual TDI4000 Please keep this instruction manual for future reference14
When the position of the plinth is set back less than 54mm from the front of the furniture, install
according to the following:
» Position the template onto the reverse of the furniture
door. It is possible to mount the hinges and closure
magnet on the right or left-hand side depending on your
requirements.
Mark the screw hole positions then drill them out.
NOTE:
We suggest mounting the furniture door so that it opens towards the left, same direction as the
porthole door.
Instruction manual TDI4000 Please keep this instruction manual for future reference14
When the position of the plinth is set back less than 54mm from the front of the furniture, install
according to the following:
» Position the template onto the reverse of the furniture
door. It is possible to mount the hinges and closure
magnet on the right or left-hand side depending on
your requirements.
Mark the screw hole positions then drill them out.
NOTE:
We suggest mounting the furniture door so that it opens towards the left, same direction as the
porthole door.
1
2
3
» Fix the hinges in place (on the door)
with the 4 screws provided (1).
» Fix the magnet (2) in place
using screw (3).
»
»
»
If necessary, use the gasket (4) to adjust and
achieve the appropriate assembly (down side).
Mount the plate (5) on the right or left-
hand side, depending on your installation
requirements.
Place the plastic support (6) under the plate
and fix it in position with screw (7).
4
2
3
Instruction manual TDI4000 Please keep this instruction manual for future reference14
When the position of the plinth is set back less than 54mm from the front of the furniture, install
according to the following:
» Position the template onto the reverse of the furniture
door. It is possible to mount the hinges and closure
magnet on the right or left-hand side depending on
your requirements.
Mark the screw hole positions then drill them out.
NOTE:
We suggest mounting the furniture door so that it opens towards the left, same direction as the
porthole door.
» Fix the hinges in place (on the door)
with the 4 screws provided (1).
» Fix the magnet (2) in place
using screw (3).
»
»
»
If necessary, use the gasket (4) to adjust and
achieve the appropriate assembly (down side).
Mount the plate (5) on the right or left-
hand side, depending on your installation
requirements.
Place the plastic support (6) under the plate
and fix it in position with screw (7).
5
6
7
5
6
7
» Fix the hinges in place (on the door) with
the 4 screws provided (1).
» Fix the magnet (2) in place using screw (3).
» If necessary, use the gasket (4) to adjust
and achieve the appropriate assembly
(down side).
» Mount the plate (5) on the right or left-
hand side, depending on your installation
requirements.
» Place the plastic support (6) under the plate
and fix it in position with screw (7).
 Loading...