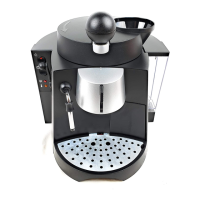
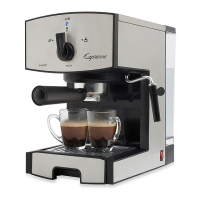
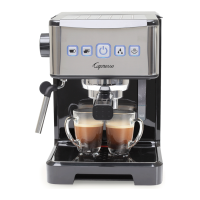
The Capresso EspressoPRO Model #112 is a sophisticated coffee center designed to produce high-quality espresso and cappuccino with ease and efficiency. It emphasizes safety, reliability, performance, and convenience, aiming to provide a superior coffee experience for consumers.
Function Description:
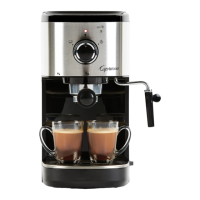
The EspressoPRO is primarily an espresso pump machine that brews coffee under high pressure to extract maximum flavor and aroma, resulting in a dense, foamy layer on top called "crema." This crema is crucial as it traps fine aromatics and light gaseous flavors, preventing them from escaping and indicating a correctly brewed espresso. The machine is capable of brewing both single (1 to 1.5 ounces) and double (up to 12 ounces) shots of espresso. A key feature is the patented frothXpress system, which allows for the rapid preparation of hot frothed milk, transforming espresso into delicious cappuccinos or lattes within seconds. Beyond coffee, the machine can also dispense hot water for tea, instant soup, or hot chocolate, making it a versatile appliance for various hot beverages.
Important Technical Specifications:
The machine operates on 120 volts/60Hz. It features a stainless steel-lined Thermoblock system for heating water, which includes an automatic water discharge mechanism to prevent stale water build-up in the drip tray. The drip tray has a capacity of approximately 16 ounces. The EspressoPRO comes with three different sieves: a small sieve for one cup (holding approximately 7 grams of coffee), a large sieve for two cups (holding approximately 15 grams of coffee), and a special "pod" sieve designed for pre-packed coffee pods (45mm diameter). The frothXpress system allows for milk frothing temperatures between 120°F and 160°F, adjustable via a knob.
Usage Features:
- Preparation: Before first use, all parts should be cleaned. The removable water tank is filled with cold, fresh water. The machine is turned on via the On/Off switch (1a), and the orange thermostat light (3) indicates when it's preheated and ready.
- Pre-warming: For optimal espresso temperature, it's recommended to pre-warm the machine, filter holder, and cup by running 2-3 ounces of hot water through the porta filter without coffee.
- Making Espresso:
- Insert the appropriate sieve (small for one shot, large for two, or pod sieve for pods) into the porta filter.
- Slightly overfill the sieve with correctly ground coffee (two to three settings coarser than usual for local coffee stores, or use a burr grinder for home grinding).
- Tamp the coffee lightly with the measuring scoop's tamper (fig. 4), ensuring no coffee grounds are on the rim (fig. 4a).
- Insert the porta filter into the filter holder, aligning the arrow on the thumb guard with the "INSERT" line (fig. 3), then lift slightly and turn right until it "CLICKS" into the locked "LOCK" position.
- Place a cup(s) underneath the porta filter (fig. 10, 11).
- Turn the selector knob (5) to the right, to the "brewing coffee" position (fig. 6).
- Once the desired amount of coffee is dispensed, turn the selector knob back to the "O"-position (fig. 5) to stop the flow.
- Enjoy immediately, as espresso temperature drops rapidly.
- Using Coffee Pods: The special "pod" sieve (10a) is used for 45mm diameter pre-packed coffee pods (fig. 9). Tabs on some pods should be folded under before insertion. Note that coffee pods generally produce less crema than ground coffee. For a double shot, brew with one pod at a time into the same cup.
- Making Hot Frothed Milk (frothXpress System):
- Assemble the frothXpress system (fig. 1d), ensuring all parts (connector, frothing sleeve, knob, joint, milk container lid with siphoning straw) are firmly connected to prevent air entry.
- Fill the milk container (7) with milk (low or no-fat milk is recommended for best froth).
- Place a cup underneath the frothing sleeve (fig. 12).
- Press the selector switch (1b) to the steam position.
- Turn the selector knob (5) to the pre-heating position (fig. 7).
- When the orange thermostat light (3) illuminates, turn the selector knob to the steam position (fig. 8).
- The system will automatically dispense hot frothed milk.
- To stop, turn the knob back to the "O"-position (fig. 5).
- Regulating Frothed Milk Temperature and Froth: The knob (X) on the frothXpress system (fig. 1d) regulates milk flow, temperature, and froth. Parallel to the joint (fig. 13) yields maximum milk flow and froth, and warm milk. Turning it 20-40 degrees (fig. 15) slows milk flow, increases temperature, and decreases froth. Turning it perpendicular (fig. 14) blocks milk flow, allowing only hot steam.
- Flexible Hose for Frothing: A flexible hose (fig. 16) can be attached to the frothXpress joint (Y) to siphon milk directly from a milk carton, provided the carton is not taller than the system.
- Making Cappuccino/Latte: Prepare frothed milk first, then brew espresso directly into the cup containing the frothed milk. For latte, reduce froth by adjusting the frothXpress knob.
- Making Hot Chocolate: Fill the milk container with cold chocolate milk (syrup recommended, not powder) and follow the hot frothed milk instructions.
- Dispensing Hot Water: Press the selector switch (1b) to the hot water position. Remove the joint and knob from the frothXpress system. Place a cup under the frothing sleeve (fig. 17). Turn the selector knob to the steam position (fig. 8) to dispense hot water (160-170°F). Turn the knob back to "O" to stop.
Maintenance Features:
- General Cleaning: Unplug the machine and allow it to cool. Wipe with a soft, damp cloth. The grid, drip tray (8), water tank (4), and filter holder (9) should be cleaned under running water and dried thoroughly (fig. 19). Do not put the drip tray in the dishwasher. Porta filter and sieves should be rinsed with warm, soapy water.
- Sieves and Inner Screen: Clean sieves with warm water, ensuring mesh holes are free of coffee oils. Soak in mild detergent and scrub if necessary. The inner screen (fig. 20) can be unscrewed with a coin for cleaning.
- frothXpress System Cleaning: This is crucial and should be done immediately after each use to prevent hardened milk deposits. Disconnect the milk container (7) from the joint (Y). Remove the knob (X), joint (Y), connector (V), and frothing sleeve (W). Rinse all parts under warm running water or soak in hot water. Run steam through the steam nozzle (U) for a few seconds. Reassemble the system.
- Milk Container Cleaning: The milk container (7) is dishwasher safe (upper rack only). The lid assembly (lid, seal, straw) should be taken apart and rinsed with water. When reassembling, insert the seal into the underside of the lid, then push the straw inside the seal for a tight fit (fig. 21).
- Decalcifying: Regular decalcification (twice a year or after 400 uses) is necessary to prevent calcium deposits.
- With Vinegar: Machine OFF. Remove inner screen (fig. 20) and unscrew steam nozzle (U). Insert porta filter without a sieve. Fill water container with 3 cups (24 oz.) water and 1.5 cups (12 oz.) white vinegar. Turn machine ON. Pump 4 oz. through the porta filter, rest 2 minutes, repeat 4 times. Decalcify steam tube: place container, press selector switch to hot water, turn knob to steam, run 4 oz., rest 2 minutes, repeat 3-4 times. Clean water tank, pump half fresh water through porta filter and half through steam tube. Replace inner screen and steam nozzle.
- With Durgol: Machine OFF. Remove inner screen and unscrew steam nozzle. Insert porta filter without a sieve. Pour 1 cup water, then 1 cup Durgol (total 16 oz.) into water tank. Turn machine ON. Pump 4 oz. through porta filter, rest 2 minutes, repeat once. Decalcify steam tube: place container, press selector switch to hot water, turn knob to steam, run 4 oz., rest 2 minutes, repeat once. Clean water tank, pump half fresh water through porta filter and half through steam tube. Replace inner screen and steam nozzle.
Troubleshooting: The manual provides solutions for common issues such as coffee not being hot enough, no or little coffee flow, fast coffee flow with little crema, uneven flow into cups, insufficient crema, coffee residue, water/coffee running down the porta filter side, and insufficient froth. These often relate to coffee grind, sieve cleanliness, or proper assembly of parts.
Warranty and Service: The EspressoPRO Model #112 comes with a one-year limited warranty covering defects in materials or workmanship within the USA. Capresso Plus Service offers free repair or replacement, including shipping costs, within the first 12 months. Customer service can be reached via a help call line, email, or fax.