EasyManua.ls Logo

Carbon M2 - Page 9

Carbon M2
35 pages
Print Icon
To Next Page IconTo Next Page
To Previous Page IconTo Previous Page
Loading...
© 2020-2024 Carbon, Inc. All rights reserved.
8
Product Manual
M2 Printer
PART# 114962-01-F
29 FEBRUARY 2024
Power Switch
Power on Button
6
Workflow stages
The details of the workflow vary depending on the resin, but you’ll always use the following stages.
STAGE
STEP
DESCRIPTION
PRE-PROCESSING
1
Design the 3D model.
2
Save the model in the STL format.
3
Repair the model.
4
Sign into Carbon UI and upload the model.
5
Check the slices.
6
Select the resin.
7
Orient the model to the printer platform.
8
Snap to platform.
9
If necessary, add supports to the model.
10
If necessary, duplicate and arrange your models.
11
Select the desired print controls and parameters.
12
Review print estimates.
PRINTING
13
Prepare the printer.
14
Print the part(s).
POST-PROCESSING
15
Wash the part(s).
16
In either order, remove the supports and cure the part(s).
CLEANING
17
Clean-up.
7
Pre-Processing
Your CTP will be instrumental in guiding you through the early stages in the printing process, often referred to as
pre-processing. Designing and optimizing your model for DLS can be a complicated task with many variables, but Carbon is
continually developing new tools to simplify this process.
8
Preparing the printer.
Before printing, you will need to prepare the resin, install the platform and cassette, and close the
printer door.
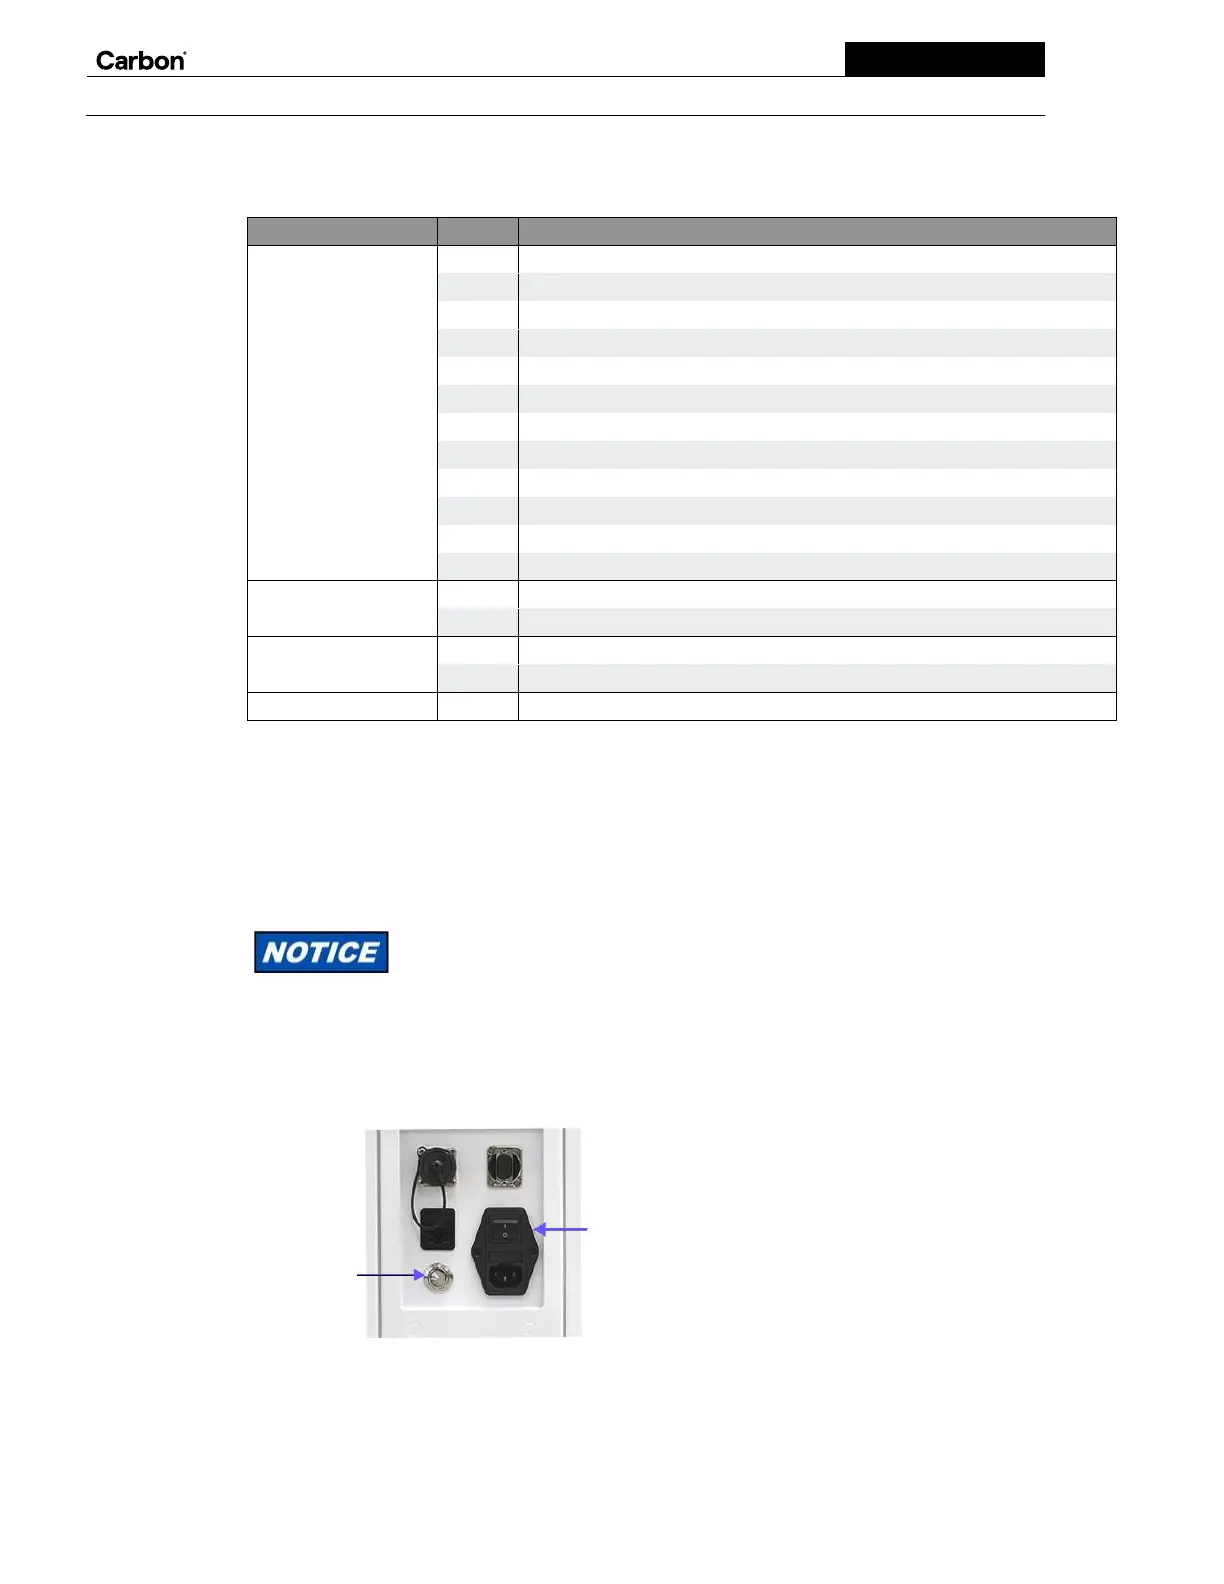
Starting the printer
You can usually keep the printer on. Follow this procedure if, for some reason, you need to restart it (for example, after a power
outage).
Always tell Carbon if you are experiencing printer issues that could be resolved with a power cycle before restarting your printer.
To start the printer:
1.
Press the power switch to the on (I) position.
2.
Press the silver power on button to reset the Emergency Stop.
3.
Wait for the display to show the printer is ready to use. This may take a few minutes.

Table of Contents