Additional Items Needed
4-channel (or more) Radio Control Set
CA or Epoxy glue (large)
1/2oz. Thin CA glue
.40 to .61 (.90 4-cycle) R/C engine
13 running ft of covering material ( two
79”
rolls of material)
Paint (fuel-proof, quantity
depends on desired finish)
one 1-1/4” and two 3-1/4” Wheels
1/2” x8” x12” CG R/C Foam Rubber
Optional T
ools
CG Engine Test Stand (no. 293)
Propeller balancer
Combination prop/glow-plulg wrench
CG Hinge Slotting Kit (no. 269)
Engine Mounting Option
Drill & Tap, Size No. 43
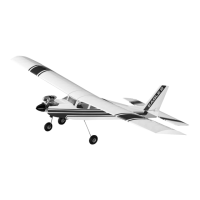
There really is nothing like a “Cub”! The C.G. version retains the honest, easy to fly qualities that made the full size airplane famous.
With the standard long wing, the model is a very graceful, realistic flyer. It’s aerobatic performance tends to be big,round, and slow.
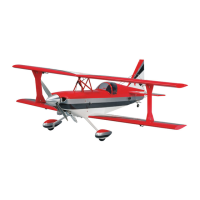
Like the full size airplane, the model can be modified into an aerobatic version byshortening the wings. This “Clipped Wing” option
is a thrilling aerobatic machine that will provide outstanding performance, including point rolls, inside and outside
maneuvers, snaps and spins.
Building is easy, but to prevent simple mistakes, the step-by-step instructions should be followed. Many a modeler has made two
right fuselage sides instead of one right and one left as a results of not following the directions.
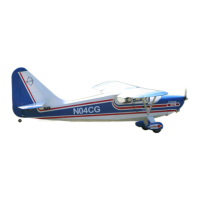
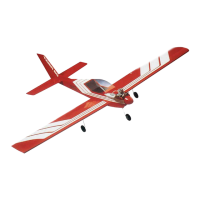
The Cub can be finished in any of the unlimited color schemes of of the original airplane.We show three popular types; standard,
sport, and military. Color scheme information's provided later in the instructions.
We’re sure that you will enjoy countless hours of flying fun with your Goldberg Cub, just as generations of pilots have had with
theirs!
Optional Parts
For Door Details
1/16” black CG Color-Stripe tape
Pilot figure (2” Scale)
“Pitts” type muffler (2-cycle only)
Small tube silicone caulk
Zap Formula 560 canopy glue
For optional “Military L-4” Scheme
WWII decals (various manufacturers)
Paint for Fuse Interior
Small spray can (gray)
Paint for Engine Detail
Artist’s acrylics, etc.
For simulating tail bracewires
1/16” nom. x36” elastic cord
Optional “Scale” Gear Struts
.025 x1/4” x2” brass strip
CG 1/16” Threaded Couplers (No.
217)
CG Mini-Snaps (No. 210)
5/32” O.D. dia. x 10” brass tube
3/32” O.D. dia. x 7” brass tube
Soldering iron, etc.
Tools & Supplies Needed
(You probably already have most of these)
Miscellaneous rubber bands
Wax paper or plastic wrap
Modeling knife or single edge razor blade
Sandpaper block & sandpaper; any grade 100
to 200, and any grade 240 to 320
A few dozen straight pins (“T” pins best)
Light power or hand drill & drill bits (sizes
1/16”,
3/32”, 1/8”, 5/32”, 3/16”, & 1/4”)
Three Allen wrenches (1/16” for #6 set screw
and 3/32” for #4 & 7/64” for #6 socket head
screws)
Flat building board (that you can push pins
into)
24” x 60”
Pliers
Small screwdrivers (1/8” and 3/16” blade tips)
Iron for applying covering (small household or
travel iron may be okay.
Masking, drafting, or scotch tape (for Holding
parts during assembly)
Carl Goldberg Products, Ltd.
P.O. Box 818 Oakwood, Ga. 30566 Phone 678-450-0085 Fax 770-532-2163 www.carlgoldbergproducts.com
©copyright 1985 Carl Goldberg Products, Ltd. Pt. #2077 issue #2 4-1-94
Instructions
Cub