Do you have a question about the Caroma QUIET FLOW and is the answer not in the manual?
Details critical air-separation, overflow, and water level measurements for proper inlet valve installation.
Measure distance from cistern base to the water level (WL) mark on the cistern back.
Remove clip, twist valve body to release, and adjust height to match cistern WL mark.
Twist and lock valve body into place before replacing the clip.
Insert Quietflow valve into cistern and secure using the provided nut.
Flush water supply line, connect to stop cock, turn mains on, and check water level and leaks.
Turn off mains water and repeat adjustment steps 2-4 for desired water level.
Step-by-step guide for servicing the inlet valve, including cap assembly and seal maintenance.
Periodic cleaning of valve seal and inlet strainer is recommended based on water quality.
Guidance for common issues like slow filling, failure to open, or valve not closing.
Details on compatible spare part kits, typically including a cap assembly and seal.
Contact information for customer support in Australia, New Zealand, and international inquiries.
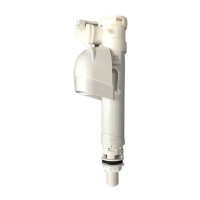
The Quietflow Inlet Valve is a crucial component designed for installation in cisterns to manage water intake and maintain appropriate water levels. This device is engineered to ensure efficient and reliable operation, adhering to specific installation and maintenance guidelines to guarantee optimal performance and compliance with plumbing standards.
The primary function of the Quietflow Inlet Valve is to control the flow of water into a cistern, ensuring that it fills to a predetermined level and then stops, preventing overflow. The valve operates based on a float mechanism (not explicitly shown but implied by water level adjustments) that senses the water level. As the water level rises, the float mechanism gradually closes the valve, stopping the water flow once the desired level is reached. When the cistern is flushed, the water level drops, causing the valve to open and refill the cistern.
A critical aspect of its design is the maintenance of a minimum 31mm air-separation from the top of the overflow to the critical level mark on the inlet valve. This air gap is essential for preventing backflow contamination, ensuring that non-potable water from the cistern does not siphon back into the potable water supply. This feature is a key safety and hygiene requirement, complying with plumbing standards such as AS/NZS 3500.1.
The valve body includes a "Water level / WL Mark" that, in conjunction with a corresponding mark on the cistern, allows for precise adjustment of the water level. This adjustability ensures that the valve can be configured to suit various cistern designs and user preferences, while still maintaining the necessary air gap and preventing overflow. The overflow tube is an integral part of the system, providing a fail-safe mechanism to direct excess water safely away in case of valve malfunction or overfilling.
The Quietflow Inlet Valve is designed for straightforward installation and adjustment, making it accessible for both professional plumbers and experienced DIY enthusiasts.
Regular maintenance of the Quietflow Inlet Valve is crucial for its longevity and efficient operation. The design facilitates easy access to key components for cleaning and replacement.
In summary, the Quietflow Inlet Valve is a well-designed, user-friendly, and maintainable device that ensures reliable water level control in cisterns while adhering to critical safety and hygiene standards. Its adjustable features and clear maintenance guidelines make it a practical choice for modern plumbing systems.
| Category | Control Unit |
|---|---|
| Brand | Caroma |
| Model | QUIET FLOW |
| Flush Type | Dual Flush |
| Flush Volume | 4.5/3 Litres |
| Water Efficiency | WELS 4 Star |
| Material | Vitreous China |
| Installation Type | Floor Mounted |