EasyManua.ls Logo

Carrier 38AK007 User Manual

Carrier 38AK007
16 pages
To Next Page IconTo Next Page
Page #1 background imageLoading...
Page #1 background image
Installation, Start-Up and
Service Instructions
CONTENTS
Page
SAFETY CONSIDERATIONS ...................1
INSTALLATION .............................1-8
Step 1 Complete Pre-Installation Checks ...1
UNCRATE UNIT
INSPECT SHIPMENT
CONSIDER SYSTEM REQUIREMENTS
Step 2 Rig and Mount the Unit .............4
RIGGING
COMPRESSOR MOUNTING
Step 3 Complete Refrigerant Piping
Connections ...............................4
SIZE REFRIGERANT LINES
FILTER DRIER AND MOISTURE INDICATOR
Step 4 Make Electrical Connections ........6
FIELD POWER SUPPLY
FIELD CONTROL WIRING
START-UP ..................................9,10
Preliminary Checks ..........................9
Evacuate and Dehydrate ......................9
Refrigerant Charge ...........................9
Compressor Overload ........................9
Cycle-LOC™ Device ..........................9
Low-Pressure/Loss-of-Charge Switch (LPS) ...9
High-Pressure Switch (HPS) .................10
Time GuardT II Device .......................10
Refrigerant Service Ports ...................10
Cooling .....................................10
Sequence of Operation ......................10
Oil Charge ................................. 10
SERVICE ..................................11,12
Cleaning ....................................11
Lubrication .................................11
Condenser-Fan Adjustment ..................11
Capacity Control Unit 38AKS012 Only .....12
Compressor Removal ....................... 12
Crankcase Heater ........................... 12
TROUBLESHOOTING GUIDE ...............13,14
START-UP CHECKLIST ...............CL-1, CL-2
SAFETY CONSIDERATIONS
Installing and servicing air-conditioning equipment can be
hazardous due to system pressure and electrical compo-
nents. Only trained and qualified service personnel should
install or service air-conditioning equipment.
When working on air-conditioning equipment, observe pre-
cautions in literature and on tags and labels attached to unit.
Follow all safety codes. Wear safety glasses and work gloves.
Use quenching cloth for brazing operations. Have fire ex-
tinguisher available. Read these instructions thoroughly. Con-
sult local building codes and National Electrical Code (NEC)
(U.S.A. Standard) for special installation requirements.
Before installing or servicing system, always turn off
main power to system. There may be more than one
disconnect switch. Electrical shock can cause personal
injury.
INSTALLATION
The 38AK007, 008, and 012 units use hermetic compres-
sors. The 38AKS008, 009, and 012 units use semi-hermetic
compressors. See Table 1A or 1B for physical data.
Step 1 Complete Pre-Installation Checks
UNCRATE UNIT (See Fig. 1) Remove unit packaging
except for the top skid assembly and wood bumpers, which
should be left in place until after unit is rigged into place.
INSPECT SHIPMENT File claim with shipping com-
pany if shipment is damaged or incomplete.
Fig. 1 Model 38AK (Size 007 Shown)
38AK007,008,012
38AKS008,009,012
Air-Cooled Condensing Units
50/60 Hz
Manufacturer reserves the right to discontinue, or change at any time, specifications or designs without notice and without incurring obligations.
Book 1 4
Tab 3a 2a
PC 111 Catalog No. 533-876 Printed in U.S.A. Form 38A-7SI Pg 1 5-99 Replaces: 38A-6SI
Question and Answer IconNeed help?

Do you have a question about the Carrier 38AK007 and is the answer not in the manual?

Carrier 38AK007 Specifications

General IconGeneral
Model38AK007
Coefficient of Performance (COP)3.4
RefrigerantR410A
HSPF Rating8.5
Power Supply220-240V, 50Hz
Operating Temperature (Heating)24°C
Operating Temperature (Cooling)18°C to 46°C

Summary

Safety Considerations

Installation

Step 1 - Complete Pre-Installation Checks

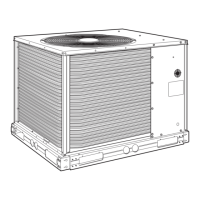
Verify unit condition, system requirements, and prepare for installation before proceeding.

Step 2 - Rig and Mount the Unit

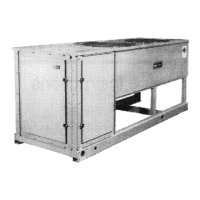
Guidance on safely rigging, lifting, and mounting the condensing unit.

Step 3 - Complete Refrigerant Piping Connections

Procedures for connecting refrigerant lines, including sizing and installation.

Step 4 - Make Electrical Connections

Instructions for making electrical connections, including power supply and control wiring.

Start-Up

Preliminary Checks

Essential checks to perform before starting the unit, including power, wiring, and component status.

System Evacuation and Charging

Procedures for evacuating the system and charging with refrigerant according to charts.

System Protection and Controls

Details on compressor overload, Cycle-LOC, LPS, HPS, and Time Guard II protection devices.

Operational Procedures

Covers refrigerant service ports, cooling setup, sequence of operation, and oil charge checks.

Service

Cleaning and Lubrication

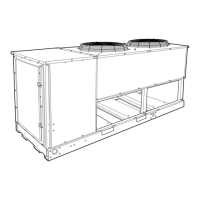
Procedures for cleaning the condenser coil, unit interior, and fan motor lubrication.

Condenser-Fan Adjustment

Steps for adjusting the condenser fan height for optimal performance.

Capacity Control and Compressor Service

Covers capacity control adjustment, compressor removal, and crankcase heater function.

Troubleshooting Guide

Compressor Not Running Issues

Diagnosing why the compressor fails to start, whether the contactor is open or closed.

Compressor Cycling Issues

Troubleshooting compressor cycling due to high or low-pressure switch activation.

Cooling Performance Issues

Resolving insufficient cooling caused by airflow restrictions, fan stops, or incorrect pressures.

Start-Up Checklist

Pre-Start-Up Checks

Comprehensive checklist for outdoor unit, controls, indoor unit, and piping before system start-up.

Voltage and Operational Checks

Includes checking voltage imbalance and recording operational parameters after initial run.

Related product manuals