8
INSTALLATION TIPS
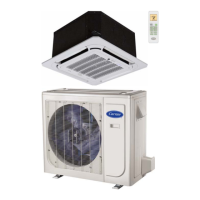
Indoor Unit
Installation locations include:
S A location where no obstacles exist near the inlet and outlet
areas.
S A location which can bear the indoor unit’s weight is critical.
S Do not install the indoor units near a direct source of heat such as
direct sunlight or a heating appliance.
S A location which provides appropriate clearances (see Fig. 4).
S Do not install the indoor unit in a location with special
environmental conditions. For those applications, contact your
Ductless Systems representative.
INDOOR UNIT INSTALLATION
1. Obstructions should be removed from the indoor unit’s intake
or outlet vents so air can flow throughout the room.
2. Ensure the installation is in accordance with the schematic
diagram’s required clearances.
3. Select an install site that can withstand four times the indoor
unit’s weight and would not increase the operating noise.
4. Ensure the unit is level.
5. Select a location where condensated coagulated water can
drain easily away from the outdoor unit.
6. Ensure there is enough space for care and maintenance.
Ensure the height between the indoor unit and ground is
≥
3ft. (1m) or ≤ 16ft. (5m).
7. Ensure the install site can withstand a weight four times of
the unit’s. If not, reinforce the site prior to installation. Refer
to the install cardboard to determine where the location
should be reinforced.
IMPORTANT: To guarantee a good performance, the unit must be
installed by professional personnel in accordance with this manual.
IMPORTANT: Drilling holes in the ceiling must be performed by
professional personnel.
1
1
2
2
3
3
21.5in(545mm)
22.4in(570mm)
25.5in(647mm)
4
5
20.6in(523mm)
22.4in(570mm)
25.5in(647mm)
Fig. 5 - Relationship of ceiling opening to unit and
suspension bolt position (Sizes 09−18)
Fig. 6 - Relationship of ceiling opening to unit and
suspension bolt position (Sizes 24−48)
2.8in(70mm)
0.6in(15mm)
0.6in(15mm)23.6in(600mm)6
7
8
0.8in(20mm)
0.8in(20mm)
Unit: in (mm)
Fig. 7 - Relationship of ceiling opening to unit and
suspension bolt position (Sizes 09−18)
1. Installation hook pitch dimensions
2. Indoor unit dimensions
3. Decoration panel dimensions
4. Refrigerant piping
5. Installation hook (X4)
6. Ceiling opening dimensions
7. Hanger bracket
8. False ceiling
Fig. 8 - Relationship of ceiling opening to unit and
suspension bolt position (Sizes 24−48)
NOTE: Adjust the position to ensure the gaps between the indoor
unit and the four sides of the false ceiling are even. The indoor unit’s
lower part should sink into the false ceiling roughly 0.9in. (24mm).
 Loading...