Table 3B — Physical Data, 40QAE Heat Pump Units
UNIT 40QAE 024* 024 036 048 060
NOMINAL CAPACITY (Tons) 1
1
⁄
2
23 45
NOMINAL SIZE (Btuh) 18,000 24,000 36,000 48,000 60,000
OPERATING WEIGHT (lb) 110 110 119 151 181
MOISTURE REMOVAL RATE (Pints/hr) 5.8 7.1 9.5 13.4 15.1
FINISH GM Motorhome White with Black Trim
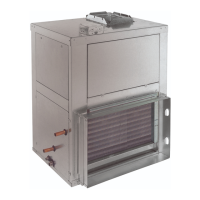
REFRIGERANT R-22
Control (Cooling) AccuRater® Piston in Fan Coil Unit
Control (Heating) AccuRater Piston in Outdoor Unit
Holding Charge (lb)† 2.0 2.0 2.0/2.5** 2.5 2.5
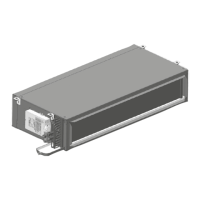
INDOOR FAN Direct Drive Centrifugal
Rpm...Cfm High 862...480 862...480 1275...870 1435...1130 1275...1600
Rpm...Cfm Medium 690...400 1200...480 972...750 1388...975 972...1220
Rpm...Cfm Low 552...320 1050...400 830...630 1315...820 830...1040
High Speed Watts 92 92 282 425 564
Motor Quantity...Hp 1...
1
⁄
15
1...
1
⁄
15
1...
1
⁄
6
2...
1
⁄
15
2...
1
⁄
6
Blowers Quantity...Size (in.) 2...6 x 8 2...6 x 8 2...6 x 8 3...6 x 8 4...6 x 8
INDOOR COIL Copper Tube, Aluminum Fin
Face Area (sq ft) 2.2 2.2 2.6 3.0 4.0
No. of Rows 44 4 4 4
Fins/in. 14.9 14.9 14.9 14.9 14.9
Circuits 44 4 8 8
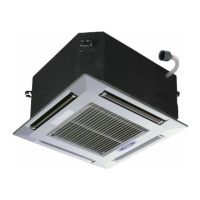
FILTERS Cleanable
Quantity...Size (in.) 4...12 x 8
3
⁄
4
4...12 x 8
3
⁄
4
5...10
5
⁄
8
x8
3
⁄
4
4...10
5
⁄
8
x8
3
⁄
4
2...12 x 8
3
⁄
4
6...12 x 8
3
⁄
4
AIRSWEEP
—
Automatic
Horizontal
Vertical
HEATER (kW) 2.0 2.0 3.0 4.0 5.0
CONTROLS
Defrost Method Timed
Manual Defrost Diagnostics Yes
Dehumidification Yes
Auto. Restart Yes
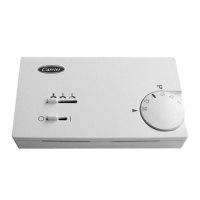
Control Voltage 24-v Provided in Control
High Indoor Coil Temperature Indoor Coil Temperature greater than 144 F; Resets at 104 F
Fan Speed High/Medium/Low
Freeze Protection Indoor Coil Less than 28 F, Resets at 50 F
Condensate Pump Safety Yes (Accessory)
Outdoor Coil High Temperature (Cooling Modes) Outdoor Coil Temperature greater than 144 F; Resets at 104 F
Filter Change Indication 250 Hours of Indoor Fan Operation (through thermostat)
REFRIGERANT LINES
Connection Type Flare
Liquid Line OD (in.)
3
⁄
8
Vapor Line OD (in.)
5
⁄
8
5
⁄
8
3
⁄
4
7
⁄
8
††
7
⁄
8
††
Maximum Length (ft) 200
Maximum Lift (Fan Coil Above) (ft) 65
Maximum Lift (Fan Coil Below) (ft) 150
CONDENSATE DRAIN CONNECTION Pipe Thread (MPT)
CONDENSATE DRAIN SIZE (in.) |
3
⁄
4
*Field reconfigured to 18,000 Btuh 1
1
⁄
2
tons. See Before Installation
section on page 3 for details.
†Outdoor unit is shipped with a holding charge. Refer to unit name-
plate (on unit) for details on specific system charge required.
**When matched with 030 outdoor unit/when matched with 036 out-
door unit.
††The valve connection size is
3
⁄
4
inch. The recommended line size
is
7
⁄
8
inch.
\ Flexible tubing (
5
⁄
8
in.) is required when the accessory condensate
pump is used.
3. Remove inlet grilles from indoor unit by sliding forward.
Reinstall prior to unit start-up.
4. If necessary, reconfigure the 24,000 Btuh fan coil unit to
18,000 Btuh as follows:
a. The plug to the motor is located just outside the con-
trol box. Refer to the label diagram on the plug for
wiring for both 18,000 Btuh and 24,000 Btuh units.
b. Remove the black, blue, yellow, and red wires from
the plug. The white wire is the common and remains
in the same position.
c. Insert the blue wire into pin number 1.
d. Insert the yellow wire into pin number 2.
e. Insert the red wire into pin number 3.
f. Insert the black wire into pin number 4.
g. Check all connections to ensure they are secure.
h. Reinstall grilles using the screws removed in Step b.
i. Reinsert filters removed in Step a.
Step 2 — Select Location — Consult local building
codes and NEC for special installation requirements. See
Fig. 3 and 4 for unit dimensions and required clearances.
There are several ways the unit may be installed to dif-
ferent types of ceiling construction. These instructions do
not cover all installation methods. As a typical installation,
these instructions focus primarily on mounting the unit to
metal in new construction. Plan your installation carefully
before you begin. Listed below are some guidelines that should
be followed when determining location for the unit.
1. Place unit adjacent to an outside wall if fresh air is
required, ensuring that location allows for complete air
distribution.
4