EasyManua.ls Logo

Carrier 40QNQ012 User Manual

Carrier 40QNQ012
16 pages
To Next Page IconTo Next Page
Page #1 background imageLoading...
Page #1 background image
38H DV,40QNC009,012
Cooling Only
38QRV,40QNQ009,012
Heat Pump
Duct-Free Systems
Installation, Start-Up and
Service Instructions
CONTENTS
Page
SAFETY CONSIDERATIONS ...................... l
GENERAL ........................................ ]
INSTALLATION ................................ 1-12
Step 1 -- Complete Pre-lnstallation Checks ...... l
UNPACK UNITS
INSPECT SHIPMENT
CONSIDER SYSTEM REQUIREMENTS
Step 2 -- Mount Unit ............................. 6
MOUNTING OUTDOOR UNqT ON GROUND
MOUNTING OUTDOOR UNIT ON ROOF
MOUNTING INDOOR UNIT ON WALL
Step 3 -- Complete Refrigerant Piping
Connections ................................... 7
INDOOR UNITS
OUTDOOR UNITS
MAKE PIPING SWEAT CONNECTIONS
AIR PURGING AND LEAK TEST
Step 4 -- Make Electrical Connections ........... 9
START-UP ....................................... 13
SERVICE ........................................ 13
MAINTENANCE ................................. 14
TROUBLESHOOTING .......................... 14,15
SAFETY CONSIDERATIONS
Installing and servicing air-conditioning equipment can be
hazardous due to system pressure and electrical components.
Only trained and qualified service personnel should install or
service air-conditioning equipment.
Untrained personnel can perform basic maintenance, such
as cleaning and replacing filters. All other operations should be
performed by trained service personnel. When working on air
conditioning equipment, observe safety precautions in litera-
ture, tags, and labels attached to unit.
Follow all safety codes. Wear safety glasses and work
gloves. Use quenching cloth for brazing operations. Have fire
extinguisher available. Read these instructions thoroughly.
Consult local building codes and the National Electrical Cede
(NEC) for special installation requirements.
GENERAL
These instructions cover the installation, start-up and
service of cooling only and heat pump duct-free systems.
INSTALLATION
Step 1 -- Complete Pre-lnstallation Checks
UNPACK UNITS (See Fig. l) -- Move the unit to final
location. Remove units from carton, being carefld not to
damage service valves and grilles. See Tables 1A and IB for
installation materials included in shipment_
40QNC,QNQ
Before installing or servicing system, always turn off main
power to system. Them may be more than one disconnect
switch. Turn off accessory heater power ff applicable. Elec-
trical shock can cause serious personal injury.
38HDV,QRV
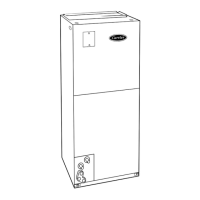
Fig. 1 -- 38HDV, QRV and 40QNC,QNQ Units
Manufacturer reserves the right to disconbnue, or change at any time, specifications or designs wilhout no13ceand without incuning obligations,
Book 1 4 Catalog No. 07-38H40Q01-SI Pdnted in U.S.A. Form 38H,Q/40Q-1SI Pg 1 24)6 Replaces: New
Question and Answer IconNeed help?

Do you have a question about the Carrier 40QNQ012 and is the answer not in the manual?

Carrier 40QNQ012 Specifications

General IconGeneral
Energy Efficiency Ratio (EER)11.0
Seasonal Energy Efficiency Ratio (SEER)15.0
Heating Seasonal Performance Factor (HSPF)8.5
RefrigerantR-410A
Voltage208/230V
Phase1
Compressor TypeScroll
Cooling Capacity12, 000 BTU/h

Summary

Safety Considerations

General System Information

Installation Procedures

Complete Pre-Installation Checks

Unpacking, inspection, and verification of system requirements prior to installation.

Mount Unit

Guidance on securely mounting indoor and outdoor units as per specifications.

Complete Refrigerant Piping Connections

Detailed steps for connecting refrigerant piping, including brazing and leak testing.

Make Electrical Connections

Instructions for correctly performing electrical wiring for the system.

Start-Up Procedures

Preliminary Checks

Verify internal wiring, power source, service valves, and crankcase heater.

Leak Test

Procedure for leak testing refrigerant piping and fan coil using pressure.

Evacuate and Dehydrate

Steps for evacuating and dehydrating the piping and fan coil system.

Start Unit with Operating Test

Performing an operating test using the remote control for system verification.

Configure Indoor Unit Remote Controls

Setting up remote controls for multiple indoor units operating in the same area.

Service Operations

Pumpdown Procedure

Method to safely pump down the system for repairs without losing refrigerant.

Filter Drier (Field Supplied)

Guidelines for replacing the filter drier, including specifications and material types.

Refrigerant Charging

Procedures for refrigerant charging and warnings against overcharging the system.

Maintenance

Troubleshooting

Fault Code Explanation

Interpreting fault codes indicated by indoor and outdoor unit LED flashing patterns.

Related product manuals