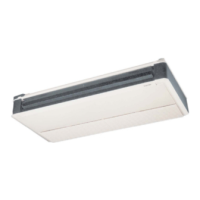
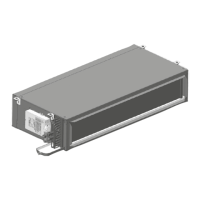
Coil Assembly Removal and Reinstallation
(Fig. 12)
Lock out and tag all power supplies to equipment and con-
trois prior to servicing unit.Follow all safety codes. Failare
to do so could result in personal injury.
Turn off all power supplies to equipment and controls. Fail-
ure to do so may cause personal injury or damage to the
unit.
To remove coil assembly:
1. Turn offpower to the unit.
IMPORTANT: Tag each right front panel (40UV) or
middle bottom panel (40UH) for each unit. Panels have
electrical information specific to each unit.
2. Remove all front (40UV) or bottom (40UH) panels. Re-
move end panels.
3. Remove 1/4in. head screws along length of unit that se-
em coil baffle to blower section. See Item 2 in Fig. 12.
4. Remove four 1/4in. head screws that connect the blower
section sides to the coil section sides. See Item 1 in
Fig. 12.
5. Remove 1/4in. head screws attaching outside air (OA) ac-
taator to damper shaft OR locking quadrant assembly to
damper shaft. Remove OA actuator or locking quadrant
assembly.
6. Tag low-limit thermostat wiring and terminals. Dis-
connect low-limit thermostat wiring (right end
compartment).
7. Drain water and/or recover refrigerant in accordance
with all applicable codes. Disconnect piping from coil
connections.
8. Tag optional electric heat element wire terminations for
later reconnection. Disconnect element wires from elec-
tric heat control box (remove coil baffle for access).
9. Remove the four sh_ in. nuts retaining the coil section to
the frame.
10. Remove co'il soction from frame.
To reinstall coil assembly:
1. Replace coil section into flames assembly.
2. Tighten the four 5/16 in. nuts retaining coil section to
frame.
3. Reconnect electric heat wiring in electric heat control
box.
4. Reconnect wiring to low limit thermostat-
S. Replace the four 1/4in. head screws holding the blower
deck to coil section (two on each side).
6. Replace coil baffle using 1/4in. head screws. See Item 2
in Fig. 12.
7. Reinstall outside air actuator or locking quadrant handle
using V4 in. head screws.
8. Reconnect piping to coils. If water coil, purge air from
coils and perform hydrostatic test to check for leaks. If
DX coil, perform leak test using nitrogen, and evacuate
and charge per recommended HVAC procedures and all
applicable codes.
9. Replace coil section side insulation.
10. Replace front (40UV) or bottom (40UH) panels. Replace
end panels. Ensure that tag on each right front panel
(4OUV) or middle bottom panel (40UH) matches unit
tag.
l I. Restore power to unit.
30

 Loading...