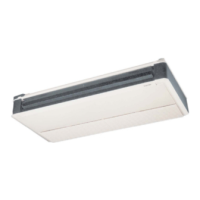
Blower Wheel Removal and Reinstallation
(Fig. 17)- Refer to Fig. 13 for 40U]-[200 units only,
Fig. 14 for 40UV050-150 and 40UH075-125 units with PSC
motors, Fig. 15 for 40UV050-125 and 40UH075-150 units
with ECM motors.
Lock out and tag all power supplies to equipment and con-
trois prior to servicing unit. Follow all safety codes. Failure
to do so could result in personal injury.
The assembly order of the bearing installation is critical. Be
careful with all components during removal and installa-
tion. Any excessive force applied to these components can
cause unintended damage and void unit warranty.
To remove blower wheel:
1. Turn off all power to the unit.
2. Remove bhiwer section per service instructions in Blower
Assembly Removal and Reinstallation.
IMPORTANT: Tag each right front panel (40UV) or
middle bottom panel (40UH) for each unit. Panels have
electrical information specific to each unit.
3. Use Sl3z in. hex tool to loosen setscrews on all blower
wheels (two per wheel).
4. Loosen inboard/center bearing setscrews (only on
40UV, UH150 and 200 size units).
5. If unit has ECM motor, remove motor shroud (sheet
metal cover -- Fig. 13, Item 6; Fig. 14; Fig. 15, Item 4)
by removing two s/is in. hex nuts. Do not discard cool-
big shroud.
6. Loosen s/t 6 in.motor mount (Fig. 13, Item 7; Fig. 14,
Item 2; Fig. 15, Item 2), nut (Fig. 13, Item 3; Fig. 14,
ltem 5; Fig. 15, Item 6), andbolt (Fig. 13,1tern 4;Fig. 14,
Item 4; Fig. 15, Item 5), until motor housing (Fig. 13,
Item 5; Fig. 14, Item 3; Fig. 15, Item 3) moves freely.
7. Slide shaft-coupling-motor assembly (Fig. 11, Items 3, 2,
1; Fig. 13, Items 5, 2, 10) out of wheels and unit until
shaft clears inboard/center bearing assembly (30 in. max-
imum clearance required from edge of frame end).
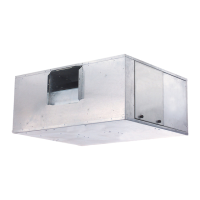
8. Remove four 1/4in. head screw (Fig. 17, Item 6) securing
blower housing(s) (Fig. 17, Item 7) to blower deck
(Fig. 17, Item 3) and remove blower and wheel assembly.
9. Remove five 1/4in. head screws (Fig. 17, Item 5) securing
blower inlet ring (Fig. 17, Item 4) to blower housing and
remove inlet ring.
10. Remove blower wheel(s) (Fig. 17, Item 8).
To reinstall blower wheel:
1. Install new blower wheel(s) (Fig. 17, Item 8). Ensure that
the fan blades are installed in the correct orientation (cup
of blade towards discharge).
2. Install inlet ring (Fig. 17, Item 4) and install five IA in.
head screws (Fig. 17, Item 5) securing blower inlet ring to
blower housing (Fig. 17, Item 7).
3. Install four I/4 in. head screws (Fig. 17, Item 6) secunng
blower housing(s) (Fig. 17, Item 7) to blower deck
(Fig. 17, Item 3).
4.
8.
9.
10.
11.
12.
13.
14.
15.
16.
17.
18.
19.
20.
21.
22.
23.
Slide shaft-coupling-motor assembly (Fig. 11, Items 3, 2,
1; Fig. 13, Items 5, 2, 10) back into beating and wheels.
Do not use excessive force. Damage to wheels may
OCCUlt.
5. Insert shaft-coupling-motor assembly into wheels until
motor clearance is as specified for motor type (PSC or
ECM). See Fig. 16 or Fig. 9.
6. Ensme that motor shaft is perpendicular to motor blower
endplate. Tighten 5/16 in. motor mount (Fig. 13, Item 7;
Fig. 14, Item 2; Fig. 15, Item 2), nut (Fig. 13, Item 3;
Fig. 14, ltem 5;Fig. 15, Item 6), and bolt (Fig. 13, ltem4;
Fig. 14, Item 4; Fig. 15, Item 5), until motor (Fig. 13,
Item 5; Fig. 14, Item 3; Fig. 15, Item 3) is secure.
7. Install motor shroud (sheet metal cover -- Fig. 13,
Item 6; Fig. 14; Fig. 15, Item 4) using two 5/is in. hex nuts
if using ECM motor. Align "window" with receptacles on
motor. Motor control module could overheat and fail if
operated without cooling shroud.
Reinstall blower section into frame assembly. See Fig. lO.
Tighten the four s/16 in. nuts retaining blower section to
frame.
Tighten the two 5/16in. (Fig. 1l, Item 6) nuts retaining the
inboard bearing bracket to the pipe chase (only on
40UV, UH150 and 200 size units).
Reinstall two carriage bolts (Fig. 10, Item 6) that attach
the front brace to the frame sides.
Re-attach green ground wire that connects the motor to
the frame with 1/4in. head screw if unit has a PSC motor.
ECM motors are grounded through the harness.
Re-attach wiring harness conneetor(s) to motor.
Center each wheel in its respective housing and tighten
wheel setscrews (two for each wheel).
Reinstall one 1/4in. head screw (Fig. 10, Item 1) at center
of blower deck attaching blower deck to pipe chase.
Reinstall the four 114in. head screws (Fig. 10, Item 2)
holding the blower section sides to the coil section sides.
Rotate the fan shaft by hand to ensure that fans am
unrestricted and can rotate freely. Cheek for any fan
obstructions.
Remove lockout and operate unit for approximately
60 seconds to letinboard/center beating mount self-adjust
(only on 4llUV,UH 150 and 200 size units).
Lock out and tag all power supplies to equipment and
controls. Tighten the two bearing setscrews (only on
40UV, UH150 and 200 size units). See Fig. 11, 13 or 17.
Reinstall the coil baffle using the six i& in. head screws
that attach the coll baffle to the coil section. See Item 4 in
Fig. 10.
Reinstall I/4in. head screws along length of unit securing
coil baffle to the blower section. See Item 5 in Fig. 10.
Reinstall optional vanes and screens and install top panel
(40UV). Reinstall top (40UV) or front (40UH) discharge
plenum and ductwork if required or discharge grille.
Reinstall front (40UV) or bottom (40UH) panels. Rein-
stall end panels. Ensure that tag on each right front
panel (40UV) or middle bottom panel (40UH) match-
es unit tag.
24. Restore power to unit.
39

 Loading...