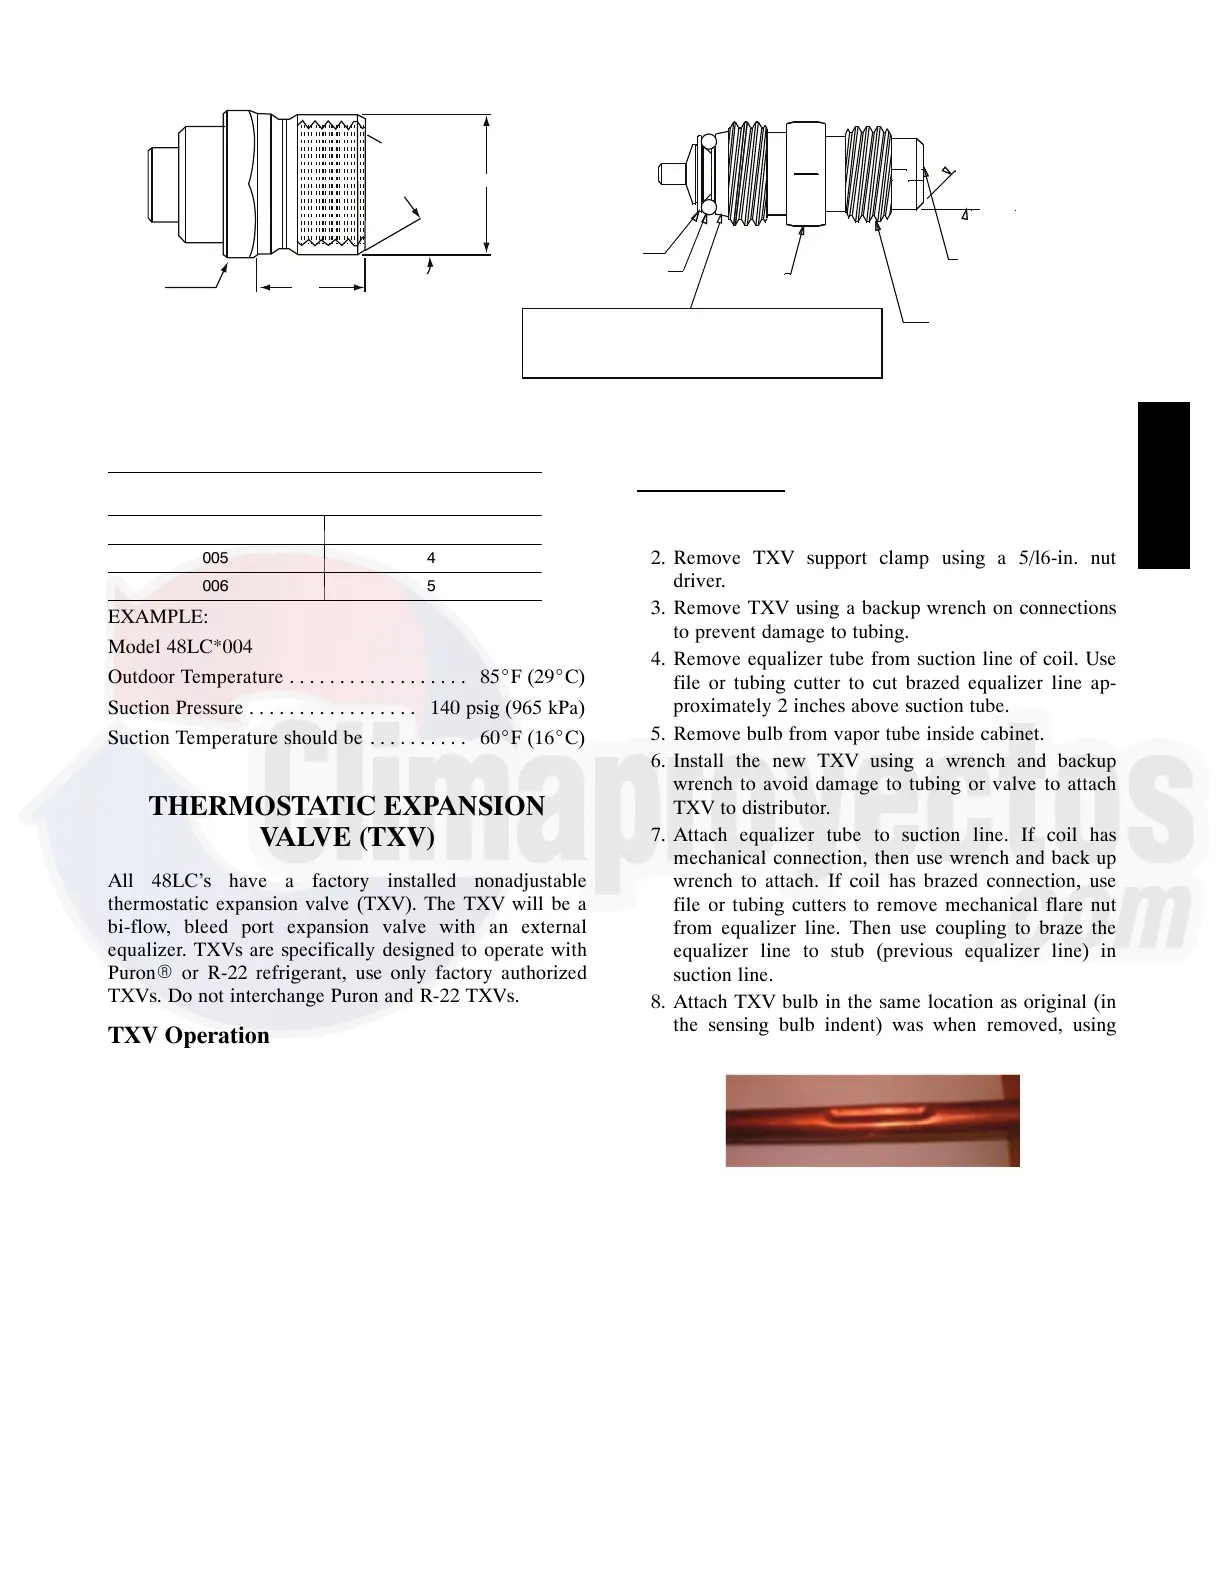
9
1/2-20 UNF RH
30
0.596
.47
5/8” HEX
SEAT
CORE
WASHER
DEPRESSOR PER ARI 720
+.01/-.035
FROM FACE OF BODY
7/16-20 UNF RH
O-RING
45
torqued into the seat. Appropriate handling is
required to not scratch or dent the surface.
1/2" HEX
This surface provides a metal to metal seal when
o
o
(Part No. EC39EZ067)
C08453
Fig. 11 -- CoreMax Access Port Assembly
SIZE DESIGNATION
NOMINAL TONS
REFERENCE
004 3
005 4
006 5
EXAMPLE:
Model 48LC*004
Outdoor Temperature 85_F(29_C)..................
Suction Pressure 140 psig (965 kPa).................
Suction Temperature should be 60_F(16_C)..........
THERMOSTATIC EXPANSION
VALVE (TXV)
All 48LC’s have a factory installed nonadjustable
thermostatic expansion valve (TXV). The TXV will be a
bi-flow, bleed port expansion valve with an external
equalizer. TXVs are specifically designed to operate with
PuronR or R-22 refrigerant, use only factory authorized
TXVs. Do not interchange Puron and R-22 TXVs.
TXV Operation
The TXV is a metering device that is used in air
conditioning and heat pump systems to adjust to changing
load conditions by maintaining a preset superheat
temperature at the outlet of the evaporator coil.
Replacing TXV
1. Recover refrigerant.
2. Remove TXV support clamp using a 5/l6-in. nut
driver.
3. Remove TXV using a backup wrench on connections
to prevent damage to tubing.
4. Remove equalizer tube from suction line of coil. Use
file or tubing cutter to cut brazed equalizer line ap-
proximately 2 inches above suction tube.
5. Remove bulb from vapor tube inside cabinet.
6. Install the new TXV using a wrench and backup
wrench to avoid damage to tubing or valve to attach
TXV to distributor.
7. Attach equalizer tube to suction line. If coil has
mechanical connection, then use wrench and back up
wrench to attach. If coil has brazed connection, use
file or tubing cutters to remove mechanical flare nut
from equalizer line. Then use coupling to braze the
equalizer line to stub (previous equalizer line) in
suction line.
8. Attach TXV bulb in the same location as original (in
the sensing bulb indent) was when removed, using
supplied bulb clamps. See Fig. 12.
C10372
Fig. 12 -- Sensing Bulb Indent
9. Route equalizer tube through suction connection
opening (large hole) in fitting panel and install fitting
panel in place.
10. Sweat inlet of TXV marked “IN” to liquid line. Avoid
excessive heat which could damage valve.
48LC
 Loading...


