EasyManua.ls Logo

Carrier 50GJ006 User Manual

Carrier 50GJ006
36 pages
To Next Page IconTo Next Page
Page #1 background imageLoading...
Page #1 background image
Installation, Start-Up and
Service Instructions
CONTENTS
Page
SAFETY CONSIDERATIONS .................. 1
INSTALLATION ............................ 1-24
Step 1— Provide Unit Support ............... 1
ROOF CURB
SLAB MOUNT
Step 2 Field Fabricate Ductwork ........... 4
Step 3 Install Condensate Drain Line and
External Trap ............................. 4
Step 4 Rig and Place Unit ................. 4
POSITIONING
Step 5 Make Electrical Connections ...... 10
FIELD POWER SUPPLY
FIELD CONTROL WIRING
HEAT ANTICIPATOR SETTINGS
Step 6 Adjust Factory Installed Options ....12
APOLLO CONTROL
DISCONNECT SWITCH
OPTIONAL VARISLIDE™ ECONOMIZER
OPTIONAL PARABLADE ECONOMIZER
Step 7 Adjust Evaporator-Fan Speed ......18
PRE-START-UP .............................25
START-UP ................................25-27
SERVICE ..................................27-31
TROUBLESHOOTING ......................32-34
START-UP CHECKLIST .....................CL-1
SAFETY CONSIDERATIONS
Installation and servicing of air-conditioning equipment
can be hazardous due to system pressure and electrical com-
ponents. Only trained and qualified service personnel should
install, repair, or service air-conditioning equipment.
Untrained personnel can perform basic maintenance func-
tions of cleaning coils and filters and replacing filters. All
other operations should be performed by trained service per-
sonnel. When working on air-conditioning equipment, ob-
serve precautions in the literature, tags and labels attached
to the unit, and other safety precautions that may apply.
Follow all safety codes. Wear safety glasses and work gloves.
Use quenching cloth for unbrazing operations. Have fire ex-
tinguisher available for all brazing operations.
Before performing service or maintenance operations on
unit, turn off main power switch to unit. Electrical shock
could cause personal injury.
The 50GJ units may only be charged with R-407C re-
frigerant. Do not use R-22.
The use of R-407C necessitates the use of a polyolester
(POE) oil. POE oil is not to be confused with or mixed with
mineral oil typically used in R-22 systems. Precautions must
also be taken to minimize open exposure of the oil to at-
mosphere as it is very hydroscopic and will absorb moisture
from the air. To minimize the possibility of moisture con-
tamination to the refrigerant system a special 100% molecu-
lar sieve filter drier is used.
Refrigerant R-407C must always be charged liquid. Charg-
ing gas will cause the refrigerant to fractionate and change
the chemical properties, impacting system performance.
INSTALLATION
Unit is shipped in the vertical configuration. To convert to
horizontal configuration, remove side duct opening covers.
Using the same screws, install covers on vertical duct open-
ings with the insulation-side down. Seals around duct open-
ings must be tight.
Step 1 Provide Unit Support
ROOF CURB Assemble and install accessory roof curb
in accordance with instructions shipped with curb. See
Fig. 1A and 1B. Install insulation, cant strips, roofing felt,
and counter flashing as shown. Ductwork must be attached
to curb. If electric or control power is to be routed through
the curb, attach the accessory thru-the-curb service connec-
tion plates to the roof curb in accordance with the accessory
installation instructions. Connection plates must be installed
before unit is set on roof curb.
IMPORTANT: The gasketing of the unit to the roof
curb is critical for watertightness. Install gasket sup-
plied with the roof curb as shown in Fig. 1A and 1B.
Improperly applied gasket can also result in air leaks
and poor unit performance.
Curb should be level. Unit leveling tolerances are shown
in Fig. 2. This is necessary for unit drain to function prop-
erly. Refer to Accessory Roof Curb Installation Instructions
for additional information as required.
SLAB MOUNT (Horizontal Units Only) Provide a level
concrete slab that extends a minimum of 6 in. beyond unit
cabinet. Install a gravel apron in front of condenser coil air
inlet to prevent grass and foliage from obstructing airflow.
NOTE: Horizontal units may be installed on a roof curb if
required.
50GJ006-012
Single-Package Rooftop Cooling Units
Manufacturer reserves the right to discontinue, or change at any time, specifications or designs without notice and without incurring obligations.
Book 1 4
Tab 1b 6b
PC 111 Catalog No. 535-042 Printed in U.S.A. Form 50GJ-1SI Pg 1 4-95 Replaces: New
Question and Answer IconNeed help?

Do you have a question about the Carrier 50GJ006 and is the answer not in the manual?

Carrier 50GJ006 Specifications

General IconGeneral
BrandCarrier
Model50GJ006
CategoryAir Conditioner
LanguageEnglish

Summary

Safety Considerations

General Safety Precautions

Follow safety codes, wear safety glasses/gloves, use quenching cloth for brazing.

Electrical Hazard Warning

Turn off main power switch before service to prevent electrical shock.

Installation Procedures

Provide Unit Support

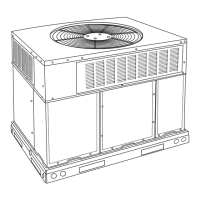
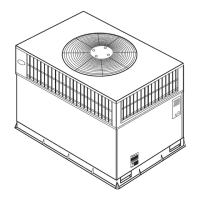
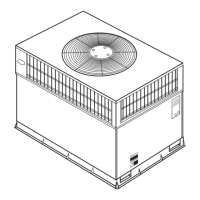
Instructions for roof curb and slab mount installation, including gasket importance.

Field Fabricate Ductwork

Securing ducts to curb, insulating, and using vapor barrier for unconditioned spaces.

Install Condensate Drain Line and External Trap

Installing condensate drain line and external trap, ensuring proper depth and pitch.

Rig and Place Unit

Inspect for damage, keep unit upright, use rollers, and maintain clearances for airflow.

Make Electrical Connections

Ensuring proper grounding, wiring, and compliance with NEC and local codes.

Adjust Factory Installed Options

Instructions for Apollo Control and optional disconnect switch setup.

Adjust Evaporator-Fan Speed

Adjusting fan speed to meet jobsite conditions for optimal airflow and performance.

Pre-Start-Up Checks

Safety Warnings Before Operation

Critical safety warnings before checking or servicing the refrigerant system.

Initial Unit Inspection

Remove panels, follow instructions, inspect for damage, and verify filter/drain setup.

Unit Start-Up Procedures

Unit Preparation and Operating Parameters

Ensure unit installation compliance and adhere to operating parameter limits.

Compressor Rotation Verification

Verifying correct compressor rotation for proper operation and preventing damage.

Cooling Mode Start-Up

Steps for starting the unit in cooling mode, including thermostat settings and charge check.

Routine Service and Cleaning

Evaporator Coil Cleaning

Instructions for cleaning the evaporator coil, including panel removal and flushing.

Condenser Coil Cleaning

Cleaning condenser coils annually, or as needed, by separating sections for thorough cleaning.

Condensate Drain and Filters

Checking and cleaning the condensate drain annually and replacing/cleaning filters.

Troubleshooting Cooling Issues

Compressor and Condenser Fan Start Issues

Diagnosing and resolving problems when the compressor and condenser fan won't start.

Compressor Operation Problems

Addressing issues like continuous operation, noise, high/low head pressure, and suction pressure.

Varislide Economizer Troubleshooting

Economizer Damper Not Opening

Diagnosing why the economizer damper fails to open, checking fan and power.

Economizer Limited to Minimum Position

Troubleshooting why economizer operation is limited to minimum, checking OAT/EC settings.

Parablade Economizer Troubleshooting

Parablade Damper Issues

Addressing damper not opening, closing, or responding to enthalpy readings.

Start-Up Checklist

Preliminary Information and Pre-Start-Up

Recording unit details and verifying pre-start-up checks are completed.

Start-Up Electrical and Temperature Readings

Recording supply voltage, compressor/fan amps, and temperature readings.

Start-Up Pressure Readings

Recording refrigerant suction and discharge pressures for both circuits.

Related product manuals