*S÷pa_atedlscgnneet per NEC
/NationalElectrlcalCode/ required
forelectrr¢heatel¸ _,nen Ongle
pointcone_t_onIs not use_
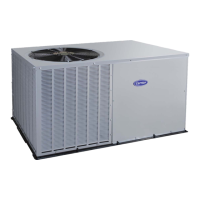
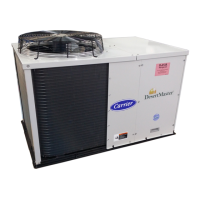
Fig. 8--Typical installation
C00008
1"(25ram)MIN.
TRAP
2" (50ram)MIN.
C99013
Fig. 9--Condensate Trap (Using Tubing)
1" min.
TRAP
OUTLET
2" min.
C00009
Fig. lO--Condensate Trap (Using PVC Piping)
Table 2--Minimum Airflow for Safe Electric Heater
Operation (CFM)
SIZE
036104210481060
1200 1225 1400 1750
Operation of unit on improper line voltage constitutes abuse
and may cause unit damage that could all,c1 warranty.
ROUTING P()WER LEADS INTO UNIT
Use only copper wire between disconnect and unit. The high-
voltage leads should be in a conduit until they enter the unit;
conduit termination at the unit must be watertight. Run the
high-voltage leads through the hole on the control box side of the
unit (see Fig. 11 l_)r location). When the leads are inside the unit,
run leads to the control box (see Fig. 12). On 3-phase units,
connect the leads to the black, yellow, and blue wires (see Fig. 13.)
CONNECTING GROUND LEAD TO UNIT GROUND
Refer to Fig. 12 and 13. Connecl the ground lead to the chassis
using the unit ground lug in the conlrol box.
ROUTING CONTROL POWER WIRES
Form a drip-loop with the thermostat leads belk)re routing them
into the unit. Route the thermostat leads through grommeted hole
provided in unit into unit control box. (See Fig. 11.) Connect
thermostat leads to unit control power leads as shown in Fig. 14.
Route thermostat wires through grommet providing a drip-loop at
the paneh Connect low-voltage leads to the thermostat as shown in
Fig. 14.
The unit translormer supplies 24-v power liar complete system
including accessory electrical beater. Translk_rmer is factory wired
lk)r 23(1-v operation. If supply voltage is 208 v, rewire translk_rmer
primary as described in the Special Procedures lk)r 2(18-v Opera-
tion section below.
ACCESSORY ELECTRIC HEAT WIRING
Refer to accessory electric beat installation instructions lk)rinl_)r-
marion on installing accessory electric beat. Accessory electric
heat wMng is shown in Fig. 15.
SPECIAL PROCEDURES FOR 208-V OPERATION
! vv. -s
Make sure thai the power supply to the unit is switched OFF
before making any wMng changes. Electrical shock can cause
serious injury or death.
1. Remove wirenut from connection of ORG wire to BLK wire.
Disconnect the ORG translormer-primary lead from the BLK
wire. Save wimnut. See unit wiring label.
2. Remove the wirenut from the terndnal on the end of the RED
transfl}rmer-primary lead.
3. Save the wirenut.
4. Connect the RED lead to the BLK wire ff(}nl which the ORG
lead was disconnected. Insulate with wirenut from Step 1.
5. Using the wirenut removed fi'om the RED lead, insulate the
loose terminal on the ORG lead.
6. Wrap the wirenuts with electrical tape so thai the metal
terminals cannot be seen.
Indoor blower-motor speeds may need to be chan(_ede f'or 2(18-v
operation. Refer to Indoor Airflow and Airflow Adjnslments
section. (See Table o1' Contents li)r page number.)
 Loading...