18
PERSONAL INJURY AND UNIT DAMAGE HAZARD
Failure to follow this warning could result in personal injury
or death and possible unit component damage.
The ability to properly perform maintenance on this
equipment requires certain expertise, mechanical skills, tools
and equipment. If you do not possess these, do not attempt to
perform any maintenance on this equipment, other than those
procedures recommended in the Owner’s Manual.
!
WARNING
The minimum maintenance requirements for this equipment are as
follows:
1. Inspect air filter(s) each month. Clean or replace when
necessary.
2. Inspect indoor coil, drain pan, and condensate drain each
cooling season for cleanliness. Clean when necessary .
3. Inspect blower motor and wheel for cleanliness each cooling
season. Clean when necessary.
4. Check electrical connections for tightness and controls for
proper operation each cooling season. Service when
necessary.
5. Ensure electric wires are not in contact with refrigerant
tubing or sharp metal edges.
ELECTRICAL SHOCK HAZARD
Failure to follow these warnings could result in personal
injury or death:
1. Turn off electrical power to the unit before performing any
maintenance or service on this unit.
2. Use extreme caution when removing panels and parts.
3. Never place anything combustible either on or in contact
with the unit.
!
WARNING
Step 1—Air Filter
IMPORTANT: Never operate the unit without a suitable air filter
in the return--air duct system. Always replace the filter with the same
dimensional size and type as originally installed. See Table 1 for
recommended filter sizes.
Inspect air filter(s) at least once each month and replace
(throwaway--type) or clean (cleanable--type) at least twice during
each cooling season and twice during the heating season, or
whenever the filter becomes clogged with dust and lint.
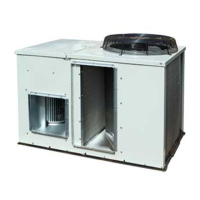
Step 2—Unit Top Removal (Outdoor--Coil Side)
NOTE: When performing maintenance or service procedures that
require removal of the unit top, be sure to perform all of the routine
maintenance procedures that require top removal, including coil
inspection and cleaning, and condensate drain pan inspection and
cleaning.
ELECTRICAL SHOCK HAZARD
Failure to follow this warning could result in personal injury
or death.
Disconnect and tag electrical power to the unit before
removing top.
!
WARNING
Only qualified service personnel should perform maintenance and
service procedures that require unit top removal.
Refer to the following top removal procedures:
1. Remove screws on unit top cover surface. (Save all screws.)
2. Remove screws on unit top cover flange. (Save all screws.)
3. Lift top from unit carefully. Set top on edge and make sure
that top is supported by unit side that is opposite duct (or
plenum) side.
4. Carefully replace and secure unit top to unit, using screws
removed in Steps 1 and 2, when maintenance and/or service
procedures are completed.
Step 3—Indoor Blower and Motor
For longer life, operating economy, andcontinuing efficiency,clean
accumulated dirt and grease from the blower wheel and motor
annually.
ELECTRICAL SHOCK HAZARD
Failure to follow this warning could result in personal injury
or death.
Disconnect and tag electrical power to the unit before cleaning
and lubricating the blower motor and wheel.
!
WARNING
To clean the blower wheel:
1. Remove the blower housing:
a. Remove the screws on the external side of the duct panel
that fasten the housing to the duct panel assembly.
b. Remove the side access panel and unscrew the mounting
bracket that fastens the blower housing to the internal
partition panel fo the control box assembly.
c. Make sure that the blower housing is supported by hand
before completely removing the mounting bracket.
d. Slide the blower housing from the rails of the duct panel
and place it outside the unit.
2. Remove the blower wheel from the housing:
a. Loosen the set screw which secures the wheel to the motor
shaft.
b. Loosen thethreemounting legs of themotor by removing
the bolts that fasten themounting legs to the housing.
c. Slide out the motor assembly (motor, belly band and the
3 mounting legs) from the hub of the wheel.
d. Remove the filler panel at the dischar ge end of the blower
housing by removing the two screws that fasten it to the
housing.
e. Remove the wheel form the housing.
3. Remove the caked on dirt from the wheel and the motor
using a brush.
4. Remove lint and dirt accumulations from the wheel and
housing with a vacuum cleaner, using a soft brush
attachment.
5. Remove grease and oil with a mild solvent.
6. Reassemble
a. Slip the wheel back in the housing with the hub set screw
parented in the correct direction.
b. Install the filler panel.
c. Reinsert the motor assembly in the wheel hub and align
the mounting legs with the housing mounting hold
locations.
d. Tighten the mounting bolts to fasten the motor assembly
with the housing.
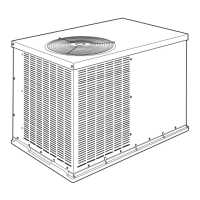
50ZPA
 Loading...