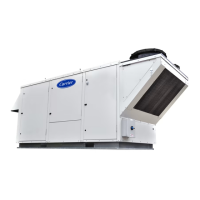
33
Fig. 30 — Unit Protection Module (UPM)
FREEZE SENSOR
The default setting for the freeze limit trip is 30°F for applications
without anti-freeze. This can be changed to 15°F for applications
with anti-freeze by cutting the R30 resistor located on top of the
DIP switch SW1.
UPM DIP SWITCH SETTINGS
The DIP switches are used to configure most of the available fea-
tures of the UPM as follows:
• Lockout mode: two (2) or four (4) strikes
• Reset mode: Y signal or R signal
• Alarm mode: Constant or Pulse
• Test mode: Normal or Test operation
Figure 31 shows the factory default settings for most heat pump
applications. However, the unit wiring diagram is the ultimate
guide for factory DIP switch default settings. See the Unit
Protection Module section in the Troubleshooting section for
further details.
Fig. 31 — Typical DIP Switch Factory Defaults
Table 4 below shows the available options on the UPM board DIP
switch banks.
Table 4 — UPM DIP Switch Options
PRE-START-UP
System Checkout
When the installation is complete, follow the system checkout
procedure outlined below before starting up the system. Be sure:
1. Voltage is within the utilization range specifications of the
unit compressor and fan motor and voltage is balanced for
3-phase units.
2. Fuses, breakers and wire are correct size.
3. Low voltage wiring is complete.
4. Piping and system flushing is complete.
5. Air is purged from closed loop system.
6. System is balanced as required. Monitor if necessary.
7. Isolation valves are open.
8. Water control valves or loop pumps are wired.
9. Condensate lines are open and correctly pitched.
10. Transformer switched to lower voltage tap (208V) if
necessary.
11. Blower rotates freely — shipping support is removed.
12. Blower speed is on correct setting.
13. Air filter is clean and in position.
14. Service/access panels are in place.
15. Return-air temperature is 50 to 95°F for heating and 68 to
95°F for cooling.
16. Air coil is clean.
17. Control field-selected settings are correct.
18. Unused drain connection (50HQP only) is capped and
sealed.
19. A pair of pants duct connection (all dual blower units)
exists.
1
2
3
4
5
6
7
9
10
11
1213
17
14
15
16
8
1 Board Power Indicator
2 UPM Status LED Indicator
3
Water Coil Freeze Protection Temperature Selection
[R30]
4 Air Coil Freeze Protection Temperature Selection
5 UPM Settings
6 Water Coil Freeze Connection
7 Air Coil Freeze Connection
8 LED Status-Diagnostic Connection
9 24VAC Power Input
10 Compressor Contact Output
11 High Pressure Switch Connection
12 Call for Compressor Y1
13 Low Pressure Switch Connection
14 24VAC Power Common
15 Condensate Overflow Sensor
16 Dry Contact
17 UPM Ground Standoff
SWITCH
NUMBER
DIP SWITCH ON OFF
4 LOCKOUT 4 2
3 RESET R Y
2 ALARM CONT PULSE
1 TEST YES NO
CAUTION
Operation of unit in test mode can lead to accelerated wear and
premature failure of components. The "TEST" switch must be
set back to "NO" after troubleshooting/servicing.
 Loading...