10
Auxiliary Sensors —
Outdoor Air Enthalpy Sensor Kit
Contents:
• Return Air Temperature Sensor or Return Air Enthalpy
Sensor
• Wiring harness and mounting bracket
• Three tie wraps
• Two No. 6-20 self-tapping screws (requires
1
/
4
in. nut
driver)
• Two No. 10-16 self-drilling screws (requires
5
/
16
in. nut
driver)
•
1
/
2
in. bushing
REPLACING THE OUTDOOR AIR TEMPERATURE SEN-
SOR WITH AN OUTDOOR AIR ENTHALPY SENSOR —
The OA temperature sensor is factory-installed in the
EconoMi$er system. See Fig. 19 to replace the OA temperature
sensor in a horizontal EconoMi$er and Fig. 31 for a vertical
EconoMi$er.
To replace the OA temperature sensor:
1. Disconnect the two wires from the installed sensor.
2. Use a
1
/
4
in. nut driver to remove the two screws secur-
ing the sensor to the sheet metal.
3. Reuse the screws to mount the new sensor.
4. Reuse the original wiring harness, using all five wires to
wire the sensor. (See Fig. 32 and 33 for connections.)
REPLACING THE RETURN AIR TEMPERATURE SEN-
SOR OR THE RETURN AIR ENTHALPY SENSOR — To
install the mounting bracket:
1. Attach the sensor to the mounting bracket using the
two No. 6 self-tapping screws provided. (The sensor
must be mounted in the upright position. See Fig. 34.)
NOTE: The mounting bracket orientation varies, depending
on the EconoMi$er assembly. (See Fig. 34 and 35 to deter-
mine the proper bracket orientation for a vertical
EconoMi$er and Fig. 36 for a horizontal EconoMi$er.)
2. Open the barometric relief dampers.
3. Mount the bracket to the inside of the EconoMi$er,
using a
5
/
16
in. nut driver and the two No. 10 self-
drilling screws provided.
TO WIRE THE RETURN AIR TEMPERATURE SENSOR
OR THE RETURN AIR ENTHALPY SENSOR
1. Remove the knockout plug. (See Fig. 36 or 37.)
2. Feed the wires through the knockout opening and
insert the bushing to secure the wires.
3. Route and attach the wiring harness to the original har-
ness using tie wraps.
4. Refer to Fig. 32 and 33 to wire the sensor.
5. Check to ensure the barometric relief dampers move
freely.
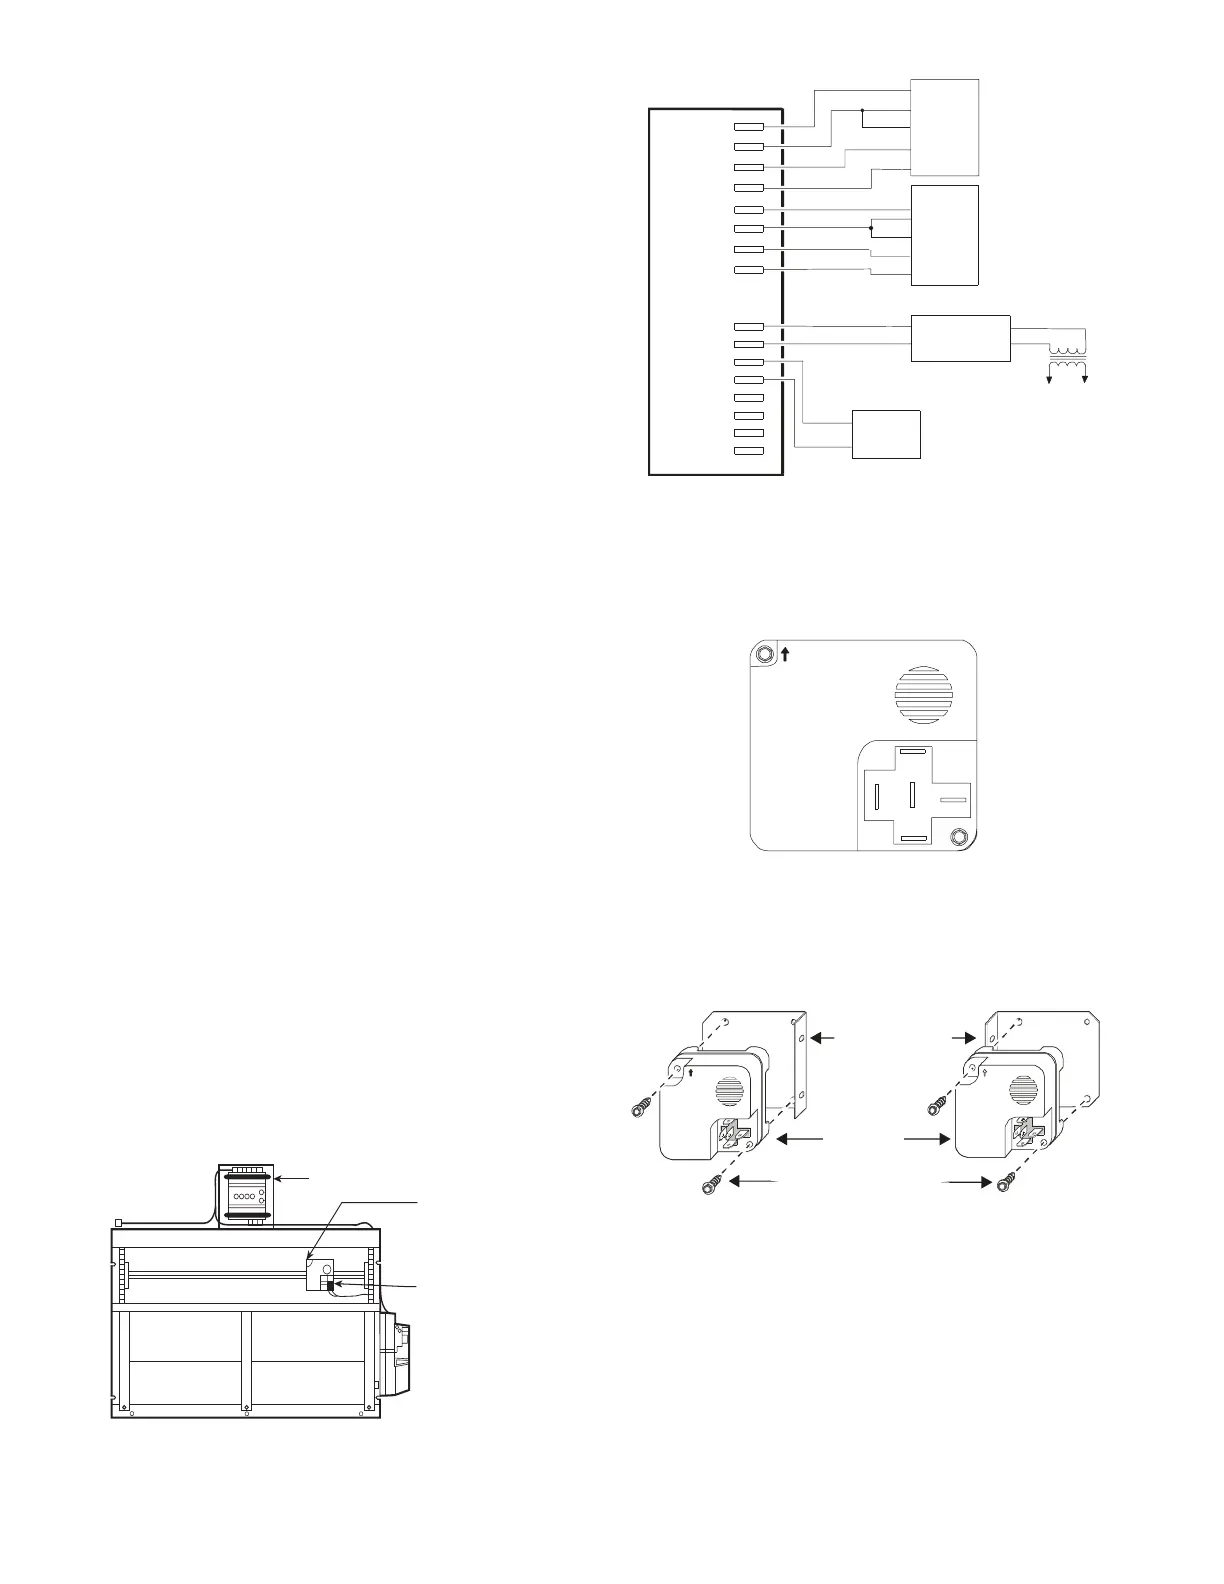
CONTROLLER
EXISTING
OUTDOOR AIR
TEMPERATURE
SENSOR*
NO.6 SELF-
TAPPING
SCREWS (2)
*The sensor is located on the left side of the damper in a 7
1
/
2
to
12
1
/
2
ton rooftop unit.
Fig. 31 — Vertical EconoMi$er Assembly
BRACKET
EDGE
SENSOR
NO. 6 SELF-TAPPING
SCREWS (2)
Fig. 33 — Terminal Locations for Outdoor Air
or Return Air Enthalpy Sensors
Fig. 34 — Mounting the Sensor to the Bracket
in a Vertical Economizer Assembly
TEMP
TEMP
COM
OUT
PWR
TEMP
TEMP
COM
OUT
PWR
24
VAC
V+
COM
Brown
Violet
Violet
White
White
Red
Red
Pink
Violet
Brown
OUTDOOR
AIR SENSOR*
RETURN
AIR SENSOR*
CO2 SENSOR*
SUPPLY AIR
TEMPERATURE SENSOR
OAT
COM
OAH
+15V
RAT
COM
RAH
+15V
CO2(+)
CO2 COM
DAT
COM
REM POT
COM
LED
COM
TEMP
TEMP
ECONOMI$ER
CONTROLLER
*Field installed accessory.
Fig. 32 — Sensor Wiring Diagram
Mounting for a 3 to 6 Ton
EconoMi$er Assembly
Mounting for a 7
1
/
2
to 12
1
/
2
To n
EconoMi$er Assembly
 Loading...