Do you have a question about the Carrier Crystal Plus 42KHFT24-708 and is the answer not in the manual?
| Brand | Carrier |
|---|---|
| Model | Crystal Plus 42KHFT24-708 |
| Category | Air Conditioner |
| Language | English |
Lists essential tools needed for the proper installation of the air conditioner unit.
Highlights hazards and essential safety measures to follow during installation and maintenance.
Details conditions and failures not covered by the manufacturer's warranty.
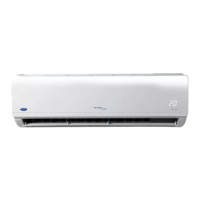
Guidelines for choosing an optimal location for the indoor unit to ensure performance and serviceability.
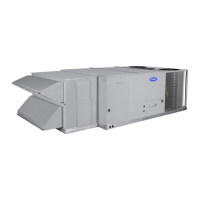
Specifies suitable areas for installing the outdoor unit of the split system.
Factors to consider when selecting the installation site for the outdoor unit.
Defines required clearance distances around the outdoor unit for proper airflow and maintenance.
Lists and describes the standard accessories provided by the factory for installation.
Details accessories not supplied by the factory but necessary for completing the installation.
Details the crucial preparatory steps before physically installing the indoor unit.
Step-by-step instructions for mounting and securing the indoor unit onto the wall bracket.
Procedure for correctly inserting batteries into the air conditioner's remote control.
Instructions on how to operate the air conditioner using the wireless remote control.
Steps to prepare the outdoor unit before the actual installation process begins.
Detailed steps for assembling and installing the wall support for the outdoor unit.
Visual guide illustrating the refrigerant connection process between units.
Essential guidelines to ensure correct and efficient connection of refrigerant piping lines.
Instructions for calculating and adding refrigerant charge based on piping length.
Steps for cutting, de-burring, and flaring refrigerant piping before connection.
Procedures for purging air from the indoor unit and refrigerant lines using vacuum pump or system refrigerant.
Methods for detecting refrigerant leaks after connecting the piping lines.
Guidelines for properly insulating refrigerant piping to prevent condensation and conserve energy.
Specifies the required size and material for the condensate drain line.
Illustrates the possible routing options for the condensate drain line from the indoor unit.
Guidance on proper installation of the drain line to ensure smooth water flow and prevent issues.
Details wiring requirements for connecting the power supply to the circuit breaker.
Instructions for connecting indoor, outdoor units, and circuit breaker according to regulations.
Provides electrical specifications, consumption data, and circuit breaker requirements for models.
Wiring diagrams for connecting the system to the power supply, including wire size recommendations.
Details the final tasks to complete the installation, including securing lines and adjusting airflow.
Important checks to perform before initiating the test run of the air conditioner.
Procedure for conducting a cooling test run using the manual control button.
Steps to perform a heating test run to verify system performance.
Overview of how air is supplied and returned, and how to control airflow direction.
Instructions on using the remote control to adjust the vertical air supply direction.
How to activate and stop the automatic swinging of horizontal louvers.
Checks to ensure the indoor unit is installed correctly and functioning as expected.
Checks to confirm the outdoor unit is securely mounted and properly installed.
Verification of refrigerant piping connections, insulation, and leak testing.
Ensures the condensate drain line is correctly connected and drains smoothly.
Verification of electrical connections, voltage, wiring, and grounding.
Checks related to the final finishing of the installation, like sealing and bundling.
Confirmation that the unit cycles, noise levels, and remote control function correctly.
Ensures the customer has been informed about operation, functions, and received manuals.
Details LED indicators for various malfunctions detected in Cool Only models.
Details LED indicators for various malfunctions detected in Heat Pump models.