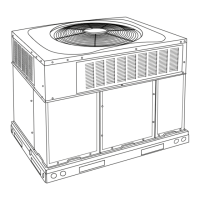
26SPA6: Installation Instructions
Manufacturer reserves the right to change, at any time, specifications and designs without notice and without obligations.
7
Follow these steps to properly start up system:
1. After system is evacuated, fully open liquid and vapor service
valves.
2. Unit is shipped with valve stem(s) front seated (closed) and caps
installed. Replace stem caps after system is opened to refrigerant
flow. Replace caps finger-tight and tighten with wrench an
additional 1/12 turn.
3. Close electrical disconnects to energize system.
4. Set room thermostat at desired temperature. Be sure set point is
below indoor ambient temperature.
5. Set room thermostat to COOL and fan control to ON or AUTO
mode, as desired. Operate unit for 15 minutes. Check system
refrigerant charge.
Sequence of Operation
Turn on power to indoor and outdoor units. Transformer is energized.
On a call for cooling, thermostat makes circuits R-Y and R-G. Circuit
R-Y energizes contactor, starting outdoor fan motor and compressor
circuit. R-G energizes indoor unit blower relay, starting indoor blower
motor on high speed.
When thermostat is satisfied, its contacts open, de-energizing contactor
and blower relay. Compressor and motors should stop.
If indoor unit is equipped with a time-delay relay circuit, the indoor
blower will run up to 30 or 90 seconds to increase system efficiency.
Check Charge
Factory charge amount and desired subcooling are shown on unit rating
plate. Charging method is shown on information plate inside unit.
Care should be taken to ensure proper refrigerant is used for charging.
Refer to outdoor unit rating plate to determine proper refrigerant.
Refrigerant cylinders used for charging should be kept in an appropriate
position and grounded to earth before charging. Hose length should be
kept to a minimum. Care should be taken to not overcharge the system.
For TXV, use subcooling method. To properly check or adjust charge,
conditions must be favorable for subcooling charging. Favorable
conditions exist when the outdoor temperature is between 70°F and
100°F (21°C and 38°C), and the indoor temperature is between 70°F and
80°F (21°C and 27°C). Follow the procedure below:
Unit is factory charged for 15ft (4.6 m) of lineset. Adjust charge by
adding or removing 0.6 oz/ft of 3/8 liquid line above or below 15 ft. (4.6
m) respectively.
Allow system to operate at least 15 minutes. If conditions are favorable,
check system charge by subcooling method for TXV. If any adjustment
is necessary, adjust charge slowly and allow system to operate for 15
minutes to stabilize before declaring a properly charged system.
If the indoor temperature is above 80°F (27°C), and the outdoor
temperature is in the favorable range, adjust system charge by weight
based on line length and allow the indoor temperature to drop to 80°F
(27°C) before attempting to check system charge by subcooling method
as described above.
If the indoor temperature is below 70°F (21°C), or the outdoor
temperature is not in the favorable range, adjust charge for line set length
above or below 15 ft. (4.6 m) only. Charge level should then be
appropriate for the system to achieve rated capacity. The charge level
could then be checked at another time when the both indoor and outdoor
temperatures are in a more favorable range.
Units with TXV
Units installed with TXV require charging by the subcooling method.
1. Operate unit a minimum of 15 minutes before checking charge.
2. Measure liquid service valve pressure by attaching an accurate
gauge to service port.
3. Measure liquid line temperature by attaching an accurate thermistor
type or electronic thermometer to liquid line near outdoor coil.
4. Refer to unit rating plate for required subcooling temperature.
5. Refer to Table 3. Find the point where required subcooling
temperature intersects measured liquid service valve pressure.
6. To obtain required subcooling temperature at a specific liquid line
pressure, add refrigerant if liquid line temperature is higher than
indicated or reclaim refrigerant if temperature is lower. Allow a
tolerance of ±3°F (±1.7°C).
NOTE: If line length is beyond 80 ft (24 m) or greater than 35 ft (11 m)
vertical separation, See Residential Piping and Long Line Guideline for
special charging requirements.
Final charge should be recorded on the outdoor unit charging label with
permanent and legible writing. Total refrigerant charge is factory charge
plus any added charge. Verify that the indoor space served by the indoor
unit, including spaces connected by ductwork, exceed the minimum
room size as listed on the outdoor unit charging label. Refer to Table 2.
WARNING
!
PERSONAL INJURY HAZARD
Failure to follow this warning could result in personal injury or death.
Do not use power tools to open and close service valves.
Power tools can cause valve stem to suddenly be ejected from the valve
body followed by a high pressure refrigerant leak.
Table 2 – Minimum Room Area Charging Table
Total System Charge (lbs.) Minimum Floor Area (sq. ft.)
4 61
5 76
6 91
7 106
8 122
9 137
10 152
11 167
12 182
13 196
14 213
15 226
16 243
17 256
18 274
19 289
20 304
21 319
22 335
23 350
24 365
25 380
 Loading...