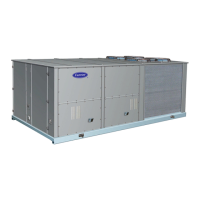
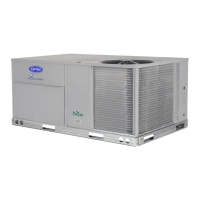
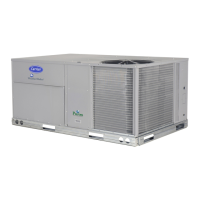
Manufacturer reserves the right to discontinue, or change at any time, specifications or designs without notice and without incurring obligations.
Catalog No. 04-53480164-01 Printed in U.S.A. Form 48N-11SI Pg 1 1-2021 Replaces: 48N-10SI
Installation Instructions
CONTENTS
PAGE
GENERAL . . . . . . . . . . . . . . . . . . . . . . . . . . . . . . . . . . . 1
SAFETY CONSIDERATIONS . . . . . . . . . . . . . . . . . . . 1
ACOUSTICAL CONSIDERATIONS . . . . . . . . . . . . . . . 3
Location . . . . . . . . . . . . . . . . . . . . . . . . . . . . . . . . . . . . 3
Ductwork . . . . . . . . . . . . . . . . . . . . . . . . . . . . . . . . . . . 3
Acoustic Insulation . . . . . . . . . . . . . . . . . . . . . . . . . . . 3
INSTALLATION
. . . . . . . . . . . . . . . . . . . . . . . . . . . . . . 4
Step 1 — Perform Jobsite Survey . . . . . . . . . . . . . . . 4
Step 2 — Place Unit . . . . . . . . . . . . . . . . . . . . . . . . . . 4
Step 3 — Roof Mount Unit . . . . . . . . . . . . . . . . . . . . . 4
• ROOF CURB
• STEEL BEAMS
Step 4 — Slab Mount Unit . . . . . . . . . . . . . . . . . . . . . 4
Step 5 — Install Curb Gasketing . . . . . . . . . . . . . . . 18
St
ep 6 — Install Field-Fabricated Ductwork . . . . . . 18
Step 7 — Rig Unit . . . . . . . . . . . . . . . . . . . . . . . . . . . 18
Step 8 — Connect Condensate Drain . . . . . . . . . . . 27
Step 9 — Install Outdoor Air Hoods . . . . . . . . . . . . 28
Step 10 — Route Field Wiring . . . . . . . . . . . . . . . . . 29
Step 11 — Make Field Electrical Connections . . . . 29
• POWER WIRING
Step 12 — Connect Air Pressure Tubing . . . . . . . . 31
• VA
RIABLE FREQUENCY DRIVE
• POWER EXHAUST
• RETURN FAN
Step 13 — Remove Supply-Fan Shipping Bracket
Screws . . . . . . . . . . . . . . . . . . . . . . . . . . . . . . . . . . . . . 33
Step 14 — Remove PE Shipping Bracket Screws . 33
Step 15 — Remove Return-Fan Shipping Brackets . . 33
Step 16 — Connect Gas Piping . . . . . . . . . . . . . . . . 34
Step 17 — Configure Modulating Gas Control . . . . 34
Step 18 — Install Flue/Inlet Hoods . . . . . . . . . . . . . 34
Step 19 — Install Supply-Air Thermistors (Modulating
Gas Units Only) . . . . . . . . . . . . . . . . . . . . . . . . . . . 36
St
ep 20 — Install Unit Accessories . . . . . . . . . . . . . 36
CONTROLS INSTALLATION . . . . . . . . . . . . . . . . . . . 41
Constant Volume / Staged Air Volume Units . . . . . 41
• CONTROL WIRING
Variable Air Volume Units . . . . . . . . . . . . . . . . . . . . 41
• VAV CONTROL WIRING
• SENSORS
• HUMIDITY CONTROL AND HOT WATER AND
STEAM VALVES
• SPACE TEMPERATURE SENSOR (T-55)
• SPACE TEMPERATURE SENSOR (T-56)
• SPACE TEMPERATURE SENSOR (T-58)
• SPACE TEMPERATURE AVERAGING
• HEAT INTERLOCK RELAY (VAV UNITS ONLY)
Option and Accessory Control Wiring . . . . . . . . . . .42
Carrier Comfort Network®
(CCN) Interface . . . . . . .47
Optional UPC Open Installation . . . . . . . . . . . . . . . .48
• WIRING THE UPC OPEN TO THE MS/TP NETWORK
• MS/TP WIRING RECOMMENDATIONS
Smoke Control Modes . . . . . . . . . . . . . . . . . . . . . . . .49
• FIRE SHUTDOWN
• PRESSURIZATION
• EVACUATION
• SMOKE PURGE
• SMOKE CONTROL INSTALLATION
GENERAL
This installation instruction contains basic unit installation infor-
mation, installation of thermostats, and installation of remote tem-
perature sensors. For additional information and service instruc-
tions, refer to the Controls, Start-Up, Operation, Service and Trou-
bleshooting literature.
SAFETY CONSIDERATIONS
Installation and servicing of air-conditioning equipment can be
hazardous due to system pressure and electrical components. Only
trained and qualified service personnel should install, repair, or
service air-conditioning equipment.
Untrained personnel can perform basic maintenance functions of
cleaning coils and filters and replacing filters. All other operations
should be performed by trained service personnel. When working
on air-conditioning equipment, observe precautions in the
literature, tags and labels attached to the unit, and other safety
precautions that may apply.
Follow all safety codes, including ANSI (American National
Standards Institute) Z223.1. Wear safety glasses and work gloves.
Use quenching cloth for unbrazing operations. Have fire
extinguisher available for all brazing operations.
It is important to recognize safety information. This is the safety-
alert symbol . When you see this symbol on the unit and in
instructions or manuals, be alert to the potential for personal
injury.
Understand the signal words DANGER, WARNING, CAUTION,
and NOTE. These words are used with the safety-alert symbol.
DANGER identifies the most serious hazards which will result in
severe personal injury or death. WARNING signifies hazards
which could result in personal injury or death. CAUTION is used
to identify unsafe practices, which may result in minor personal
injury or product and property damage. NOTE is used to highlight
suggestions which will result in enhanced installation, reliability,
or operation.
WeatherExpert
®
48N2,N3,N4,N5,N6,N7,N8,N9
Packaged Rooftop Cooling Units with Gas Heat
and ComfortLink Controls


 Loading...