Manufacturer reserves the right to discontinue, or change at any time, specifications or designs without notice and without incurring obligations.
Catalog No. 04-53480245-01 Printed in U.S.A. Form 48FC-4-7-02SI Pg 1 2-19 Replaces: 48FC-4-7-01SI
Installation Instructions
CONTENTS
SAFETY CONSIDERATIONS . . . . . . . . . . . . . . . . . . . . 1
MODEL NUMBER NOMENCLATURE AND
DIMENSIONS . . . . . . . . . . . . . . . . . . . . . . . . . . . . . . 3
INSTALLATION. . . . . . . . . . . . . . . . . . . . . . . . . . . . . . . 7
Jobsite Survey . . . . . . . . . . . . . . . . . . . . . . . . . . . . . . . 7
Step 1 — Plan for Unit Location . . . . . . . . . . . . . . . . . 7
• ROOF MOUNT
Step 2 — Plan for Sequence of Unit Installation . . . . 7
• CURB-MOUNTED INSTALLATION
• PAD-MOUNTED INSTALLATION
• FRAME-MOUNTED INSTALLATION
Step 3 — Inspect Unit . . . . . . . . . . . . . . . . . . . . . . . . . 7
Step 4 — Provide Unit Support. . . . . . . . . . . . . . . . . . 7
• ROOF CURB MOUNT
• SLAB MOUNT (HORIZONTAL UNITS ONLY)
• ALTERNATE UNIT SUPPORT (IN LIEU OF CURB OR
SLAB MOUNT)
Step 5 — Field Fabricate Ductwork . . . . . . . . . . . . . . 9
Step 6 — Rig and Place Unit . . . . . . . . . . . . . . . . . . . . 9
• POSITIONING ON CURB
Step 7 — Convert to Horizontal and Connect
Ductwork (When Required). . . . . . . . . . . . . . . . . . 10
Step 8 — Install Outside Air Hood . . . . . . . . . . . . . . 11
• ECONOMIZER AND TWO-POSITION DAMPER HOOD
PACKAGE REMOVAL AND SETUP (FACTORY
OPTION)
• ECONOMIZER AND TWO-POSITION HOOD
Step 9 — Units with Hinged Panels Only. . . . . . . . . 12
Step 10 — Install Flue Hood . . . . . . . . . . . . . . . . . . . 12
• FACTORY-OPTION THRU-BASE CONNECTIONS
(GAS CONNECTIONS)
Step 12 — Install External Condensate Trap and
Line . . . . . . . . . . . . . . . . . . . . . . . . . . . . . . . . . . . . . 15
Step 13 — Make Electrical Connections . . . . . . . . . 15
• FIELD POWER SUPPLY
• UNITS WITH FACTORY-INSTALLED NON-FUSED
DISCONNECT
• UNITS WITHOUT FACTORY-INSTALLED NON-
FUSED DISCONNECT
• ALL UNITS
• CONVENIENCE OUTLETS
• FACTORY-OPTION THRU-BASE CONNECTIONS
(ELECTRICAL CONNECTIONS)
• UNITS WITHOUT THRU-BASE CONNECTIONS
(ELECTRICAL CONNECTIONS)
• FIELD CONTROL WIRING
• THERMOSTAT
• HEAT ANTICIPATOR SETTINGS
• HUMIDI-MIZER® CONTROL CONNECTIONS
• TYPICAL UNIT WIRING DIAGRAMS
Integrated Gas Controller . . . . . . . . . . . . . . . . . . . . . 25
EconoMi$er® X (Factory Option) . . . . . . . . . . . . . . . 26
• SYSTEM COMPONENTS
• SPECIFICATIONS
•INPUTS
•OUTPUTS
• ENVIRONMENTAL
• ECONOMIZER MODULE WIRING DETAILS
• INTERFACE OVERVIEW
• SETUP AND CONFIGURATION
• ENTHALPY SETTINGS
• TWO-SPEED FAN OPERATION
• CHECKOUT
• TROUBLESHOOTING
RTU Open Controller (Factory Option) . . . . . . . . . . .40
SystemVu™ Controller (Factory Option) . . . . . . . . .40
Controller Options . . . . . . . . . . . . . . . . . . . . . . . . . . .40
• LOW AMBIENT
Smoke Detectors. . . . . . . . . . . . . . . . . . . . . . . . . . . . .40
Step 14 — Adjust Factory-Installed Options . . . . . .41
• SMOKE DETECTORS
• ECONOMI$ER® IV OCCUPANCY SWITCH
Step 15 — Install Accessories . . . . . . . . . . . . . . . . . .41
Step 16 — Fan Speed Set Up . . . . . . . . . . . . . . . . . . .42
• UNITS WITH ELECTRO-MECHANICAL CONTROLS
• UNITS WITH SYSTEMVU™ CONTROLS
START-UP CHECKLIST . . . . . . . . . . . . . . . . . . . . .CL-1
SAFETY CONSIDERATIONS
Improper installation, adjustment, alteration, service,
maintenance, or use can cause explosion, fire, electrical shock
or other conditions which may cause personal injury or
property damage. Consult a qualified installer, service agency,
or your distributor or branch for information or assistance. The
qualified installer or agency must use factory-authorized kits or
accessories when modifying this product. Refer to the
individual instructions packaged with the kits or accessories
when installing.
Follow all safety codes. Wear safety glasses and work gloves.
Use quenching cloths for brazing operations and have a fire
extinguisher available. Read these instructions thoroughly and
follow all warnings or cautions attached to the unit. Consult
local building codes and appropriate national electrical codes
(in USA, ANSI/NFPA70, National Electrical Code (NEC); in
Canada, CSA C22.1) for special requirements.
It is important to recognize safety information. This is the
safety-alert symbol . When you see this symbol on the unit
and in instructions or manuals, be alert to the potential for
personal injury.
Understand the signal words DANGER, WARNING,
CAUTION, and NOTE. These words are used with the safety-
alert symbol. DANGER identifies the most serious hazards
which will result in severe personal injury or death.
WARNING signifies hazards which could result in personal
injury or death. CAUTION is used to identify unsafe practices,
which may result in minor personal injury or product and
property damage. NOTE is used to highlight suggestions
which will result in enhanced installation, reliability, or
operation.
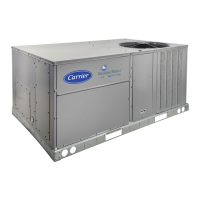
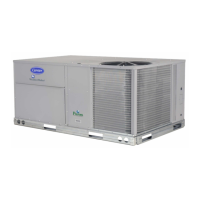
WeatherMaker
®
48FC04-07
Single Package Rooftop Gas Heating/Electric Cooling Unit
with Puron
®
(R-410A) Refrigerant




 Loading...