Manufacturer reserves the right to discontinue, or change at any time, specifications or designs without notice and without incurring obligations.
Catalog No. 04-53500208-01 Printed in U.S.A. Form 50HC-7-12-07SI Pg 1 11-18 Replaces: 50HC-7-12-06SI
Installation Instructions
TABLE OF CONTENTS
Page
SAFETY CONSIDERATIONS . . . . . . . . . . . . . . . . . . . 2
MODEL NUMBER NOMENCLATURE
AND DIMENSIONS . . . . . . . . . . . . . . . . . . . . . . . . . . . . 2
Rated Indoor Airflow . . . . . . . . . . . . . . . . . . . . . . . . . . 2
INSTALLATION . . . . . . . . . . . . . . . . . . . . . . . . . . . . . . . 8
Jobsite Survey. . . . . . . . . . . . . . . . . . . . . . . . . . . . . . . . .8
Step 1 — Plan for Unit Location . . . . . . . . . . . . . . . . 8
• ROOF MOUNT
Step 2 — Plan for Sequence of Unit Installation . .9
• CURB-MOUNTED INSTALLATION
• PAD-MOUNTED INSTALLATION
• FRAME-MOUNTED INSTALLATION
Step 3 — Inspect Unit . . . . . . . . . . . . . . . . . . . . . . . . . 9
Step 4 — Provide Unit Support . . . . . . . . . . . . . . . . . 9
• ROOF CURB MOUNT
• SLAB MOUNT (HORIZONTAL UNITS ONLY)
• ALTERNATE UNIT SUPPORT (IN LIEU OF CURB OR
SLAB MOUNT)
Step 5 — Field Fabricate Ductwork . . . . . . . . . . . . 11
• UNITS WITH ACCESSORY OR OPTIONAL
ELECTRIC HEATERS
Step 6 — Rig and Place Unit . . . . . . . . . . . . . . . . . . 11
• POSITIONING ON CURB
Step 7 — Convert to Horizontal and Connect
Ductwork (When Required) . . . . . . . . . . . . . . . . . . . 12
Step 8 — Install Outside Air Hood . . . . . . . . . . . . . 13
• ECONOMIZER AND TWO POSITION DAMPER
HOOD PACKAGE REMOVAL AND SETUP —
FACTORY OPTION
• ECONOMIZER HOOD AND TWO-POSITION HOOD
Step 9 — Install External Condensate Trap
and Line. . . . . . . . . . . . . . . . . . . . . . . . . . . . . . . . . . . . . 14
Step 10 — Make Electrical Connections. . . . . . . . 15
• FIELD POWER SUPPLY
• UNITS WITH FACTORY-INSTALLED NON-FUSED
DISCONNECT OR HACR
• UNITS WITHOUT FACTORY-INSTALLED NON-
FUSED DISCONNECT OR HACR
•ALL UNITS
Page
• CONVENIENCE OUTLETS
• HACR AMP RATING
• FACTORY-OPTION THRU-BASE CONNECTIONS
• UNITS WITHOUT THRU-BASE CONNECTIONS
• FIELD CONTROL WIRING
• THERMOSTAT
• ELECTRIC HEATERS
•HUMIDI-MIZER
®
CONTROL CONNECTIONS
• TYPICAL CONTROL AND POWER WIRING
DIAGRAMS
Economi$er
®
X (Factory Option) . . . . . . . . . . . . . . 33
• INTERFACE OVERVIEW
• SEQUENCE OF OPERATION
• ENTHALPY SETTINGS
• TWO-SPEED FAN OPERATION
• CHECKOUT
• TROUBLESHOOTING
Smoke Detectors . . . . . . . . . . . . . . . . . . . . . . . . . . . . . 47
• COMPLETING INSTALLATION OF RETURN AIR
SMOKE SENSOR
• ADDITIONAL APPLICATION DATA
Staged Air Volume (SAV™) with Variable
Frequency Drive (Factory-Installed Option) . . . . . 48
ComfortLink (Factory-Installed Option). . . . . . . . . 48
PremierLink™ Controller (Factory Option). . . . . . 48
RTU Open Controller System . . . . . . . . . . . . . . . . . . 48
Controller Options . . . . . . . . . . . . . . . . . . . . . . . . . . . . 48
• LOW AMBIENT CONTROL (FACTORY OPTION)
Step 11 — Adjust Factory-Installed Options . . . . 48
• SMOKE DETECTORS
• ECONOMI$ER
®
IV OCCUPANCY SWITCH
Step 12 — Install Accessories . . . . . . . . . . . . . . . . . 49
Step 13 — Check Belt Tension. . . . . . . . . . . . . . . . . 49
• BELT FORCE — DEFLECTION METHOD
• BELT TENSION METHOD
UltraTech™ Compressor
(50HC07 Units Only) . . . . . . . . . . . . . . . . . . . . . . . . . . 49
Pre-Start and Start-Up . . . . . . . . . . . . . . . . . . . . . . . . 50
START-UP CHECKLIST . . . . . . . . . . . . . . . . . . . . CL-1
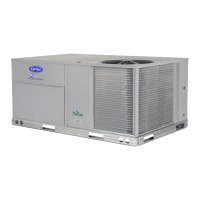
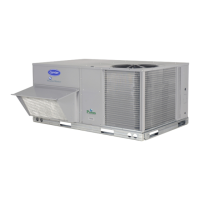
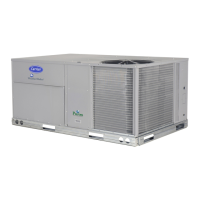
50HC07-12 WeatherMaster
®
Series
Single Package Rooftop
Cooling Only with Puron
®
(R-410-A) Refrigerant


 Loading...