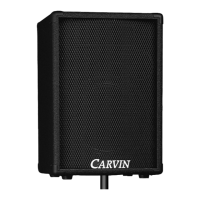
Congratulations on your purchase of the StageMate™. We’ve included all the great
features of a full PA system into the compact portable size of the StageMate™. Then
we added BATTERY POWER to make the StageMate™ work anywhere. Plus, with the
“D” option model you get 256 24-BIT Digital Effects from chorus to reverb to echoes.
The StageMate™ is well suited for set-up anywhere. Use it at events like parties, picnics,
club meetings, weddings, church gatherings, company functions, auctions, parades,
county fairs, aerobics clubs, soccer, baseball, football, camping & beach events for qual-
ity announcements & music.
RECEIVING INSPECTION—read before getting started
INSPECT YOUR UNIT FOR ANY DAMAGE which may have occurred during shipping.
If any damage is found, please notify the shipping company and CARVIN immediately.
SAVE THE CARTON & ALL PACKING MATERIALS. In the event you have to re-ship your
unit, always use the original carton and packing material. This will provide the best pos-
sible protection during shipment. CARVIN and the shipping company are not liable for
any damage caused by improper packing.
SAVE YOUR INVOICE. It will be required for warranty service if needed in the future.
SHIPMENT SHORTAGE. If you find items missing, they may have been shipped sep-
arately. Please allow several days for the rest of your order to arrive before inquiring.
RECORD THE SERIAL NUMBER on the enclosed warranty card or below on this manual
for your records. Keep your portion of the card and return the portion with your name
and comments to us.
SERVICE: In the USA, please call 800-854-2235 for a RMA # (return authorization
number). Write this number on the box and enclose a description of the problem. Prepay
to Carvin 12340 World Trade Drive, SD, CA 92128.
Outside the USA, contact your dealer or go to http://www
.carvinworld.com for your
nearest service center. Include a written description of the problem with serial number
and date of purchase.
STAGEMATE™ SPECIFICATIONS:
Frequency Response: Mic or Line Inputs: 20Hz-20KHz ±2dB
Total Harmonic Distortion: Less than 1%
Output Power: 60 Watts RMS @ 8ohms
100 Watts RMS @ 4ohms (with 8 ohm extension speaker)
Channel 1: 3 band active
LOW: 80Hz ±15dB
MID: 750Hz ±15dB
HI: 10KHz ±15dB
Channel 2-4: 2 band active,
LOW: 80Hz ±15dB
HI: 10kHz ±15dB
Effects loop send & return: 1/4” Phone Jack
Tape / CD inputs: Dual RCA jacks
Cabinet Freq Resp: 85 -16.5k Hz
Power Requirements: 150VA @ 120VAC, 12VDC @ 8 amps
Size & Weight: 12.75Wx11.5Dx18.5H, 34lbs.
76-04000C 0705
For your records, you may wish to record the following information.
Serial No._____________________ Invoice Date_______________
CONNECTING AND USING AC POWER
• Connect the StageMate™ to a standard AC power outlet.
• Use only a grounded (3 prong) power outlet to prevent a shock hazard. This also gives
the quietest grounding.
OPERATING IN BATTERY MODE
• The StageMate™ charges its battery using AC power. If the Battery Status LED indicates
a low or dead battery, plug the StageMate™ into AC power and turn the power switch
“ON”. Usual charging time is approximately 8 hours (with dual batteries 16 hours).
CONNECTING INPUTS TO YOUR STAGEMATE™
• Channel 1 is designed for acoustic and electric guitars using a 1/4” phone shielded cable.
• Channels 2 through 4 are microphone & instrument inputs. Plug a microphone into the
balanced XLR MIC input using an XLR shielded microphone cable and a 1/4” shielded
cable from your instruments. Both can be used at the same time.
TURNING ON YOUR STAGEMATE™
• Adjust all channel level controls to their off position (full counter clockwise).
• Adjust all “EQ” tone controls to their center detent position.
• Adjust all channel EFF controls to their off position.
• Turn the StageMate™ on by the power switch and watch for the power LED to come on.
• Plug in your instruments and microphones into the appropriate channels, and adjust the
level controls to the desired playing volumes. (For detail on the individual channel tone
controls and battery charging, see the appropriate sections in this manual.)
CARVIN ENGINEERING DATA OPERATING MANUAL
S400 & S400D StageMate™ Battery PA