- 2 -
Only a certified technician should bias Carvin amps, this can be
very dangerous, you can get hurt, please be very careful when
working with any tube amp!
If you are changing the tubes make sure they are a matched set.
-The bias for the V3M, V3MC should be 80mA (measured across the Standby
switch) in the 50W Power Mode setting.
These are the tools you will need:
1. A Phillips head screw driver.
2. A small (plastic if available) flat head screwdriver.
3. A multi-meter, with milli amp (mA) reading.
4. Banana to clip meter leads.
5. An Amp Stand or several wood blocks.
STEP 1
(A) For the V3M, first remove the top grill with the 4 large side screws.
-or-
(B) For the V3MC, first remove the amp from the speaker cabinet:
1. Unplug speaker from rear amp jack.
2. Remove rear wood panel (4 screws on back of cabinet)
3. Remove 4 screws on top of amp.
4. Slide amp out of speaker cabinet, to the rear.
-Replace tubes now if they are to be changed. *Be very careful with the tubes they can break.
STEP 2
Set the amp with tubes down, on an amp stand.
NOTE: If you don't have an amp stand, steadily
support the chassis on solid blocks of wood so that the
power tubes are not touching anything - they get very
hot.
* Be very careful with the tubes they can break.*
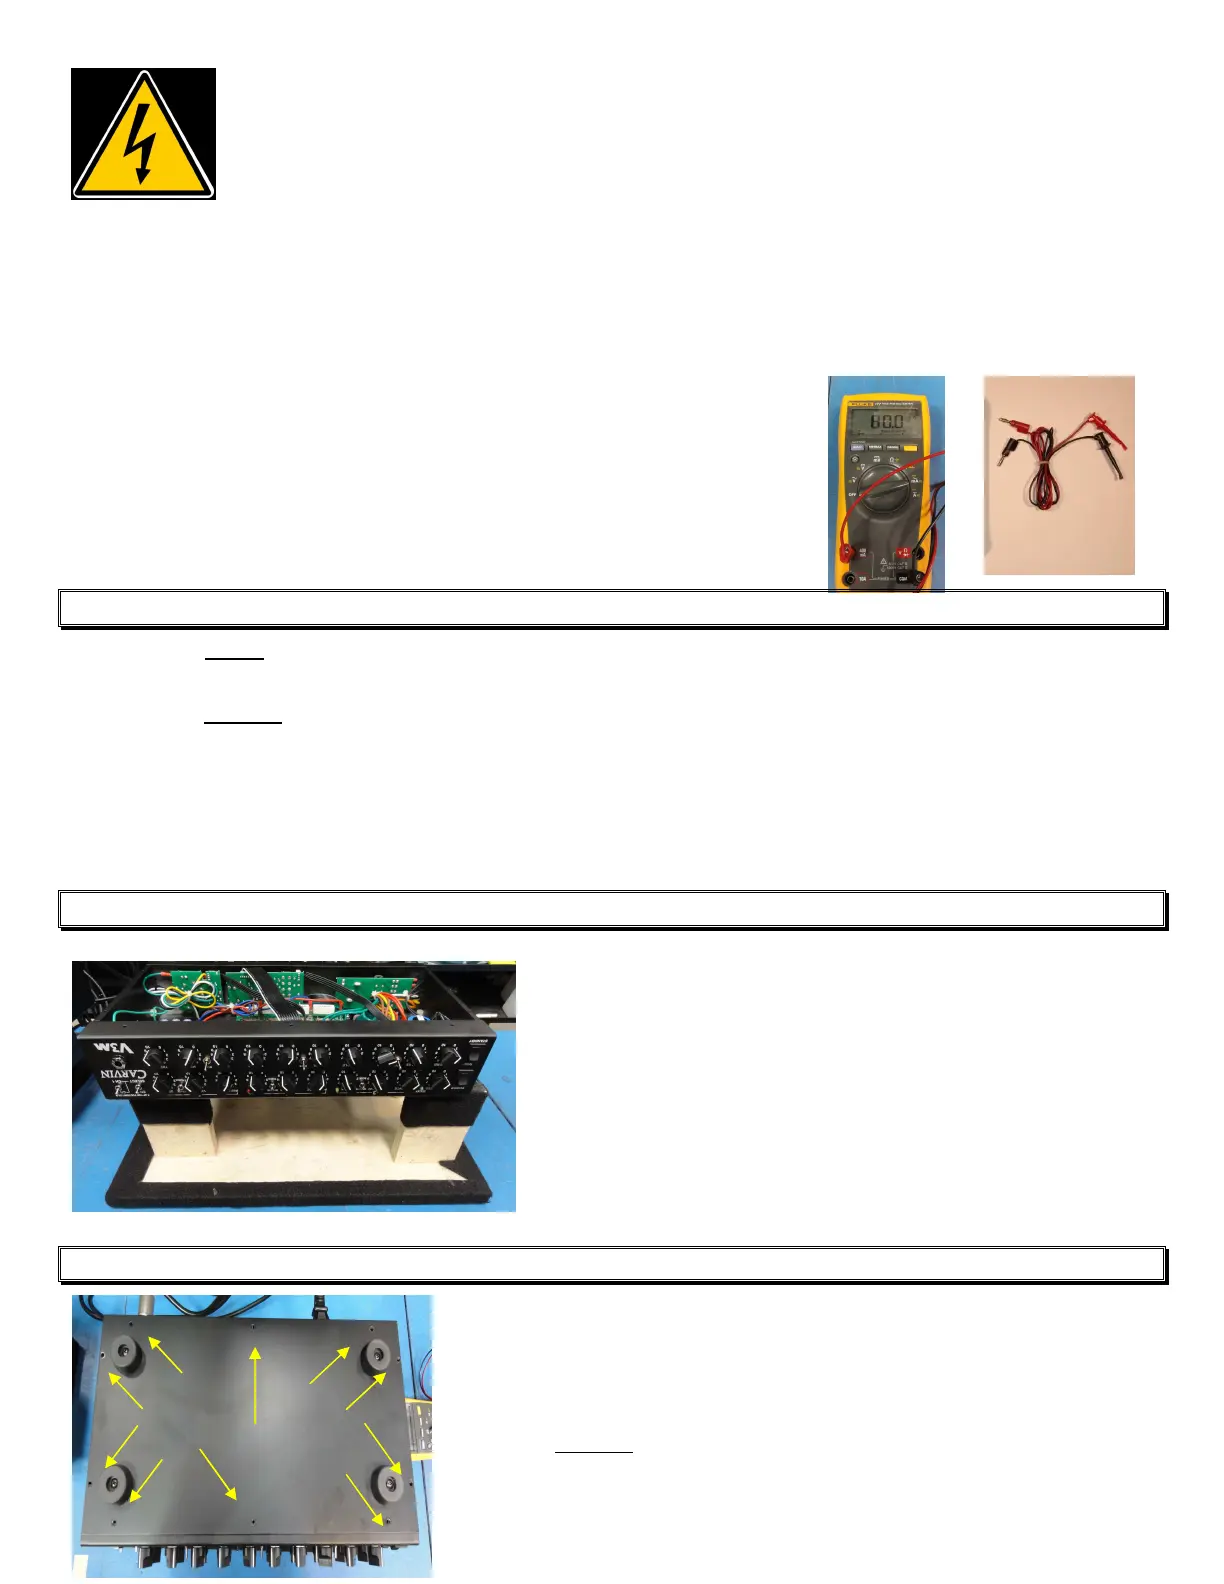
STEP 3
Remove the bottom lid by removing the 10 screws
where indicated.
For the V3MC, there are 6 screws to remove the metal plate.
 Loading...