Do you have a question about the CARVIN V3M and is the answer not in the manual?
Lists essential tools including a flat head screwdriver, multimeter, clip leads, drill, and optional amp stand.
Instructions to remove the bottom cover by unscrewing the 10 indicated screws before proceeding.
Place the amp in a stand, or support it securely to avoid damaging the tubes.
Connect a speaker to output 1 or 2, ensuring the impedance matches the amp's setting.
Verify the amplifier's speaker impedance setting matches the connected speaker's impedance.
Set the amplifier's power switch to the 50W position for accurate bias adjustment.
Lower all channel volumes and disconnect the guitar cord to ensure accurate bias readings.
Connect meter leads and set the multimeter to the DC milliamp (mA) position for measurement.
Connect the multimeter leads to the wires leading from the standby switch to the main circuit.
Plug the AC power cord into the amplifier, ensuring a firm connection if necessary.
Turn the amp ON and wait 2 minutes for it to warm up before checking the bias current reading.
Adjust the bias potentiometer clockwise to lower current or counter-clockwise to raise it towards 80mA.
Fine-tune bias reading for stability, then power down and disconnect meter leads.
Includes warnings about hot tubes, potential smells/noises, and the procedure's origin.
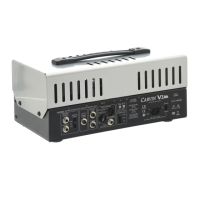
| Channels | 3 |
|---|---|
| Preamp Tubes | 4 x 12AX7 |
| Power Tubes | 4 x EL84 |
| Reverb | Yes |
| Effects Loop | Yes |
| Footswitch Included | Yes |
| EQ | 3-band EQ per channel |
| Type | Tube |
| Speaker Outputs | 4, 8, 16 ohm |
| Power | 50W/22W/7W Switchable |