Do you have a question about the CARVIN Belair212 and is the answer not in the manual?
Warning: High voltage. Only certified technicians should bias tube amps. Risk of injury.
List of necessary tools: flat head screwdriver, multimeter with mA reading, clip leads, amp stand.
Remove amp from cabinet. Support chassis safely, ensuring power tubes are not touching surfaces.
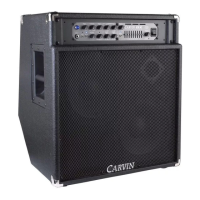
Plug in speaker to output 1 or 2. Crucial: Never turn on amp without a speaker connected.
Verify amplifier's Ohm setting matches the speaker's impedance to prevent damage.
Lower channel volumes and disconnect guitar input to ensure accurate bias measurement.
Connect meter leads and set to mA range. Ensure meter fuse is intact for proper operation.
Attach meter clips to wires from standby switch to the main circuit board for current measurement.
Plug the amplifier's AC power cord into the wall outlet. Push firmly if new.
Turn power ON. Wait 2 minutes for the amp to reach operating temperature.
Use a screwdriver to turn the bias potentiometer clockwise to lower, counter-clockwise to raise current.
Turn off amp, disconnect meter, unplug power cord, and allow tubes to cool before reassembly.
Covers abnormal smells, tube glow, hot tubes, and notes the Carvin-approved biasing method.
Check meter leads, fuse, and connections if no current reading is observed after warm-up.
Export (230-240VAC 50Hz) models use the same biasing procedure as standard models.
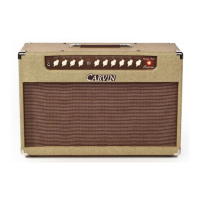
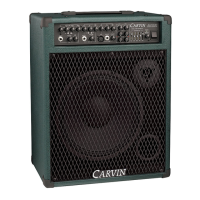
| Power Output | 50 Watts |
|---|---|
| Effects Loop | Yes |
| Type | Guitar Amplifier |
| Speaker Configuration | 2x12" |
| Channels | 2 |
| Tubes | 4 x 12AX7 |
| Controls | Volume, Treble, Bass, Reverb, Presence |
| Dimensions | 10" |