EasyManua.ls Logo

Casio 5587 - User Manual

Casio 5587
2 pages
Print Icon
To Next Page IconTo Next Page
Loading...
Operation Guide 5587/5661
E-9
Charging Time
The times below are general guidelines for reference only.
Charging Time to Support Daily Use
Exposure Level (Brightness) Approximate Charging Time
Outdoor sunlight (50,000 lux) 6 minutes
Sunlight through a window (10,000 lux) 23 minutes
Daylight through a window on an overcast day
(5,000 lux)
36 minutes
Indoor fluorescent lighting (500 lux) 6 hours
E-8
Low Battery Alert
The second hand will jump at two-second intervals to alert you when the charge is
low.
2-second jump
E-7
Low Charge and Dead Battery Conditions
An alert operation is performed when the battery charge goes low.
E-6
Caution!
x The case of the watch may become quite hot when charging. Guard against burn
injury after charging.
x Avoid charging in the following locations, and anywhere else where the watch may
become very hot.
On the dashboard of an automobile parked in the sun
Close to an incandescent light source or other sources of heat
Locations exposed to direct sunlight for long periods
Battery Indicator
While the crown is pushed in, holding down the B button for about one second will
cause the stopwatch second hand to move to a position that indicates the current
battery level (about how long the watch can continue operating).
H : At least four months
M : Two to four months
L : No more than two months
After about two seconds, the hand will return to 12o’clock.
E-5
Solar Charging
A solar panel generates electrical power that charges a built-in (secondary) battery.
The entire face is a solar panel, so power is generated when the face is exposed to
light. Keep the watch exposed to light as much as possible.
Charging the Battery
When you are not wearing the watch, leave it where it is
exposed to light. For stable operation, expose the watch to at
least a half day of light per month.
When wearing the watch, try to keep your clothing from
blocking its face (solar panel). Charging efficiency is reduced
significantly even if the face is blocked only partially.
E-4
Contents
Before Using the Watch for the First Time .......................................... E-2
Solar Charging .................................................................................... E-5
Indicators and Crown Operation ....................................................... E-11
Setting the Current Time and Day .................................................... E-12
To adjust the time setting ...........................................................................E-12
To change the day indicator setting ............................................................E-13
Using the Stopwatch ........................................................................ E-14
Specifications................................................................................... E-17
Operating Precautions ...................................................................... E-18
User Maintenance ............................................................................ E-28
E-3
Crown Operations
Some water-resistant models (10BAR, 20BAR) have a screw-
in crown. When you need to perform a crown operation,
rotate it towards you to unscrew it. Then pull the crown out.
Avoid applying undue force when pulling. The watch loses
its water resistance while the crown is unscrewed. After
performing a crown operation, fully screw the crown back in.
Crown
Loosen
If your watch has a rotary bezel...
You can rotate the bezel to align its
mark with
the minute hand. Then you will be able to tell how
much time has elapsed since aligning the
mark.
Start
Elapsed time
Current
E-2
Before Using the Watch for the First Time
Crown
Spacer
x Depending on your watch model, there may be a spacer
installed at the factory around the crown. If your watch has
a spacer, you should remove the spacer before using the
watch.
x After removing the spacer, use the procedures in “Crown
Operations” (page E-3) and “To adjust the time setting” (page E-12)
to set up the watch for use.
E-1
ENGLISH
x Be sure to keep all user documentation handy for future reference.
x Your watch may differ somewhat from the one shown in the illustration.
MA2007-EA
©
2018 CASIO COMPUTER CO., LTD.
Question and Answer IconNeed help?

Do you have a question about the Casio 5587 and is the answer not in the manual?

Overview

This document describes the operation and features of a Casio watch, models 5587/5661, which is a solar-powered analog timepiece with stopwatch functionality.

Function Description

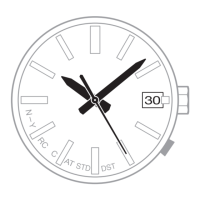
The watch is primarily a timekeeping device, displaying hours, minutes, and seconds, along with a day indicator. It features a solar panel integrated into its face, which generates electrical power to charge a built-in rechargeable (secondary) battery. This allows the watch to operate without the need for periodic battery replacement, provided it receives sufficient light exposure.

Beyond basic timekeeping, the watch includes a stopwatch function capable of measuring elapsed time, split times, and two finishes. The stopwatch measures in 1-second increments up up to 9 minutes, 59 seconds.

Important Technical Specifications

  • Accuracy: ±20 seconds a month at normal temperature.
  • Stopwatch Measuring Capacity: 9 minutes, 59 seconds (10 minutes total).
  • Stopwatch Measuring Unit: 1 second.
  • Stopwatch Measurements: Elapsed time, split time, two finishes.
  • Power Supply: Solar panel and one rechargeable battery.
  • Approximate Battery Operating Time: 5 months (with no exposure to light after a full charge).
  • Water Resistance: Some models (10BAR, 20BAR) feature a screw-in crown for enhanced water resistance.

Usage Features

Crown Operations: The watch utilizes a crown for various adjustments. For models with a screw-in crown, it must be unscrewed by rotating it towards you before pulling it out. Pulling the crown out to different "clicks" allows access to different settings:

  • Click 1: Used for changing the day indicator setting.
  • Click 2: Used for adjusting the time setting and correcting the 0 positions of the hands. It is crucial to fully screw the crown back in after any operation to maintain water resistance.

Time and Day Setting:

  • Time Setting: Pull the crown out to Click 2 when the second hand is at 12 o'clock. Rotate the crown to change the time, ensuring correct AM/PM. Push the crown back in on a time signal to resume timekeeping. It is recommended to move the minute hand four or five minutes past the desired setting and then back it up for precise adjustment.
  • Day Indicator Setting: Pull the crown out to Click 1. Rotate the crown to set the day. Push the crown back in. Avoid changing the day indicator between 9 p.m. and 1 a.m. to prevent incorrect changes at midnight.

Stopwatch Usage:

  • Elapsed Time: Start, stop, resume, and reset the stopwatch using the designated buttons (A and B).
  • Split Time: Start, record split times, release split times, stop, and reset.
  • Two Finishes: Start, record the first runner's finish (split), display the first runner's time, then record the second runner's finish (split release) to display the second runner's time, and finally reset.
  • Important Note: Do not operate the stopwatch with the crown pulled out. An elapsed time operation will automatically stop after 10 minutes.

Rotary Bezel (if applicable): Some models may feature a rotary bezel. This can be rotated to align its ▼ mark with the minute hand, allowing the user to easily track elapsed time since the alignment.

Battery Indicator: While the crown is pushed in, holding down button B for about one second will cause the stopwatch second hand to move to a position indicating the current battery level:

  • H (High): At least four months of operation remaining.
  • M (Medium): Two to four months of operation remaining.
  • L (Low): No more than two months of operation remaining. After approximately two seconds, the hand will return to 12 o'clock.

Low Battery Alert: When the battery charge is low, the second hand will jump at two-second intervals to alert the user.

Correcting 0 Positions of the Hands: If the stopwatch hands do not return to their 0 (zero) positions after resetting, pull the crown out to Click 2. Use buttons A (clockwise) and B (counterclockwise) to move the stopwatch second hand and stopwatch minute hand to 12 o'clock. Holding down either button will move the second hand at high speed. The stopwatch minute hand is synchronized with the stopwatch second hand. After adjusting, push the crown back in. Note that timekeeping stops while the crown is pulled out, so the current time setting should be corrected after this operation.

Maintenance Features

Solar Charging: The watch's face acts as a solar panel, generating electrical power to charge the built-in secondary battery. To ensure stable operation and longevity, it is crucial to keep the watch exposed to light as much as possible.

  • General Recommendation: When not wearing the watch, leave it where it is exposed to light. For stable operation, expose the watch to at least half a day of light per month.
  • Wearing: When wearing the watch, try to prevent clothing from blocking its face (solar panel), as charging efficiency is significantly reduced even if only partially blocked.
  • Charging Time to Support Daily Use (Guidelines):
    • Outdoor sunlight (50,000 lux): 6 minutes
    • Sunlight through a window (10,000 lux): 23 minutes
    • Daylight through a window on an overcast day (5,000 lux): 36 minutes
    • Indoor fluorescent lighting (500 lux): 6 hours
  • Charging Time to Recover from Dead Battery (Guidelines):
    • To 1-second hand movement:
      • Outdoor sunlight (50,000 lux): 2 hours
      • Sunlight through a window (10,000 lux): 6 hours
      • Daylight through a window on an overcast day (5,000 lux): 10 hours
      • Indoor fluorescent lighting (500 lux): 96 hours
    • To Full Charge:
      • Outdoor sunlight (50,000 lux): 21 hours
      • Sunlight through a window (10,000 lux): 78 hours
      • Daylight through a window on an overcast day (5,000 lux): 125 hours
      • Indoor fluorescent lighting (500 lux): --- (not specified, implying very long)
  • Caution during Charging: The watch case may become quite hot when charging. Guard against burn injury. Avoid charging in locations where the watch may become excessively hot, such as on an automobile dashboard parked in the sun, close to incandescent light sources, or locations exposed to direct sunlight for long periods.

Low Charge and Dead Battery Conditions: The watch performs an alert operation when the battery charge goes low, indicated by the two-second interval jump of the second hand.

Casio 5587 Specifications

General IconGeneral
BrandCasio
Model5587
CategoryWatch
LanguageEnglish

Related product manuals