– 27 –
DT-X200/DT-X8
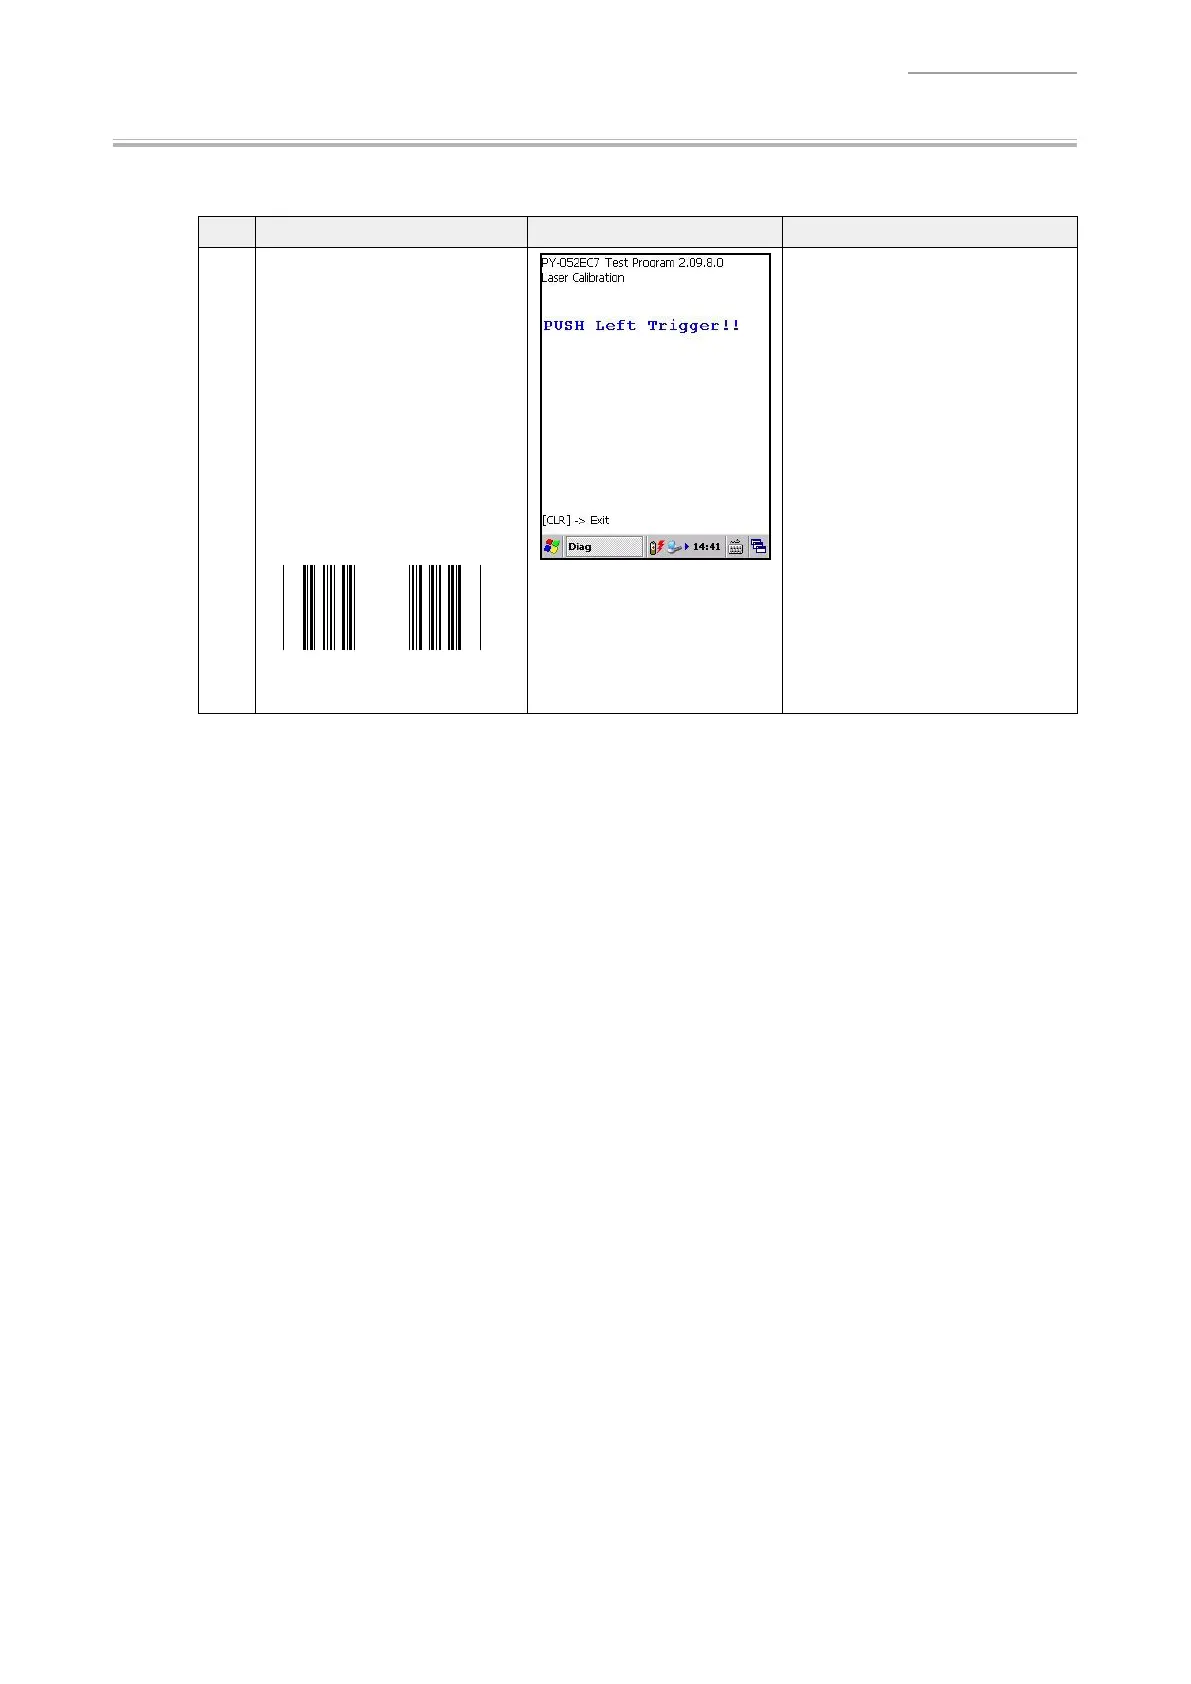
2. Laser Calibration (*1D Laser model only)
Note:
When the MAIN-UNIT or LASER-UNIT is replaced with a new one, carry out this calibration
before testing “Laser Barcode Read”.
No. Operation Display Test Details
1
Select
“
[7].Laser Calibration
”
from All Test MENU-3 screen.
Open the page of the User’s
Guide where “Emission Width
Adjustment Bar Code” is
printed.
Adjust the distance between
the barcode reader port of DT-
X200/DT-X8 and the printed
barcode to be 60 mm.
Emission Width Adjustment Bar code
Then, press the “Trigger” key.
Calibration is executed
automatically.
If the calibration is made
successfully, “Calibration OK”
is displayed and a laser beam
lights in order of Wide, Middle and
Narrow for 1 second respectively.
(This cycle is repeated.)
Press the “Enter” key to turn off
the leaser beam and return to the
Menu screen.
If the calibration fails, an error
indication is displayed.
-> Pressing the “Enter” key
returns you to the Menu
screen.
 Loading...