EasyManua.ls Logo

Casio G-SHOCK GA-100 - User Manual

Casio G-SHOCK GA-100
4 pages
Print Icon
To Next Page IconTo Next Page
Loading...
Operation Guide 5081
1
MO0911-EA
Getting Acquainted
Congratulations upon your selection of this CASIO watch. To get the most out of your
purchase, be sure to read this manual carefully.
About This Manual
Depending on the model of your watch, display text appears either as dark figures
on a light background or light figures on a dark background. All sample displays in
this manual are shown using dark figures on a light background.
Button operations are indicated using the letters shown in the illustration.
Each section of this manual provides you with the information you need to perform
operations in each mode. Further details and technical information can be found in
the “Reference” section.
Alarm Mode
Countdown Timer Mode
World Time Mode
Stopwatch Mode
General Guide
Press C to change from mode to mode.
In any mode (except a setting mode), press B to illuminate the display.
Timekeeping Mode
Press C.
Timekeeping
You can adjust the Home Time city date and time in the Timekeeping Mode.
Pressing D in the Timekeeping Mode will toggle lower left display between the
screens shown below.
D
Home City Date Home City Time
Date Seconds
Day of the week
Hour
Minutes
SecondsPM indicator
Day of the week
To set the time and date
1. In the Timekeeping Mode, hold down A for about three
seconds until the city code flashes on the lower right
display. This is the setting mode.
2. Use D and B to select the city code you want.
Make sure you select your Home City code before
changing any other setting.
For full information on city codes, see the “City Code
Table”.
l
l
l
l
l
l
l
l
l
l
l
l
Hour
Minutes
City code
PM indicator
Seconds
3. Press C to change the flashing screen content in the sequence shown below to
select the other setting.
Seconds
12/24-Hour
Format
Hour
Minutes
DST
Month
Year
City Code
Day
Illumination
Duration
4. When the timekeeping setting you want to change is flashing, use D or B to
change it as described below.
Change the city code
Toggle the DST setting between
Daylight Saving Time (
) and
Standard Time (
).
Use D (east) and B
(west).
Press D.
To do this: Do this:Screen:
5. Press A to exit the setting mode.
The day of the week is displayed automatically in accordance with the date (year,
month, and day) settings.
Toggle between 12-hour ( ) and
24-hour ( ) timekeeping
Reset the seconds to
Change the hour and minutes
Change the year, month, or day
Toggle the display illumination
duration between 1.5 seconds (
)
and three seconds (
)
Press D.
Press D.
Use D (+) and B (–).
Press D.
Daylight Saving Time (DST)
Daylight Saving Time (summer time) advances the time setting by one hour from
Standard Time. Remember that not all countries or even local areas use Daylight
Saving Time.
To change the Daylight Saving Time (summer time) setting
1. In the Timekeeping Mode, hold down A for about three
seconds until the city code flashes on the lower right
display. This is the setting mode.
2. Press C. This will display the DST setting screen.
3. Use D to toggle the DST setting on and off.
DST off ( ) DST on ( )
The default DST setting is OFF ( ).
4. When the setting you want is selected, press A to exit
the setting mode.
The DST indicator appears to indicate that Daylight
Saving Time is turned on.
l
l
l
l
l
l
l
l
l
l
l
l
l
l
l
l
l
DST indicator
12-hour and 24-hour timekeeping
With the 12-hour format, the PM indicator appears above the hour digits for times in
the range of noon to 11:59 p.m. and no indicator appears for times in the range of
midnight to 11:59 a.m.
With the 24-hour format, times are displayed in the range of 0:00 to 23:59, without
the PM indicator.
The 12-hour/24-hour timekeeping format you select in the Timekeeping Mode is
applied in all other modes.
Stopwatch
You can use the stopwatch to measure elapsed time, lap
times and split times. If you specify a distance value, the
stopwatch also will calculate and display speeds.
The digital display range of the stopwatch is 99 hours,
59 minutes, 59.999 seconds. The stopwatch continues
to run until you stop it. If it reaches the above limit, it will
restart the time measurement from zero.
The stopwatch operation continues even if you exit the
Stopwatch Mode. If you exit the Stopwatch Mode while a
stopwatch operation is in progress, the segments in the
upper right dial will appear and disappear sequentially
as stopwatch seconds are counted. This is to let you
know that a stopwatch operation is in progress.
All of the operations in this section are performed in the
Stopwatch Mode, which you enter by pressing C.
Speed hand
Important!
Check to make sure that the speed hand is not moving before you perform any
Stopwatch Mode button operation.
Specifying a Distance Value
You can use the procedure below to specify a distance value, if you want. If you
specify a distance value, the watch will calculate and indicate speed for certain
stopwatch operations.
The distance value represents kilometers, miles, or any other distance unit you want.
Specifying a distance value of 10.0, for example, can mean 10.0 kilometers or 10.0
miles.
No speed calculation is performed when 0.0 is specified as the current distance
value.
For lap time readings, you can specify either the lap distance (when all the laps are
the same distance) or the total race distance.
For split time readings, you can specify the total race distance only. Though the
watch will indicate a speed each time you take a split reading, they will be based on
the total race distance, and so they will not indicate actual intermediate split speeds.
Question and Answer IconNeed help?

Do you have a question about the Casio G-SHOCK GA-100 and is the answer not in the manual?

Summary

Getting Acquainted

About This Manual

Manual overview, button operations, and display conventions.

General Guide

Mode Navigation and Illumination

How to change modes and use the display illumination feature.

Timekeeping Mode Operations

Setting Time, Date, DST, and Format

Adjusting time, date, DST, and 12/24 hour format.

Stopwatch Mode Operations

Stopwatch Use and Speed Calculation

Basic stopwatch use and specifying distance for speed.

Stopwatch Mode Advanced Features

Speed Calculation and Time Measurements

Detailed steps for speed calculation and lap/split time measurements.

Countdown Timer Mode

Countdown Timer Operation and Settings

How to use, set, and configure the countdown timer with auto-repeat.

World Time Mode

Managing World Times, DST, and City Swapping

Viewing world times, adjusting DST, and swapping cities.

Alarm and Illumination Features

Alarms, Hourly Signal, and Illumination Use

Overview of alarms, signal, manual/auto illumination, and duration.

Auto Light Switch Safety

Safety precautions and warnings for using the auto light switch.

Hand Home Position Correction

Adjusting Analog Hand Positions

Manual correction of speed, hour, and minute hands if misaligned.

Technical Specifications and Reference

Watch Specs, City Codes, and Usage Notes

Specs, city codes, auto return, and illumination/auto light switch notes.

Overview

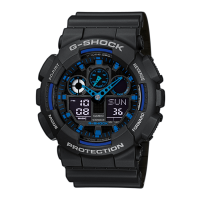
This document describes the operation and features of a CASIO watch, model 5081. It covers various modes, settings, and maintenance aspects to help users get the most out of their device.

The watch features a digital display that can show text as dark figures on a light background or light figures on a dark background, depending on the model. Button operations are indicated by letters (A, B, C, D) corresponding to the physical buttons on the watch.

General Operation

The watch has a General Guide that explains how to navigate between modes by pressing button C. Pressing button B in any mode (except a setting mode) illuminates the display, allowing for easy readability in low-light conditions.

Timekeeping Mode

In Timekeeping Mode, users can adjust the Home Time city, date, and time. Pressing button D in this mode toggles the lower left display between the Home City Date and Home City Time screens.

To set the time and date:

  1. Hold down button A for about three seconds until the city code flashes on the lower right display, indicating entry into the setting mode.
  2. Use buttons B and D to select the desired city code. It's crucial to select the correct Home City code before proceeding with other settings. A "City Code Table" is provided for reference.
  3. Press button C to cycle through the flashing screen content, allowing selection of other settings like Illumination Duration, DST, 12/24-Hour Format, Day, Month, Seconds, Hour, Year, and Minutes.
  4. When a timekeeping setting is flashing, use buttons B and D to change its value. For example, button D toggles DST, 12/24-hour format, and resets seconds to 00. Buttons B and D are used to adjust hours, minutes, year, month, and day.
  5. Press button A to exit the setting mode. The day of the week is automatically displayed based on the date settings.

Daylight Saving Time (DST)

DST (summer time) advances the time setting by one hour from Standard Time. Not all countries or local areas use DST. To change the DST setting:

  1. In Timekeeping Mode, hold down button A for about three seconds until the city code flashes.
  2. Press button C to display the DST setting screen.
  3. Use button D to toggle the DST setting on (07) or off (OFF). The default is OFF.
  4. Press button A to exit the setting mode. The DST indicator appears on the display when DST is turned on.

12-hour and 24-hour Timekeeping

The watch supports both 12-hour and 24-hour formats. In 12-hour format, the PM indicator appears for times between noon and 11:59 p.m., with no indicator for midnight to 11:59 a.m. In 24-hour format, times are displayed from 0:00 to 23:59 without a PM indicator. The selected format in Timekeeping Mode applies to all other modes.

Stopwatch Mode

The stopwatch can measure elapsed time, lap times, and split times. If a distance value is specified, the stopwatch also calculates and displays speeds. The digital display range is 99 hours, 59 minutes, 59.999 seconds. It continues to run until stopped, or restarts from zero if it reaches its limit. The stopwatch operates even if you exit Stopwatch Mode; segments in the upper right dial will appear and disappear sequentially to indicate an ongoing stopwatch operation. All stopwatch operations are performed in Stopwatch Mode, accessed by pressing button C. Users should ensure the speed hand is not moving before any stopwatch button operation.

Specifying a Distance Value

This feature allows the watch to calculate speed based on a specified distance.

  1. In Stopwatch Mode, ensure the stopwatch is stopped and reset to all zeros (press A to reset).
  2. Hold down button A for about three seconds until DIST (DIST) appears and the left digit of the current distance value flashes.
  3. Press button C to move the flashing between the left and right sides of the decimal point.
  4. Use buttons B and D to change the distance value, which can be set from 0.1 to 99.9.
  5. Press button A to exit the setting mode. No speed calculation occurs if 0.0 is specified. For lap times, users can specify lap distance or total race distance. For split times, only total race distance can be specified.

Speed Indication

During stopwatch operation, the watch displays a speed value based on the specified distance and elapsed time. Speed is indicated by the upper right dial, two indicators (1000 and MACH), and the speed hand. The upper right dial shows the 100s digit. The speed hand indicates values less than 100 (only even-numbered values). "1000" appears for speeds over 1,000, and "MACH" for speeds over 1,226. Speed can be indicated from 0 to 1998. "OVER" is indicated by the speed hand for values exceeding 1998.

Time Measurement

Users must specify either lap time or split time measurement before starting a stopwatch operation. For total elapsed time, split time measurement should be selected. To specify lap time or split time readings:

  1. In Stopwatch Mode, ensure the stopwatch is stopped and reset to all zeros.
  2. Press button A to toggle between LAP (lap times) and SPL (split times).

Elapsed Time Measurement

To measure elapsed time without lap or split readings:

  1. Select split time (SPL) measurement.
  2. Press button D to start, D to stop, and A to reset. If a distance value is specified, the upper right dial and speed hand will show overall speed upon stopping. Pressing D again after stopping will restart from where it left off.

Lap Time

A lap time reading shows the time elapsed since the last lap time reading. If calculating speed for each lap (same distance), specify the lap distance. If calculating speed for the entire race, specify the race distance. To set up for lap time readings:

  1. In Stopwatch Mode, ensure the stopwatch is stopped and reset to all zeros.
  2. Ensure LAP (lap times) is shown (press A to toggle if SPL is displayed). To perform a lap time measurement:
  3. Select lap time (LAP) measurement.
  4. Press button D to start, A to take a lap reading, A to take another lap reading, D to stop, and A to reset. Lap times are released automatically in about 12 seconds. Users can take multiple lap readings. The LAP indicator flashes during a lap reading. A lap number (#01 through #99) alternates with the lap hour value. If more than 99 readings are taken, the lap number restarts from #00. Stopping elapsed time measurement displays the time (and speed if specified) of the final lap.

Split Time

A split time reading shows the time elapsed since the beginning of the current measurement. If calculating race speed, specify the race distance. For split times, only total race distance can be specified. To set up for split time readings:

  1. In Stopwatch Mode, ensure the stopwatch is stopped and reset to all zeros.
  2. Ensure SPL (split times) is shown (press A to toggle if LAP is displayed). To perform a split time measurement:
  3. Select split time (SPL) measurement.
  4. Press button D to start, A to take a split reading, A to release the split, D to stop, and A to reset. Split times are released automatically if button A is not pressed within about 12 seconds. Users can take multiple split readings. The SPLIT indicator flashes during a split reading. The stopwatch continues internal measurement while a split time is displayed. Releasing the split switches the display to elapsed time measurement, or users can press D to stop. Stopping elapsed time measurement displays the time (and speed if specified) of the final split.

Countdown Timer Mode

The countdown timer can be set from one minute to 24 hours. An alarm sounds when the countdown reaches zero. Auto-repeat can be selected to automatically restart the countdown from the original value. All operations are performed in Countdown Timer Mode, accessed by pressing button C. To use the countdown timer:

  1. Press button D to start the countdown timer. When zero is reached, the alarm sounds for 10 seconds or until any button is pressed. The countdown time resets automatically after the alarm stops if auto-repeat is off. If auto-repeat is on, the countdown restarts automatically without pausing. The countdown timer continues even if you exit the mode.
  2. Press button D to pause an ongoing countdown. Press D again to resume.
  3. To stop completely, pause it (D), then press A. This returns the countdown time to its starting value.

To configure countdown start time and auto-repeat settings:

  1. While the countdown start time is displayed in Countdown Timer Mode, hold down button A for about three seconds until the hour setting flashes. This is the setting mode. If the start time is not displayed, use the procedure under "To use the countdown timer" to display it.
  2. Press button C to move the flashing between hour, minute, and auto-repeat settings.
  3. While the start time setting is flashing, use buttons B and D to change it. While auto-repeat on/off is flashing, press D to toggle it on (1) or off ().
  4. Press button A to exit the setting mode. The auto-repeat on indicator appears on the Countdown Timer Mode screen when this function is turned on.

World Time Mode

World Time digitally displays the current time in one of 48 cities (29 time zones) worldwide. A simple operation allows swapping the Home City with the selected World Time City. Times in World Time Mode are synchronized with Timekeeping Mode. Users should check the correct Home City and Timekeeping Mode time if there are errors. Times are based on UTC offsets (refer to "City Code Table"). All operations are performed in World Time Mode, accessed by pressing button C. To view the current time in another time zone: In World Time Mode, use button D to scroll through available city codes. Holding D scrolls at high speed. The lower left display shows the current time. A PM indicator appears for times between noon and midnight. When a city code is selected, press A to display the date. After about one second, the watch resumes regular timekeeping for the selected city.

To toggle a city code time between Standard Time and Daylight Saving Time:

  1. In World Time Mode, press button D to display the city code whose setting you want to change.
  2. Hold down button A for about three seconds to toggle between Daylight Saving Time (DST indicator displayed) and Standard Time (DST indicator not displayed). The DST indicator is shown in the lower left display when DST is on. DST can be turned on individually for each city code, except UTC. Turning on DST for the Home City code also turns it on for normal timekeeping.

Swapping your Home City and World Time City

This procedure swaps your Home City with your World Time City, useful for frequent travelers.

  1. In World Time Mode, use button D to select the desired World Time City.
  2. Hold down buttons A and B until the watch beeps. This makes the selected World Time City your Home City, and the previous Home City becomes your World Time City. The watch remains in World Time Mode, displaying the newly set Home City.

Alarms

The alarm tone sounds for 10 seconds at the preset time, regardless of the mode. The snooze alarm repeats seven times, every five minutes, or until turned off. Alarm and Hourly Time Signal operations are based on the Home City time. Pressing any button stops the alarm tone. Displaying the Timekeeping Mode setting screen or any other setting screen cancels the current snooze alarm operation. There are five alarm screens: AL1, AL2, AL3, AL4 for daily alarms, and SNZ for the snooze alarm. The Hourly Time Signal screen is SIG. All operations are performed in Alarm Mode, accessed by pressing button C. To turn an alarm on and off:

  1. In Alarm Mode, use button D to select an alarm.
  2. Press button A to toggle it on or off. Turning on an alarm displays the alarm on indicator. The alarm on indicator is shown in all modes when an alarm is on. It flashes when the alarm is sounding. The snooze alarm indicator flashes when sounding and during the 5-minute intervals. To turn the Hourly Time Signal on and off:
  3. In Alarm Mode, use button D to select the Hourly Time Signal (SIG).
  4. Press button A to toggle it on or off. The Hourly Time Signal on indicator is shown in all modes when on.

To set an alarm time:

  1. In Alarm Mode, use button D to scroll through the alarm screens until the desired alarm (AL1-AL4 or SNZ) is displayed. SIG is for the hourly time signal. The snooze alarm repeats every five minutes.
  2. After selecting an alarm, hold down button A for about three seconds until the hour setting flashes. This automatically turns on the alarm.
  3. Press button C to move the flashing between hour and minute settings.
  4. While a setting is flashing, use buttons B and D to change it.
  5. Press button A to exit the setting mode.

Illumination

An LED (light-emitting diode) illuminates the watch face for easy reading in the dark. The watch's auto light switch turns on illumination automatically when the watch is angled towards the face. The auto light switch must be on (indicated by the auto light switch indicator) for it to operate. Refer to "Illumination Precautions" for more information. To illuminate the display manually: In any mode, press button B to turn on illumination. This works regardless of the auto light switch setting. Users can select either 1.5 seconds or 3 seconds for illumination duration. To specify the illumination duration:

  1. In Timekeeping Mode, hold down button A until the display contents flash.
  2. Press button C nine times to display the current illumination duration (LT1 or LT3).
  3. Press button D to toggle between LT1 (1.5 seconds) and LT3 (three seconds).
  4. Press button A to exit the setting screen.

About the Auto Light Switch

Turning on the auto light switch causes illumination to turn on when the wrist is positioned as described. Moving the watch parallel to the ground and then tilting it more than 40 degrees towards you turns on illumination. Wear the watch on the outside of your wrist. Warning! Always ensure safety when using the auto light switch, especially during activities that could result in accident or injury. Be careful not to startle or distract others. Turn off the auto light switch before riding a bicycle or operating a motorcycle to prevent distraction and potential accidents. To turn the auto light switch on and off: In Timekeeping Mode, hold down button B for about three seconds to toggle the auto light switch on (indicator displayed) and off (indicator not displayed). The auto light switch indicator remains in all modes when on. To protect the battery, the auto light switch automatically turns off approximately six hours after being turned on. Repeat the procedure to turn it back on.

Hand Home Position Correction

The watch's speed hand and hour/minute hands can be misaligned due to strong magnetism or impact. The watch is designed for manual correction. To adjust home positions:

  1. In Timekeeping Mode, hold down button A for about three seconds until H-SET (H-SET) appears and Sub (Sub) appears. This is the home position adjustment mode.
  2. Check the speed hand position. It should point at 50 (12 o'clock). If not, use button D to move it clockwise.
  3. After confirming the speed hand, press button C.
  4. Check the hour and minute hand positions. They should point at 12 o'clock. If not, use button D (clockwise) and B (counterclockwise) to adjust them.
  5. When all hands are correctly positioned, press button A to return to regular timekeeping. This moves the hands to the current Timekeeping Mode time and the speed hand to the 0 position. Pressing button C returns to the beginning of step 2.

Reference

This section provides detailed technical information and precautions. Auto Return Features: If a flashing setting is left on for two or three minutes without operation, the watch automatically exits the setting mode. It returns to Timekeeping Mode automatically if no operation is performed for two or three minutes in Alarm Mode. High-Speed Movement: Buttons B and D are used for high-speed movement in various setting modes when held down. Initial Screens: When entering Stopwatch, World Time, or Alarm Mode, the data last viewed will appear first. Timekeeping: Resetting seconds to 00 when the count is 30-59 increases minutes by 1. For 00-29, seconds reset to 00 without changing minutes. The year can be set from 2000 to 2099. The full auto-calendar accounts for different month lengths and leap years. The date only needs to be changed if the battery is replaced. Current time for all city codes is calculated based on Coordinated Universal Time (UTC) and the Home City time setting. Illumination Precautions: Illumination may be difficult to see in direct sunlight. It turns off automatically when an alarm sounds. Duration depends on the setting. Frequent use drains the battery. Auto Light Switch Precautions: Avoid wearing the watch on the inside of the wrist to prevent unnecessary operation and battery drain. If worn inside, turn off the auto light switch. Illumination may not turn on if the watch face is more than 15 degrees above or below parallel to the ground. Ensure the back of the hand is parallel to the ground. Illumination turns off after 1.5 or 3 seconds, even if the watch is pointed towards you. Static electricity or magnetic force can interfere with auto light switch operation. If illumination doesn't turn on, try repositioning the watch. Illumination may not turn on for about one second after turning the watch face towards you, which is not a malfunction. A faint clicking sound when the watch is shaken is caused by mechanical operation of the auto light switch and is not a problem.

Casio G-SHOCK GA-100 Specifications

General IconGeneral
BrandCasio
ModelGA-100
SeriesG-SHOCK
Water Resistance200 meters
Shock ResistanceYes
Case MaterialResin
Band MaterialResin
Display TypeAnalog-Digital
Battery Life2 years
MovementQuartz
World TimeYes
Countdown TimerYes
Accuracy±15 seconds per month
Approx. Battery Life2 years
Magnetic ResistanceYes
Size55 x 51.2 x 16.9 mm
Alarm5 daily alarms
Weight70 g
Stopwatch1/1000-second stopwatch; Measuring capacity: 99:59'59.999''; Measuring modes: Elapsed time, lap time, split time; Others: Speed (0 to 999 units/hour), Distance input (0.0 to 99.9)

Related product manuals