E-55
7. Screen Capture
u ALGEBRA FX Series
1
. Set up the calculator to send a screen shot to a computer.
• Use the calculator’s LINK mode set up (u3(SET UP)) to specify Direct (direct send) for
the H-Copy item.
2
. On the calculator, display the screen you want to send to the computer.
3
. On the FA-124 menu bar, select [Link] - [Screen Capture].
4
. On the calculator, press u6(H-COPY) to send the screen shot.
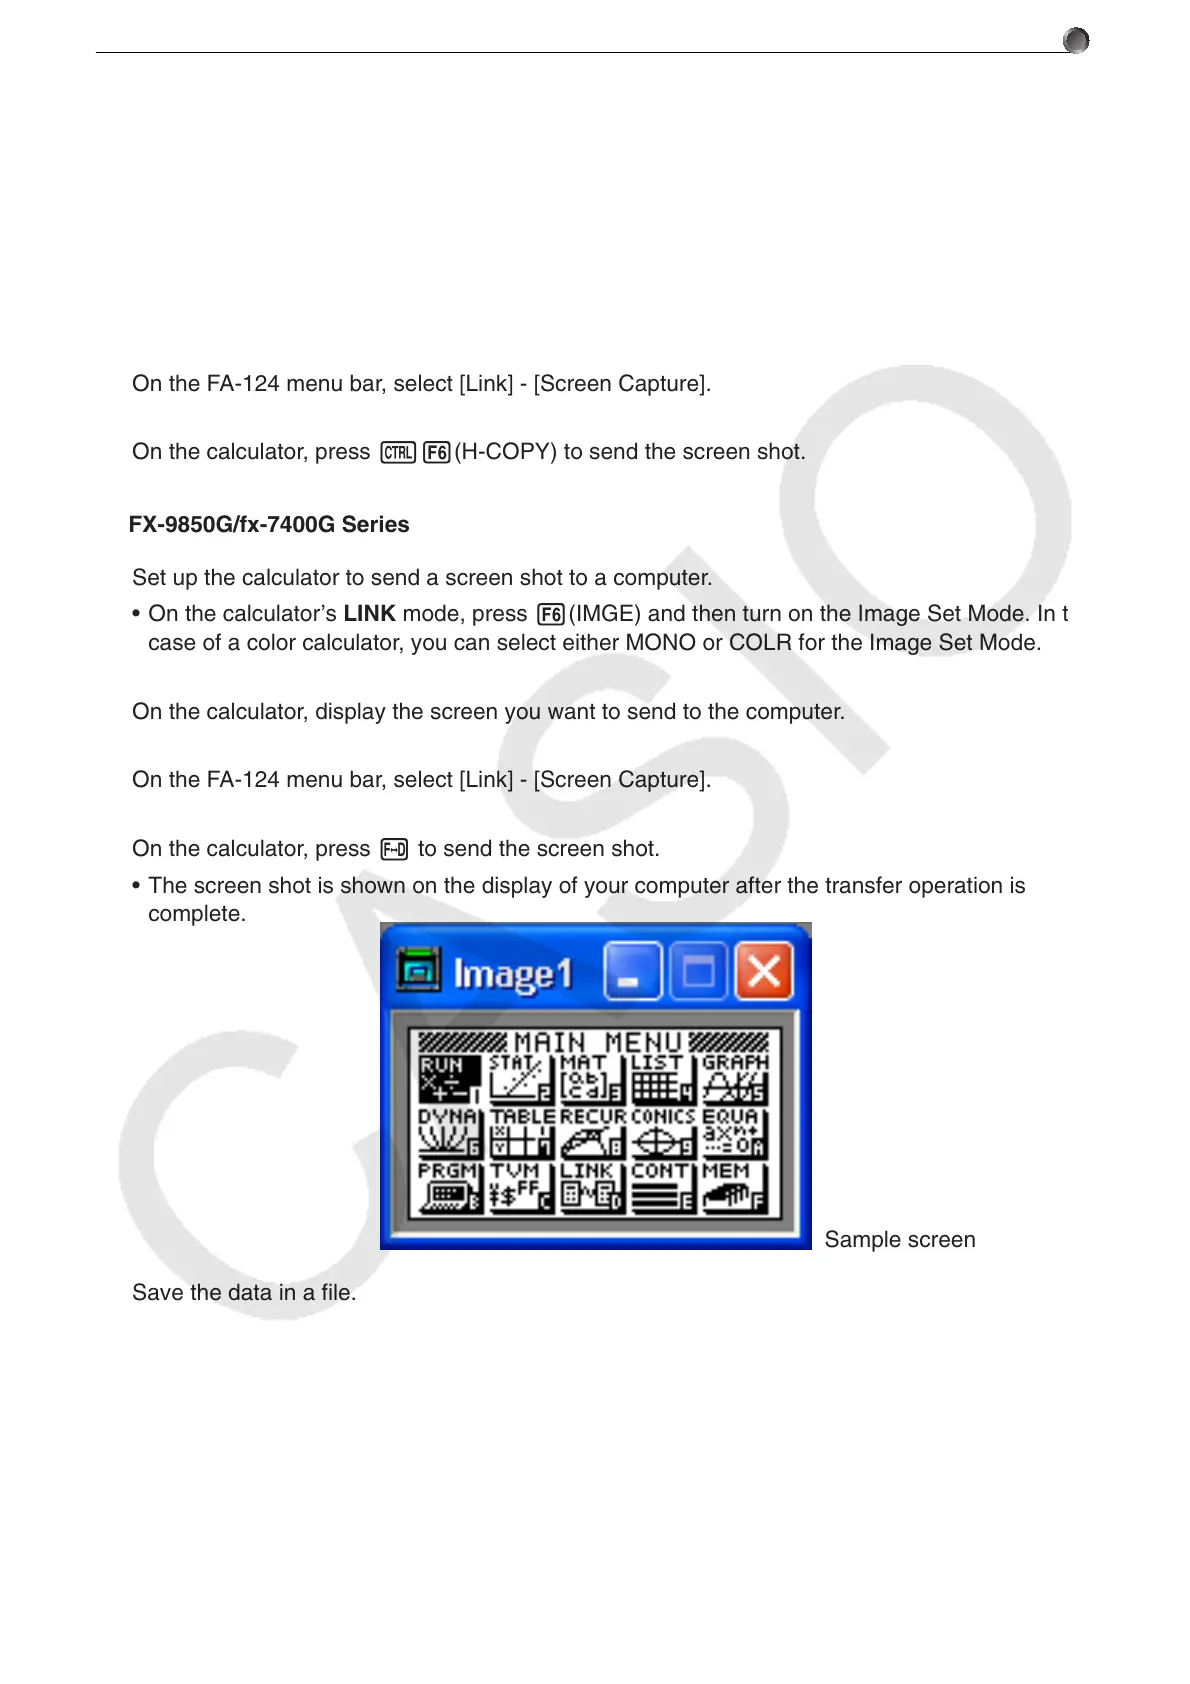
u CFX-9850G/fx-7400G Series
1
. Set up the calculator to send a screen shot to a computer.
• On the calculator’s LINK mode, press 6(IMGE) and then turn on the Image Set Mode. In the
case of a color calculator, you can select either MONO or COLR for the Image Set Mode.
2
. On the calculator, display the screen you want to send to the computer.
3
. On the FA-124 menu bar, select [Link] - [Screen Capture].
4
. On the calculator, press M to send the screen shot.
• The screen shot is shown on the display of your computer after the transfer operation is
complete.
5
. Save the data in a file.
Select [File] - [Save As].
Specify a file name and save the file.
To change the format of the image file, specify the file type and then save the file.
Note
• Selecting [File] - [Save As] causes a dialog box to appear. This dialog box can be used to
specify a file name and also to specify a drive and directory.
Sample screen