— 47 —
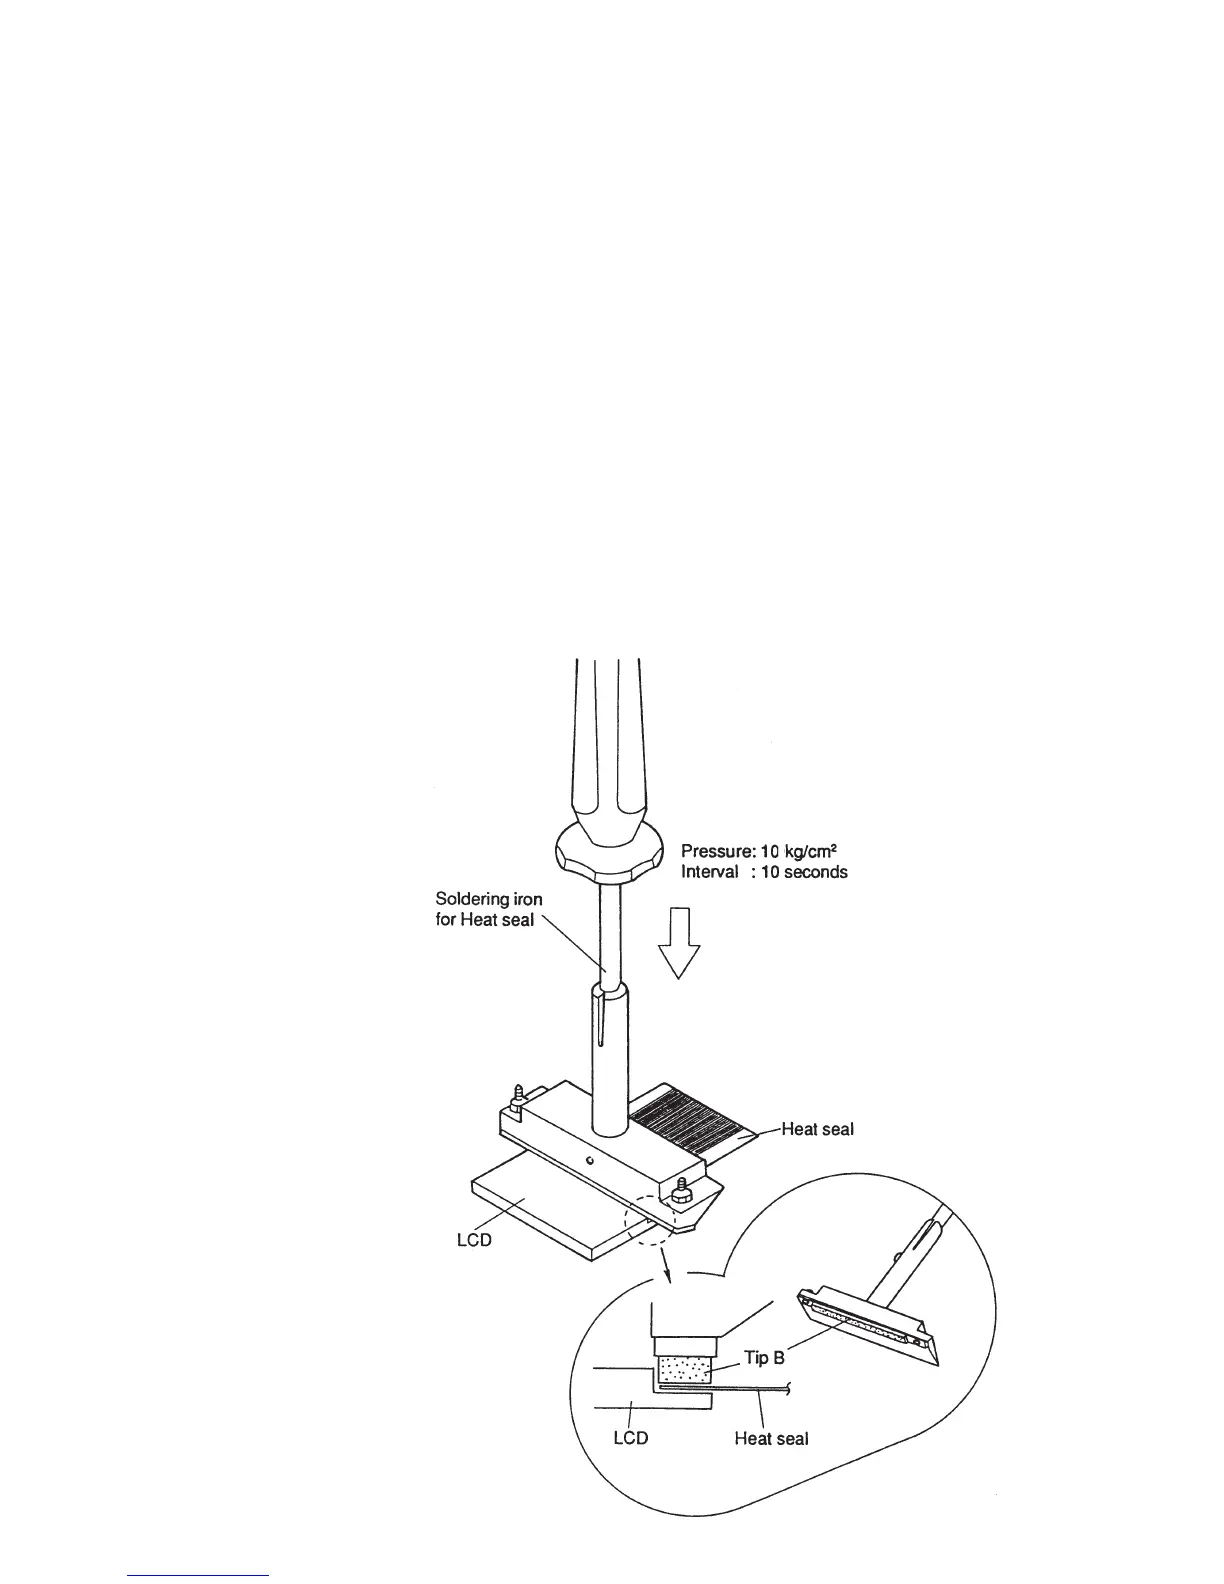
5) On using both silicone rubber and heat seal tip, perform the thermal compression bonding by
touching the soldering iron vertically to heat seal and LCD from upper side as shown in drawing
with following conditions.
Pressure: 10kg/ cm
2
Pressing time: approx. 10 seconds.
Firstly make the bonding at both end to fix the position of the heat seal on LCD, and then make the
bonding to the rest.
6) When the thermal compression bonding is completed, turn the LCD with heat seal and check the
condition of the bonding.
On this time, you can judge the bonding was performed correctly if the bonding part is turned
translucent.
In case the bonding part is not translucent partially, perform the thermal compression bonding
again to such part.
7) Perform the thermal compression bonding of heat seal (with LCD) and P.C.B. ass’y. Though the
bonding way is as same as the one of the heat seal and LCD, perform the thermal compression
bonding until the terminals of the P.C.B. ass’y are float up on the heat seal.
8) When the thermal compression bonding is completed, reassemble them and install the battery to
the clock to check the display.
Fig. 16-2