Do you have a question about the Cateye CC-VT230W and is the answer not in the manual?
Instructions for attaching the mounting bracket to the bicycle stem or handlebar.
Guide for positioning and attaching the speed sensor and wheel magnet onto the bicycle.
Steps for aligning components, attaching the computer, and verifying installation.
Resets the computer, sets measurement units (km/h or mph), and selects tire size.
Guide to measuring or finding tire circumference for precise settings.
Instructions for setting the clock and completing the initial setup process.
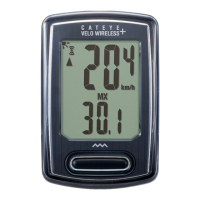
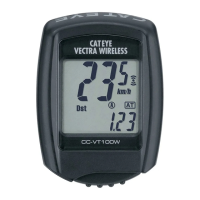
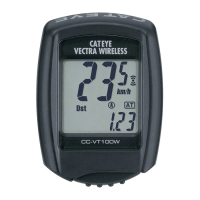
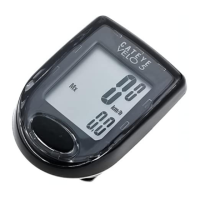
Explanation of display elements, icons, and current functions.
How to switch functions, start/stop measurement, reset data, and use power-saving mode.
Methods for setting tire size and selecting measurement units (km/h or mph).
Adjusting the clock and manually inputting total distance.
Important safety guidelines and handling precautions for the device.
Details on sensor operation, FCC compliance, and modifications.
Guidance on care, battery replacement, issue resolution, and product warranty.
Overview of the computer's main technical data and dimensions.
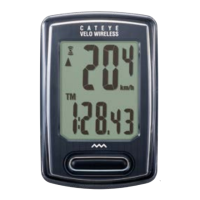
The CatEye Velo Wireless Cyclocomputer (CC-VT230W) is a bicycle computer designed to provide cyclists with essential ride data and features. This device is a wireless cyclocomputer, meaning it communicates with its speed sensor without physical cables, offering a clean and uncluttered setup on your bicycle.
The primary function of the CC-VT230W is to measure and display various cycling metrics. It provides real-time data such as current speed, average speed, and maximum speed. Beyond speed, it tracks trip distance (DST) and total distance (ODO), allowing you to monitor individual rides and your cumulative mileage. The cyclocomputer also includes an elapsed time (TM) function, which measures the duration of your ride. A clock function displays the current time, configurable in either 12-hour or 24-hour format. For those interested in fitness metrics, the device estimates calorie consumption (CAL) during your rides. A unique feature is the "pace arrow," which indicates whether your current speed is faster or slower than your average speed, providing immediate feedback on your performance. The "sensor signal icon" flashes in sync with the sensor signal, confirming active communication between the computer and the speed sensor.
Setting up the CC-VT230W involves several steps to ensure accurate data collection. The mounting process begins with attaching the bracket to either the stem or handlebar of your bicycle. The bracket should be secured using nylon ties and double-sided tape for stability. Next, the speed sensor is mounted on the right or left front fork, also using nylon ties and a sensor rubber pad. It's crucial to position the speed sensor so that the distance from the computer to the sensor is within the signal range, ideally a maximum of 70 cm (27 inches). The magnet is then mounted on a spoke of the front wheel. For accurate readings, the magnet must pass through the speed sensor's designated zone, and the clearance between the speed sensor and the magnet should be within 5 mm (3/16 inches). After mounting all components, a test operation is recommended: gently rotate the front wheel to confirm that the current speed is displayed on the computer. If not, recheck the attachment conditions.
Once mounted, the computer needs to be configured. For first-time use or after a factory reset, all data should be cleared by pressing the AC button on the back of the computer. This action deletes all previous data and resets the computer to its default settings. The next step is to select the measurement unit, choosing between "km/h" or "mph." Tire size is a critical setting for accurate speed and distance calculations. The device offers a simple setting method where you can select common tire sizes (e.g., 26", 700C, 27.5", 29", 16", 18", 20", 22", 24") in a predefined order. For more accurate measurements, an advanced setting allows you to input the tire circumference in centimeters, ranging from 100 to 299 cm. The clock can then be set, with options for 12-hour or 24-hour display and adjustment of hours and minutes. Finally, pressing the MENU button completes the setup, and the computer switches to the measurement screen.
The cyclocomputer automatically starts measurement when the bicycle moves and stops when the bicycle is stationary. During measurement, the selected measurement unit (km/h or mph) flashes. All measurement data, except for the total distance (ODO), can be reset to zero by pressing and holding the MODE button on the measurement screen. The device also features a power-saving function: if no sensor signal is received for 10 minutes, the screen activates a power-saving mode, displaying only the clock. If left in power-saving mode for 1 hour, it will display "SLEEP." Pressing the MODE button or receiving a sensor signal will reactivate the measurement screen.
The menu screen allows for changing various settings after initial setup. From the measurement screen, pressing MENU accesses the menu. Here, you can revisit and adjust the tire size, clock settings, and measurement unit. An additional feature in the menu is "manual distance input," which allows you to set an arbitrary total distance value. This is useful when replacing the computer battery or transferring data from a previous device, enabling you to continue tracking from a specific mileage. After making any changes in the menu, it's essential to press MENU again to confirm the changes. If the menu screen is left inactive for one minute, the computer will automatically return to the measurement screen.
Maintaining the CC-VT230W is straightforward. For cleaning, a soft cloth moistened with mild soap is recommended. It's important to avoid using thinners, benzine, or alcohol, as these can damage the computer and its accessories.
Battery replacement is a key maintenance task. When the computer's display becomes dim, it indicates that the lithium battery (CR2032) needs to be replaced. The battery is inserted with the (+) side facing up. After replacing the battery, it's crucial to follow the setup procedure again, particularly re-entering the total distance if you wish to continue tracking your cumulative mileage. Similarly, if the speed is not displayed correctly even after adjusting the sensor and magnet, the speed sensor's lithium battery (CR2032) may need replacement. After replacing the sensor battery, the position of the magnet relative to the speed sensor should be re-adjusted.
Troubleshooting guidance is provided for common issues. If the sensor signal reception icon does not flash (meaning speed is not displayed), check the clearance between the speed sensor and the magnet (should be within 5 mm), ensure the magnet passes through the sensor zone correctly, and verify that the computer is mounted at the correct angle with its back facing the speed sensor. Also, confirm that the computer and speed sensor are within the correct distance range (20 to 70 cm). If these conditions are met and the issue persists, the computer or speed sensor battery might be flat, especially in cold weather, as battery performance diminishes in winter. Weak batteries can cause the computer to react only when very close to the speed sensor. In such cases, replacing the batteries is recommended. If the display remains blank when a button is pressed, the computer battery likely needs replacement. For incorrect data display, clearing all data and re-configuring the computer as described in the setup procedure is advised.
| Model Number | CC-VT230W |
|---|---|
| Display Type | LCD |
| Current Speed | Yes |
| Total Distance | Yes |
| Trip Distance | Yes |
| Elapsed Time | Yes |
| Average Speed | Yes |
| Maximum Speed | Yes |
| Wireless Transmission | Yes |
| Clock | Yes |
| Pace Arrow | Yes |
| Auto Power Saving | Yes |
| Auto Start/Stop | Yes |
| Tire Size | Yes |
| Battery | CR2032 |
| Battery Life | Approx. 1 year |
| Mounting Type | Handlebar |
| Water Resistance | Yes |
| Type | Wireless |