52 support@cedarsummitplay.com
Fig. 24.4
2639
2644
Hardware
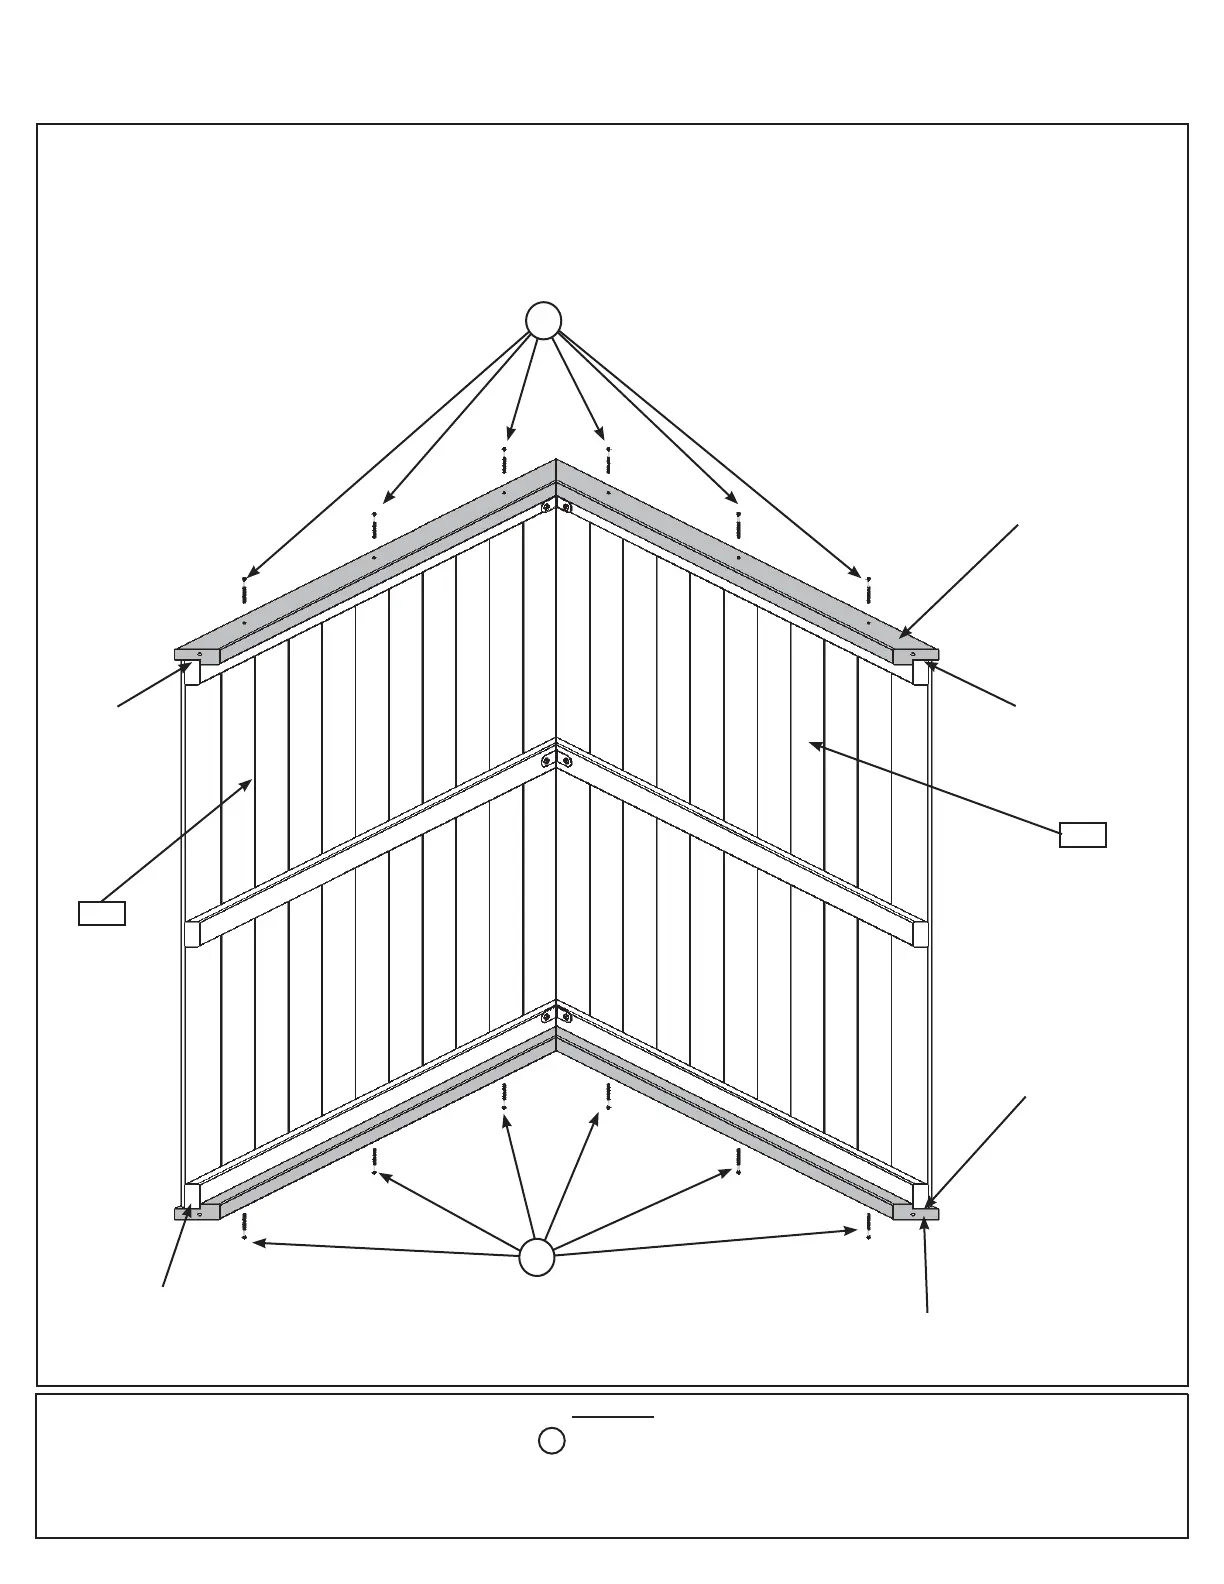
C: Place 1 Roof Support Assembly against one side so the peaks meet and the ends of the roof supports are
ush with the ends of the roof panels. Attach with 6 (S11) #8 x 2” Wood Screws. (g. 24.4)
D: Attach the second Roof Support Assembly on the opposite side, peaks to meet and ends are ush with 6
(S11) #8 x 2” Wood Screws. (g. 24.4)
Step 24: Roof Assembly
Part 2
12 x #8 x 2” Wood Screw
S11
Flush
Flush
S11
S11
Flush
Flush
Roof Support
Assembly
Roof Support
Assembly