Assembling Your Celestron C5 Spotting Scope • 7
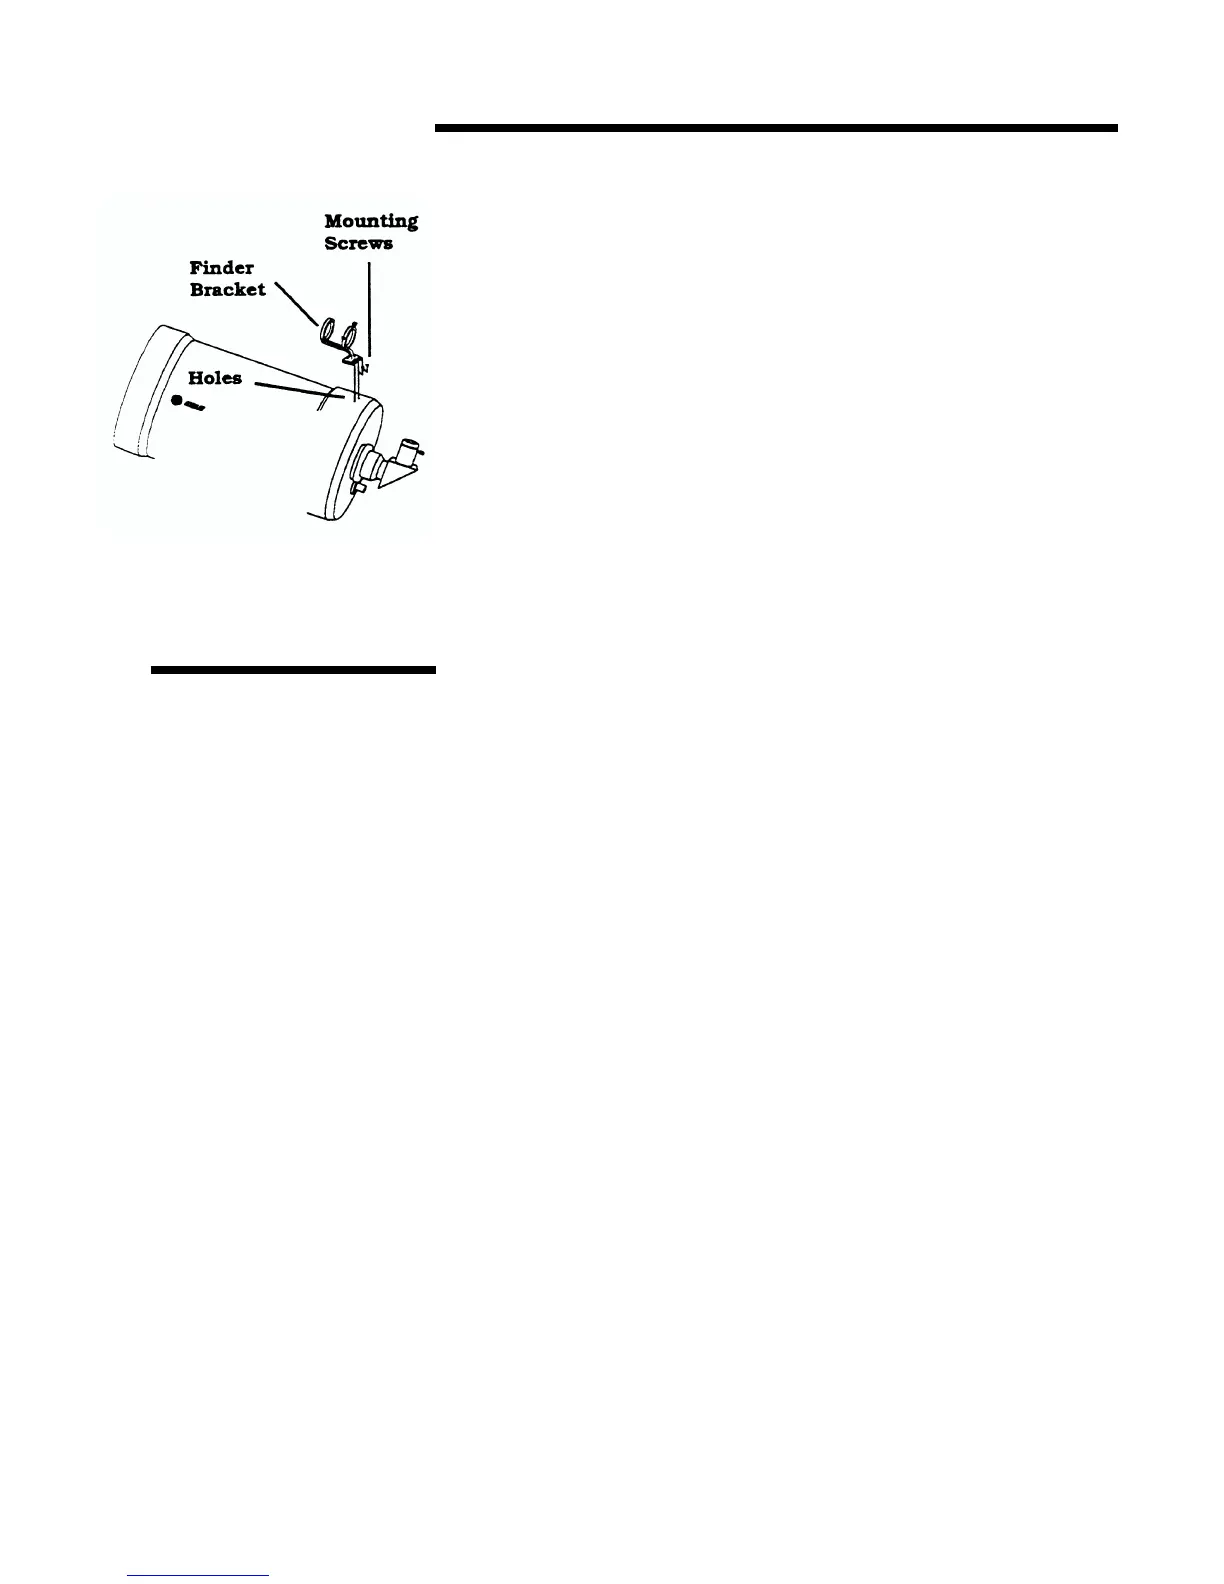
Attaching the Finder to the Bracket
With the bracket firmly attached to the spotting scope, you are ready to attach the
finder to the bracket.
1. Thread the three screws into the finder bracket. Tighten the screws until the
ends are flush with the inner diameter of the bracket ring. Do not thread them
in completely or they will interfere with the placement of the finder.
2. Slide the rubber O-ring onto the back (eyepiece end) of the finder — it may
need to be stretched a little.
3. Position the O-ring on the main body of the finder so that it is toward the front
(i.e., objective) end of the finder.
4. Slide the finder, objective end first, into the front ring of the bracket. Push it
back until the O-ring is snug inside the front ring of the bracket.
5. Hand tighten the three set screws until snug.
To align the finder, please see the section on “Aligning the Finder.”
The C5 spotting scope will attach to any photographic tripod with a 1/4x20
threaded screw. The C5 attaches to the tripod via a photo tripod adapter block that
has three 1/4x20 holes. To attach the C5 to a photographic tripod:
1. Place any of the 1/4x20 holes in the photo tripod adapter block over the 1/4x20
screw on your photographic tripod.
2. Tighten the 1/4x20 screw to hold the C5 firmly in place.
If the telescope/spotting scope is not properly balanced, try using one of the other
holes in the photo tripod adapter block. Once mounted on the photographic tripod,
you are ready to use your C5 spotting scope.
Attaching the C5 to a
Photographic Tripod
Figure 1-3