7
OPERATION
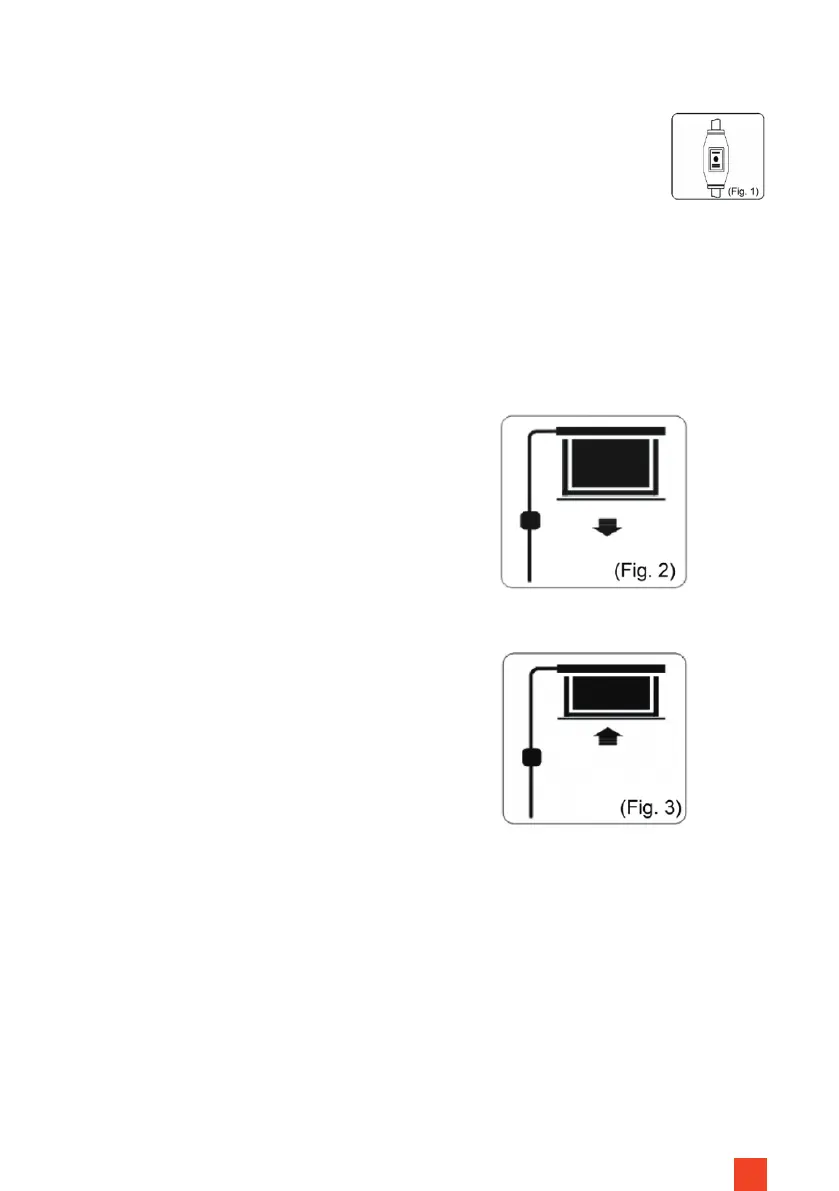
STEP 1: SAFETY CHECK (FIG. 1)
STEP 3: RETRACT SCREEN (FIG. 3)
Insert the plug into the socket (ensure correct voltage). The cable must not be
laid on hot surfaces or stretched. When using an extension make sure it has
the correct speci cation. The wall control box must be mounted with the cable
outlet on the underside.
Press the arrow key pointing upwards.
The screen retracts and stops auto-
matically at the housing or the set up-
per end point. Make sure that no ob-
jects or persons obstruct the retraction
of the screen.
CONTROL VIA THE WALL CONTROL BOX
STEP 2: EXTEND THE SCREEN (FIG. 2)
Press the downward pointing arrow
button. The screen extends and stops
automatically at the set end point.
Make sure that no objects or persons
obstruct the extension path of the
screen.
STEP 4: STOP THE SCREEN
To stop the screen manually, press the stop button between the arrows.