
T
tina52Aug 8, 2025
Why my CEN-TECH 61839 Digital Camera will not turn on?
- FfernandezadamAug 8, 2025
If your CEN-TECH Digital Camera won't turn on, the most likely cause is low batteries. Replacing the batteries should resolve this issue.
Why my CEN-TECH 61839 Digital Camera will not turn on?
If your CEN-TECH Digital Camera won't turn on, the most likely cause is low batteries. Replacing the batteries should resolve this issue.
Why does the display on my CEN-TECH 61839 Digital Camera turn off by itself?
If the display of your CEN-TECH Digital Camera turns itself off, this is likely due to low batteries. Replacing the batteries should solve the problem.
Why is the light dim on my CEN-TECH Digital Camera even at maximum brightness?
If the light on your CEN-TECH Digital Camera is dim even at maximum brightness, it probably means the batteries are low. Try replacing the batteries.
What to do if my CEN-TECH 61839 display is on, but does not show image?
If your CEN-TECH Digital Camera display is on but doesn't show an image, there could be a couple of reasons: * A loose cable connection. Ensure the cable is securely connected. * A dirty Imager Head. Try cleaning the Imager Head.
General safety guidelines for the work environment, including cleanliness and ventilation.
Precautions to prevent electric shock, especially when working with water or electricity.
Operator safety measures including protective gear and avoiding hazards.
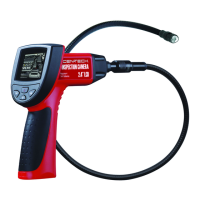
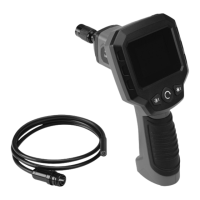
Identification of the parts included with the digital inspection camera.
Instructions for correctly inserting batteries into the device.
Overview of the buttons and functions on the handheld display.
Guidance on viewing the camera feed on the display or external monitor.
Common problems and their likely solutions for the inspection camera.
The CENTECH Digital Inspection Camera (Item 61839) is a handheld device designed for visual inspection in hard-to-reach areas. It features a flexible cable with an imager head equipped with adjustable LED lights, allowing users to view and inspect various environments on a built-in display screen or an external monitor.
The primary function of this device is to provide visual access to confined or obstructed spaces where direct line of sight is not possible. It is suitable for inspecting walls (after shutting off circuit breakers), pipes (after checking for electrical charges), engines (after turning off the automobile), and other areas that may require visual assessment for maintenance, troubleshooting, or general inspection. The imager head captures images that are displayed in real-time on the handheld unit's screen. The adjustable LED lights on the imager head illuminate the inspection area, and the brightness can be controlled by the user. The device also includes a "Flip Image" function to adjust the orientation of the displayed image, which is useful when navigating in complex spaces. Accessories such as a mirror, hook, and magnet can be attached to the imager head to enhance its functionality, allowing for tasks like retrieving small objects or viewing at different angles. The camera can also be connected to an external monitor via an RCA cable for larger display viewing.
The CENTECH Digital Inspection Camera is a practical tool for professionals and DIY enthusiasts alike, offering a safe and efficient way to conduct visual inspections in challenging environments, supported by clear operational guidelines and safety warnings.
| Brand | CEN-TECH |
|---|---|
| Model | 61839 |
| Category | Digital Camera |
| Language | English |