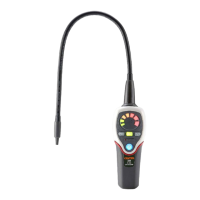
Refrigerant Leak Detector
▪ When the Instrument signals a leakage, pull the
probe away from the leak for a moment, then bring
it back to pinpoint the location. If the refrigerant leak
is large, setting the sensitivity switch to LOW will
make it easier to find the exact site of the leak.
▪ Return the sensitivity switch to HIGH before
searching for additional leaks.
▪ When you've finished leak-testing, turn OFF the
instrument and store it in a clean place, protect the
leak detector from possible damage.
8. REPLACING NEW SENSOR
The sensor has a limited operative period. Under
normal operation, the sensor should work more than
one year. Expose the sensor under high density of
coolant (>30000ppm) will shorten its life cycle rapidly. It
is important to ensure that sensor surface is free from
water droplets, vapor, oil, grease, dust and any or all
other forms of contaminant. Furthermore, to ensure
good working condition of the unit, sensors must be
replacement periodically when its operative life is over.
WARNING! When replacing new
sensor, the worn-out sensor may be HOT!!
(1) Remove cone cap cover from the tip of snake tube.
(2) Pull out old sensor and insert the new sensor into
the plug ( see below fig.2).