Page 6
For technical questions, please call 1-800-444-3353.
SKU 32879
Determine where you want to use 2.
the Press and bolt it to the oor (See
Mounting to the Floor - page 7).
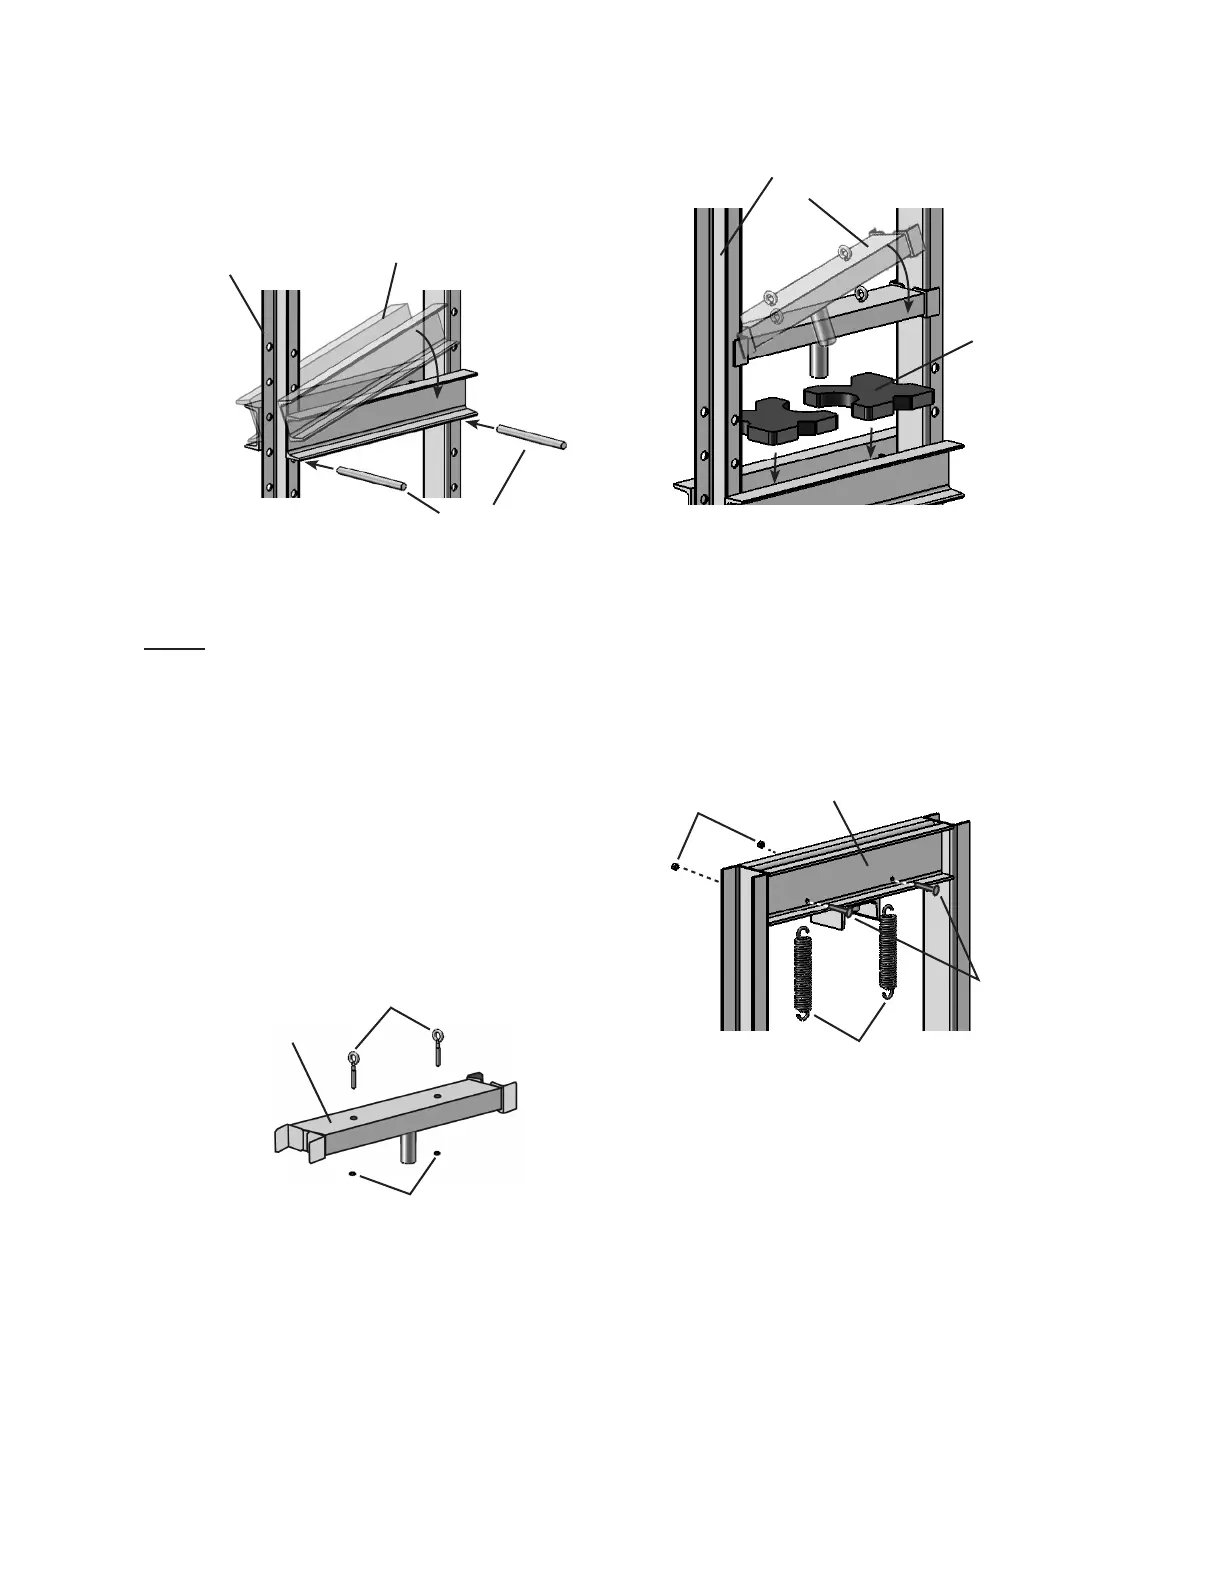
Figure 3
Pins (6)
Press Frame (1)
Press Apron (5)
3. Slide the Pins (6) into the holes in the
Press Frame (1).
Note: For set-up, position the pins at least
several holes down from the top
holes in the Frame legs so you have
room to place the Jack Plate (2). You
can re-adjust the placement of the
Press Apron after assembly.
Angle the Press Apron (5) so the rails
of the Press Apron straddle the Legs
of the Press Frame, then lower into
place so the Press Apron rests on the
Pins.
Figure 4
Jack Plate (2)
Eye Bolts (8)
Nuts (11)
4. Insert the Eye Bolts (8) into the holes
in the Jack Plate (2) and secure in
place with the Nuts (11).
Figure 5
Arbor
Plate
(3)
Jack Plate (2)
Press Frame (1)
5. Place the Arbor Plates (3) on the
Press Apron.
Angle the Jack Plate (2) the same
way you placed the Press Apron and
slide it down the Press Frame so it
rests on the Arbor Plates.
Figure 6
Nuts (11)
Spring (7)
Spring
Bolts
(10)
Press Frame (1)
6. Insert the Spring Bolts (10) through
the top of the Press Frame (1) and
secure with the Nuts (11).
Hang the Springs (7) on the Spring
Bolts.
 Loading...