Page 7
For technical questions, please call 1-800-444-3353.
SKU 32879
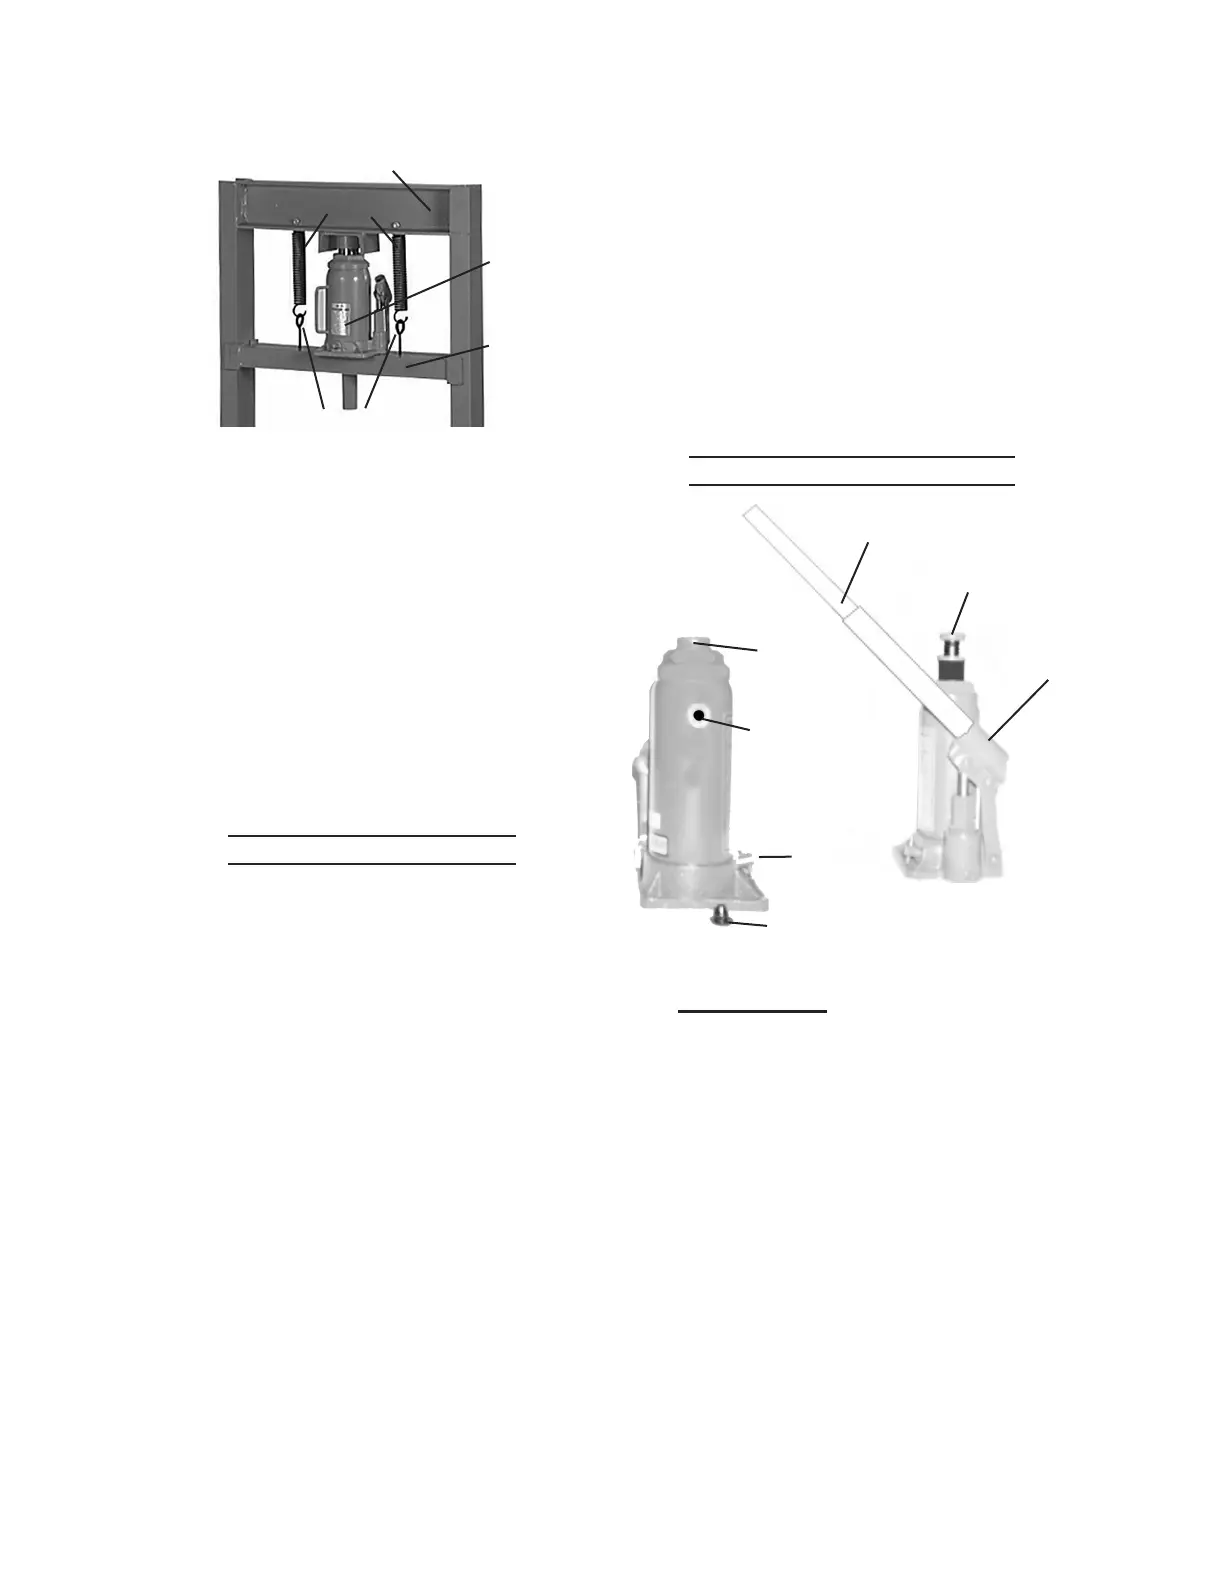
Figure 7
Bottle
Jack
(14)
Springs (7)
Press Frame (1)
Eye Bolts (8)
Jack
Plate
(2)
7. Bleed the Bottle Jack (see Bleeding
the Bottle Jack section) and make
sure it is fully collapsed. Place the
Bottle Jack (14) on the center of the
Jack Plate (2). Slide the Jack Plate
up the Press Frame (1) so the Bottle
Jack Saddle ts in the bracket (center
underside of top of frame). Hook the
Springs (7) into the Eye Bolts (8) to
secure the Bottle Jack/Jack Plate in
place.
Mounting to the Floor
To mount the Shop Press, with 1.
assistance, move the unit to the
location where it is to be used. If
needed, drill four 1/2” diameter
mounting holes in the feet and use as
a template to mark the spots where
four 1/2” diameter holes will be drilled
in the concrete or wood oor. Check
for any hidden wiring or cables and
adjust the location for the holes as
needed. Then, temporarily set the
Shop Press aside.
Use a masonry drill bit to drill the 2.
four 1/2” diameter holes (about 3”-4”
deep) into the concrete. Make sure to
blow out the concrete dust from the
drilled holes. Insert lag screw anchors
(not included) into the holes.
Set the Shop Press back to the 3.
location where it is to be used, and
align the four 1/2” diameter mounting
holes in its feet with the four pre-
drilled 1/2” holes in the concrete or
wood. Then use four minimum 3”
long, 1/2” diameter, concrete anchor
bolts or lag bolts (not included)
to secure the Shop Press to the
concrete or wood oor.
Bleeding the Bottle Jack
Plunger/
Fulcrum
Handle (15)
Elevating
Screw
(some models)
Oil Fill Hole
Oil Filler
Plug
Valve
Release
Screw
Saddle
Figure 8
IMPORTANT! Before rst use, check
for proper hydraulic oil level in the
Jack. Then thoroughly test the Jack
for proper operation prior to its actual
use. If the Jack appears not to be
working properly, it may be necessary
to bleed its hydraulic system of
excess air. To bleed the Bottle Jack:
Remove the Oil Filler Plug. Insert 1.
the slot on the lower portion
of the Handle over the Valve
Release Screw. Turn the Handle
counterclockwise to close the Valve
Release Screw.
 Loading...