Page 12 ;&(%$*4.8"4,7%<'*#$"&8#=%/7*,#*%4,77%>?@@@?@AA?BCDC1 Item 60801
EF;6GH IJ6KFGLIM NFLMG6MFMO6E6GPJ
I/*(,$"83%L8#$('4$"&8#
%K*,9%$.*%6MGLK6%LNJIKGFMG%EF;6GH%LM;IKNFGLIM%#*4$"&8%,$%$.*%+*3"88"83%&2%$."#%
5,8',7%"847'9"83%,77%$*\$%'89*(%#'+.*,9"83#%$.*(*"8%+*2&(*%#*$%'/%&(%'#*%&2%$."#%/(&9'4$1
L8#/*4$%E&9,%S7,#$*(%+*2&(*%'#*=%7&&Y"83%2&(%9,5,3*9=%7&&#*=%,89%5"##"83%/,($#1%%
L2%,8[%/(&+7*5#%,(*%2&'89=%9&%8&$%'#*%E&9,%S7,#$*(%'8$"7%(*/,"(*91
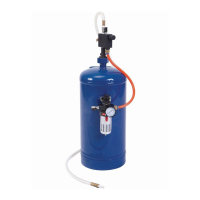
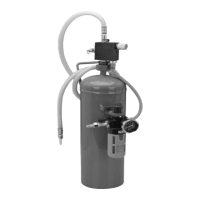
G&&7%E*$%P/%?%T&,9"83%F+(,#"]*
GI%JK6!6MG%E6KLIPE%LMXPKH%;KIN%FOOLU6MGFT%IJ6KFGLIM-%
O7&#*%,77%!,7]*#=%9*$,4.%$.*%,"(%#'//7[=%#,2*7[%9"#4.,(3*%,8[%(*#"9',7%,"(%/(*##'(*%"8%$.*%E&9,%S7,#$*(=%%
,89%47&#*%,77%!,7]*#%,3,"8%+*2&(*%/*(2&(5"83%,8[%/(&4*9'(*%"8%$."#%#*4$"&81
GI%JK6!6MG%E6KLIPE%LMXPKH-%
U&%8&$%,9Z'#$%&(%$,5/*(%)"$.%,8[%4&8$(&7%&(%4&5/&8*8$%"8%,%),[%8&$%#/*4"2"4,77[%*\/7,"8*9%)"$."8%
$."#%5,8',71%%L5/(&/*(%,9Z'#$5*8$%4,8%(*#'7$%"8%E&9,%S7,#$*(%2,"7'(*%&(%&$.*(%#*("&'#%.,_,(9#1
P#*%#&9"'5%+"4,(+&8,$*%+7,#$%5*9",%&87[1
QFKMLMRc%%U&%8&$%'#*%#,89%&(%&$.*(%+7,#$"83%
5,$*(",7#%$.,$%4&8$,"8%4([#$,77"8*%#"7"4,1
M&$*- Use only dry and clean abrasives
to avoid clogging the Soda Blaster.
M&$*- The Nozzle size depends on grit of media used.
Change the nozzle as needed to suit the abrasive.
1. Pull back on the blue Quick Disconnect Safety
Valve (7) collar and pull out Air Hose (10).
2. Hold collar on Tank (1) with a wrench and use
another wrench to loosen Bushing (13).
(wrenches not included.)
3. Remove entire media discharge assembly slowly,
being careful with the Pickup Tube (11) as it may
contain residual media which can spill when
removed. Allow time for the trapped aggregate
to safely discharge back into the Tank.
4. Using a funnel and screen (sold
separately), pour media into the Tank.
M&$*- If this is a large job, fill the Tank only 3/4 full
and reload as needed to finish the job.
M&$*- If the humidity is 90 to 100%, reduce the amount
of media and refill more frequently to reduce clogging.
5. Inspect condition of the O-ring (12) at the bottom
of the Bushing, and replace if damaged.
6. Insert the Pickup Tube into the Tank and
tighten the Bushing. U&%8&$%&]*(%$"3.$*81
7. Insert the Air Hose deep into the
fitting. Release the collar.
M&$*- If air leaks around the Air Hose, remove it,
cut approximately a quarter of an inch off and reattach it.
8. Turn on the compressor and set the
regulator to the pressure recommended
for this Soda Blaster (90 PSI).
OFPGLIMc%%U&%8&$%*\4**9%Da%JEL1
 Loading...