Page 16 ?*,)(.82<&80;)@+.'(&*<'A)3;.0'.)80;;)#BCCCBC!!BDEFE5 Item 64142
GH?:IJ KL:MHINKO PHNOI:OHOQ:G:IRL
Q;.0,&<7)[09'
IK)LM:%:OI)G:MNKRG)NO[RMJ)?MKP)HQQNW:OIHV)WNGQZHMT:A))
U:?KM:)HOJ)PHNOI:OHOQ:)KM)M:LHNMG)HM:)WKO:)g&<8;+=&<7)8;.0,&<7)]09'h1
i)S.0,)HOGNB033,*_.=)'06.(X)7*77;.')-&(2)'&=.)'2&.;='5)))
Other people in the work area must also wear ANSI-approved impact safety goggles with side shields.
i)M.;.0'.)(2.)I,&77.,5
i)W.(082)(2.)0&,)'+33;X5
i)H((.93()(*)=&'820,7.)(2.)I**;)&<(*)0)3&.8.)*6)'8,03)-**=)(*).<'+,.)(20()
&()&')=&'8*<<.8(.=)0<=)&')&<8030/;.)*6)=,&_&<7)0<X)60'(.<.,'5
i):93(X)(2.)P070b&<.)0<=);.0_.)&()*3.<)=+,&<7)'.,_&8.5)))
I2.)P070b&<.)&')'3,&<7B;*0=.=)0<=)90X)80+'.)30,(')*,)0)60'(.<.,)(*)6;X)*+()*6)(2.)I**;5
1. If a fastener is jammed in the
discharge area, remove it with pliers.
a. If the jam cannot be cleared using this method,
have the Tool serviced by a qualified technician.
2. If a fastener is jammed in the Magazine,
depress the Magazine Latch and pull back
on the Moveable Magazine, sliding it back
to the end of the Fixed Magazine.
a. Use a screwdriver to release the jammed fastener
by probing the openings in the Fixed Magazine.
b. Pull out the jammed fastener and the remainder
of the fastener strip that is still in the Magazine.
Dispose of the remaining fastener strip; it is
likely bent or damaged and may cause repeated
jamming or damage to the tool if reused.
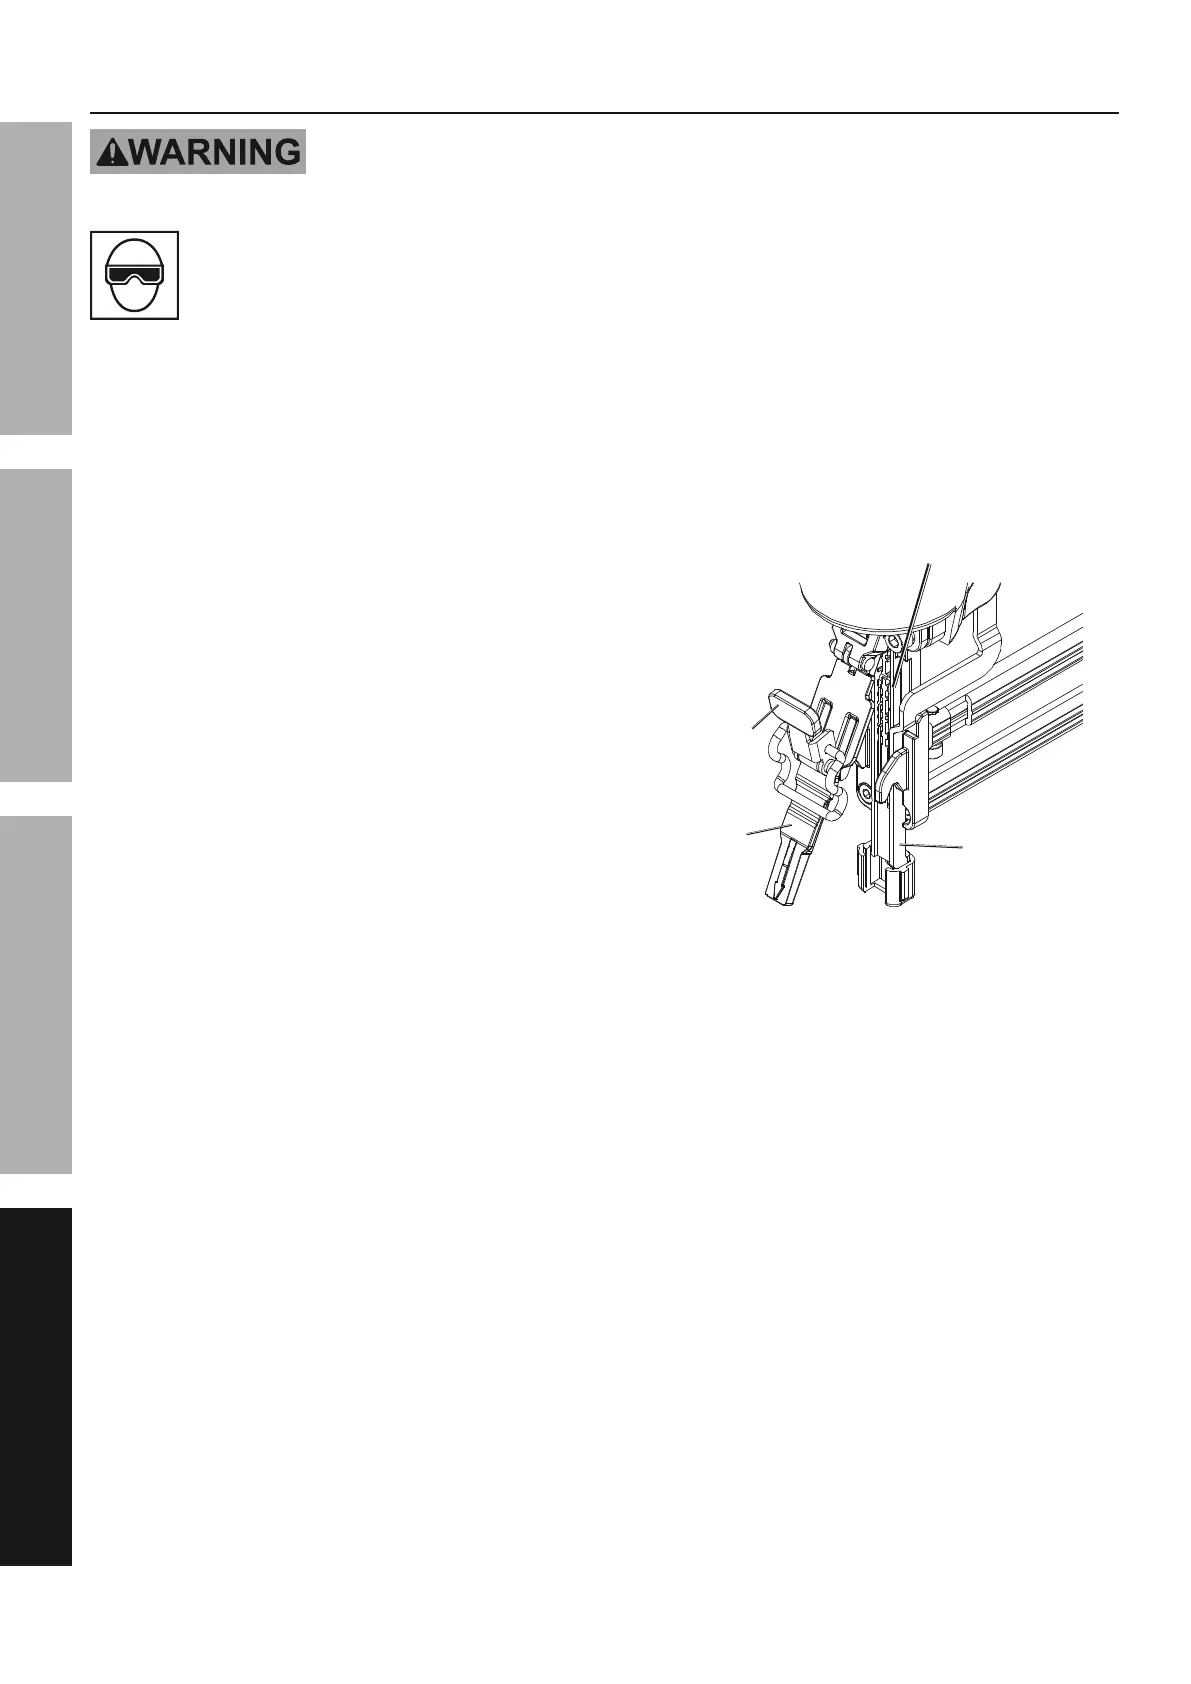
3. If a fastener is jammed in the Drive Guide,
push down on the Quick Release Latch and lift
the Drive Guide Cover off the Drive Guide.
W,&_.)T+&=.)
d+&8\)
M.;.0'.)
V0(82
G06.(X)
O*'.3&.8.
W,&_.)T+&=.)
Q*_.,
a. Remove the jammed fastener; pliers may
be necessary to remove a stuck fastener.
b. Inspect the Drive Guide for any bends or
breakage. If it is damaged, do not use the tool
until it is repaired by a qualified technician.
c. Lightly oil the Drive Guide, replace the Drive
Guide Cover and secure it by snapping the
Quick Release Latch back into place.
d. Make sure that the Safety
Nosepiece moves without sticking.
4. Reload the Nailer/Stapler and then
reconnect it to the air supply.
5. Press the Workpiece Contact of the Nailer/Stapler
against an appropriate piece of scrap wood.
6. Test fire the Nailer/Stapler several times,
checking for proper operation.
7. If the jam cannot be cleared using
the methods above, have the tool
serviced by a qualified technician.