Hardware & Networking requirements
Supported Hardware
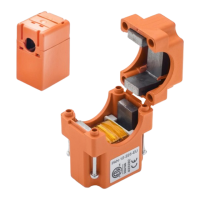
• Sensors: PAN10, PAN12, PAN14 and PAN42.
• The Modbus interface also supports reading the Bridge’s pulse inputs (Gen4 and above)
• The Modbus TCP solution is supported by Gen3 and above and requires firmware v470 or
higher. To support PAN42 sensors, and/or RTU interface, firmware v476 is needed.
• In stand-alone mode, each Bridge supports up to 32 data points (A single phase sensor or a
phase in a 3-phase sensor).
Supported LAN networks
To work in the Modbus TCP mode, the Bridge must be set-up for Ethernet or Wi-Fi network
connectivity. A Bridge configured for cellular network connectivity supports Modbus RTU but does
not support Modbus TCP.
Assigning a fixed Bridge IP address
For Modbus TCP to operate properly, the Modbus master must be able to repeatedly reach a
specific Bridge via its IP address or DNS name. The solution requires a fixed static IP address
assigned to the Bridge. This can be done by selecting ‘fixed IP’ in the Bridge network settings, or
alternatively using DHCP but ensuring that the DHCP server always assigns the same IP address to
the specific Bridge.
Please refer to the Gen 4+ Bridge Manual for more information about configuring the Bridge
networking.
Assigning a Slave address
For Modbus RTU to operate properly, the Bridge is assigned a Base (slave) Address and the
Modbus master must have a list of all the monitored Bridges and their Base Addresses (in the
range of 1 to 247).
Bridge configuration
Bridge configuration is done from a laptop’s web browser using the Bridge built-in web server.
Initial Bridge configuration, including setting up a fixed IP address to be used later, is done via a
directly connected laptop. Please see ‘Accessing the Bridge web interface’ section in the Gen 4+
Bridge Manual.
Once a fixed IP has been assigned to the Bridge and the
Bridge Admin UI Availability
in the
Bridge
Configuration
screen is set to
Always
, further configuration can be done by navigating to the Bridge
IP address from a web browser. The laptop used for such configuration must have HTTP route to
the Bridge.



 To Next Page