SmaRT HH-x10
U089.1.1-SmaRT_HH-x10
3.0 Battery Installation or Change
Two size AAA cell batteries power SmaRT HH-x10 remote control units. When installing
batteries, be sure to observe proper polarity—as marked on the inside of the compartment—to
avoid damaging the unit.
To replace or install remote control batteries:
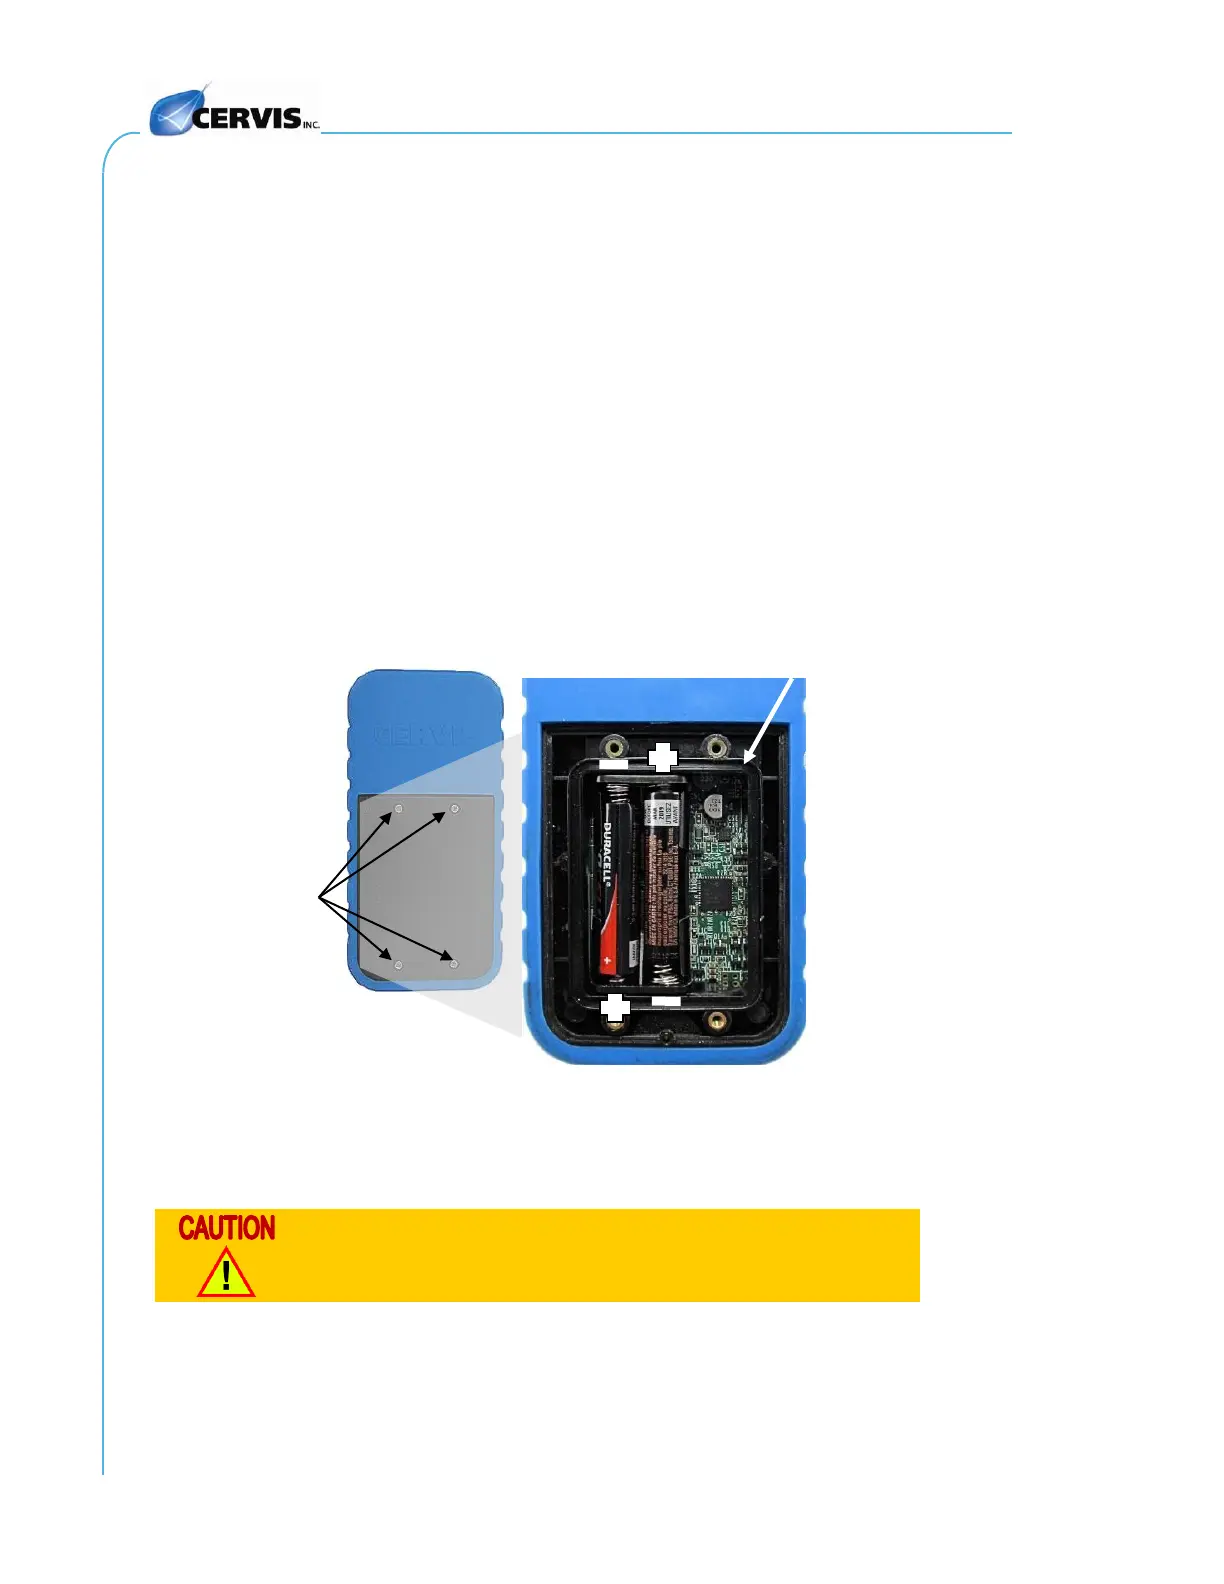
1. Loosen the four small Phillips screws on the battery compartment cover, and lift
the cover from the remote control. The screws remain attached to the cover.
2. If installing batteries in an empty battery compartment, install two fresh size AAA
cell batteries. Be sure to position the batteries as illustrated in Figure 5 below.
3. If replacing expired batteries, remove the old batteries, and install two fresh size
AAA cell batteries. (Discard the used batteries according to local regulations.) Be
sure to position the batteries as illustrated in Figure 5 below.
4. Replace the compartment cover and tighten the four Phillips screws. Do not over-
tighten these screws, but make sure they are tight enough to properly seal the
gasket.
Note: Discard expired batteries according to local regulations.
Figure 5. Remote Control Battery Installation
Note: Cover screws must be tight enough to compress the sealing gasket. Do not over-
tighten the screws.
Be sure to observe proper polarity when placing batteries in
the remote control battery compartment.
 Loading...