6
Preparation
1.InstallTheSoftware
Note:CGXAcquisitionsoftwarerunsonWindows
only.
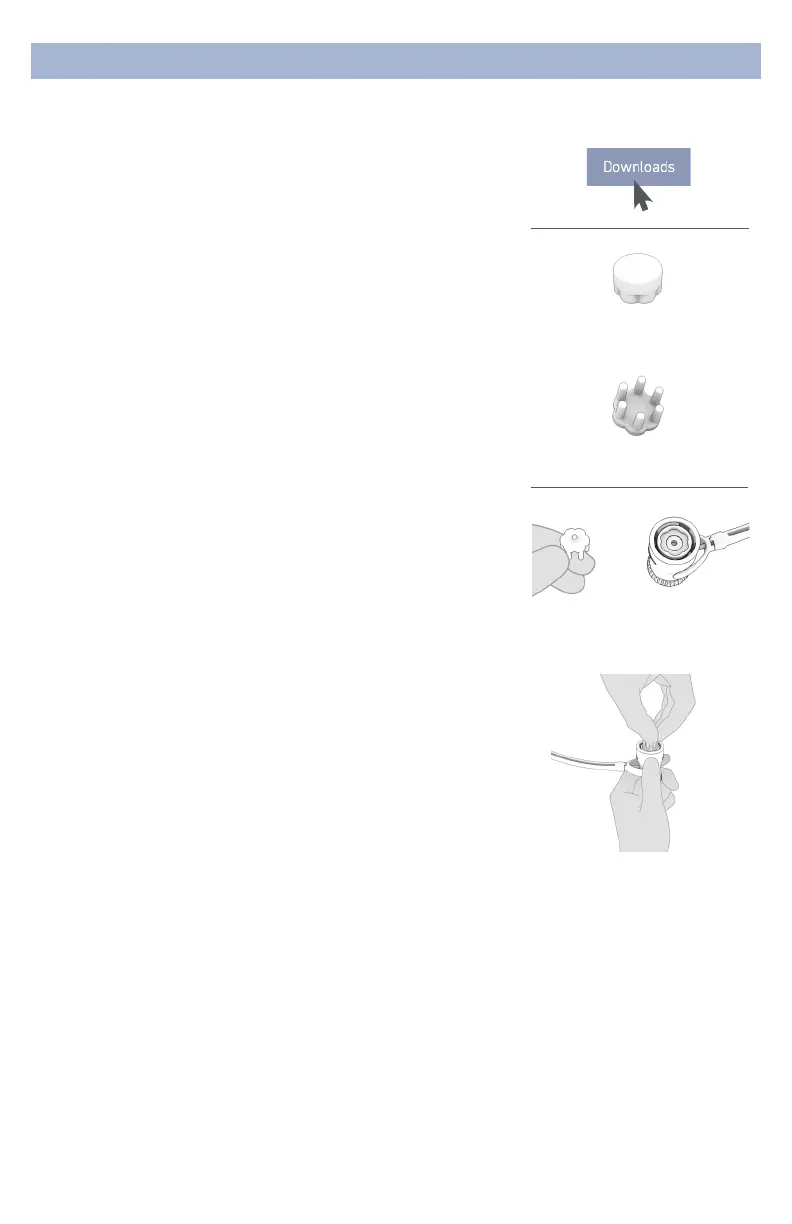
• Navigate to CGXSystems.com
• Select Downloads from the top navigation menu.
• Select ClickHereForAcquisitionSoftware
• Choose the latest version link under “Downloading and
Installing the Software.”
• Extract the zipped le to your desktop.
• Run CGX Setup and follow the instructions.
• If you see a security warning, select MoreInfo and Run
Anyway
• The software will create a shortcut on your desktop.
Download the latest software
from CGXSystems.com
2.SelectSensors
Choose the appropriate sensor for your application.
Drypad Sensors
Use Drypad sensors in positions where the subject has no
hair (forehead and bald areas).
Flex Sensors
Use Flex sensors to penetrate hair.
3.AttachSensors
Sensors have a round ower pattern on the mating end
that aligns with a recessed ower pattern on the snap
connector.
• Lightly rotate the sensor until it begins to lock into the
snap connector.
• Push rmly at the center of the sensor when installing.
• For Flex sensors, do not apply pressure to, or bend the
sensor tips.
• When removing sensors, pry between the sensor and the
connector.
• Do not pull on the tips of the Flex sensors.
Drypad Sensor for
direct skin contact
Flex Sensor for hair
Sensor footprint matches
snap connector
Attach sensor
It may require extra pressure
to insert a sensor due to
variability in surface coating.
Try that sensor in an alternate
pod location in case of a
particularly tight t.

 Loading...