EasyManua.ls Logo

Chamberlain 2280 User Manual

Chamberlain 2280
36 pages
To Next Page IconTo Next Page
Page #1 background imageLoading...
Page #1 background image
The Chamberlain Group, Inc.
845 Larch Avenue
Elmhurst, Illinois 60126-1196
www.liftmaster.com
GARAGE DOOR OPENER
Model 2280 1/2 HP
For Residential Use Only
®
Owner’s Manual
Please read this manual and the enclosed safety materials carefully!
Fasten the manual near the garage door after installation.
The door WILL NOT CLOSE unless the Protector System
®
is connected and
properly aligned.
Periodic checks of the opener are required to ensure safe operation.
The model number label is located under the light lens on the front panel
of your opener.

Table of Contents

Question and Answer IconNeed help?

Do you have a question about the Chamberlain 2280 and is the answer not in the manual?

Chamberlain 2280 Specifications

General IconGeneral
Horsepower1/2 HP
Battery BackupNo
Warranty1-year
Drive SystemChain Drive
Max Lift Power1/2 HP
Smart TechnologyMyQ Compatibility
Safety and SecuritySafety sensors
SecurityRolling code technology

Summary

Garage Door Preparation

Safety Checks and Warnings

Essential safety steps and precautions before starting installation.

Required Tools List

Lists all necessary hand tools for the installation process.

Installation Planning

Door Type Planning Considerations

Planning steps specific to sectional or one-piece doors.

Carton Contents and Hardware

Identifying Opener Components

Lists all parts included in the packaging.

Installation Hardware Inventory

Details the specific hardware required for installation.

Assembly: T-Rail and Belt Tension

Attaching T-Rail to Motor Unit

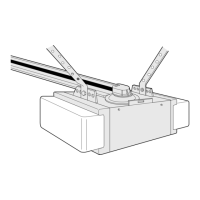
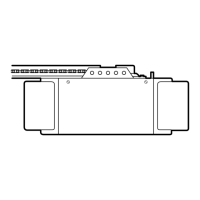
Steps for securing the T-rail to the motor unit.

Setting Belt Tension

Procedure to adjust the belt tension for optimal operation.

Assembly and Installation Introduction

Attaching Belt Cap Retainer

Securing the belt cap retainer to the motor unit.

Critical Installation Safety Instructions

Outlines essential safety rules before beginning installation.

Installation Step 1: Header Bracket Location

Sectional Door Bracket Placement

Guides header bracket placement for sectional doors.

Installation Step 1 Continued: One-Piece Doors

One-Piece Door Bracket Measurements

Details measuring for header bracket on one-piece doors.

Installation Step 2: Header Bracket Installation

Wall and Ceiling Mounting Options

Instructions for mounting the header bracket on wall or ceiling.

Installation Step 3: T-Rail to Header Bracket

Connecting T-Rail Assembly

Steps for attaching the T-rail assembly to the header bracket.

Installation Step 4: Position Opener

Opener Positioning for Different Doors

How to position the opener for sectional or one-piece doors.

Installation Step 5: Hang the Opener

Securing the Opener Unit

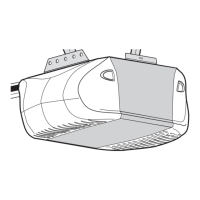
Details on how to securely hang the opener unit.

Safety Warning: Secure Mounting

Crucial safety advice regarding secure mounting.

Installation Step 6: Install Door Control

Door Control Wiring and Mounting

Steps for installing and wiring the wall-mounted door control.

Door Control Safety Precautions

Precautions for electrical safety and child access.

Installation Steps 7 & 8: Lights and Release Handle

Installing Opener Lights

Instructions for installing the opener's light bulbs.

Attaching Emergency Release Rope

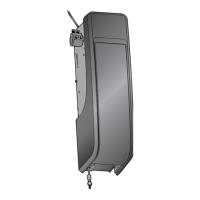
Steps for attaching the manual release rope and handle.

Safety Warning: Emergency Release

Critical safety advice for using the release handle.

Installation Step 9: Electrical Requirements

Electrical Connections and Warnings

Covers plug type, grounding, permanent wiring, and safety.

Installation Step 10: Install Protector System®

Safety Reversing Sensor Functionality

Explains how the safety sensor prevents closing on obstructions.

Sensor Mounting and Placement

Guides on sensor placement for optimal safety.

Safety Warning: Closing Door Obstruction

Critical warning about injury from closing doors.

Installing Safety Sensor Brackets

Sensor Bracket Mounting Options

How to attach brackets to door tracks, walls, or floor.

Mounting and Wiring Safety Sensors

Sensor Wiring and Alignment

Details on connecting wires and aligning sensors for operation.

Troubleshooting Safety Sensors

Common issues and solutions for safety sensor problems.

Installation Step 11: Fasten Door Bracket

Door Bracket Attachment Methods

How to attach the bracket to sectional and wood doors.

Lightweight Door Reinforcement

Reinforcement needs for lightweight doors.

One-Piece Door Bracket Installation

Attaching Bracket to One-Piece Doors

Instructions for metal and wood one-piece doors.

Installation Step 12: Connect Door Arm to Trolley

Sectional Door Arm Connection

Steps to connect the door arm to the trolley for sectional doors.

One-Piece Doors: Door Arm Assembly & Adjustment

Door Arm Assembly and Travel Limits

Assembling the arm and adjusting travel limits for one-piece doors.

Connecting One-Piece Door Arm

Final connection of the door arm to the trolley.

Adjustment Step 1: Adjust Travel Limits

Testing Travel Limits and Safety Reversal

How to test door limits and confirm safety reversal functionality.

Adjustment Step 2: Adjust Door Force

Testing and Adjusting Door Force

How to test and adjust the force required to open/close the door.

Force Adjustment Safety Warnings

Important warnings regarding force adjustment.

Adjustment Steps 3 & 4: Testing Systems

Test Safety Reversal System

Step-by-step guide to test the safety reversal function.

Test Protector System®

How to verify the safety reversing sensor is working.

Operation Overview

Critical Operation Safety Instructions

Critical safety guidelines for operating the opener.

Basic Opener Operation

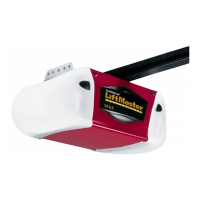
Basic operation of the opener with remotes and controls.

Using the Wall-Mounted Door Control

Door Control Features and Manual Operation

Explains control features and manual door release.

Care of Your Opener

Maintenance, Adjustments, and Troubleshooting

Covers maintenance schedule, adjustments, and initial problem-solving.

Troubleshooting Common Door Problems

Diagnosing Door Operation Issues

Addresses issues like doors opening/closing by themselves or not operating.

Programming Your Opener

Programming Remotes and Erasing Codes

Steps to program new remotes and clear previous codes.

Keyless Entry PIN Programming

Adding or Changing Keyless Entry PIN

Instructions for programming and changing Keyless Entry PINs.

Repair Parts Identification

Rail and Installation Parts Lists

Lists and diagrams parts for the rail assembly and installation kit.

Motor Unit Assembly Parts Breakdown

Motor Unit Component Identification

Detailed diagram and list of motor unit parts.

Available Accessories

Service, Parts, and Warranty Information

Contacting LiftMaster Service and Ordering Parts

Information on contacting service and ordering replacement parts.

LiftMaster One-Year Limited Warranty

Explains the terms and conditions of the product warranty.

Related product manuals