Do you have a question about the Chamberlain 3245 1/3 HP and is the answer not in the manual?
Explains safety symbols and signal words used in the manual for hazard identification.
Provides essential pre-installation checks for the garage door's balance and condition.
Lists the necessary hand tools for assembly and installation of the garage door opener.
Guides users to survey their garage area for installation considerations and potential material needs.
Details the contents of the opener packaging for verification before starting installation.
Instructions for connecting the main drive rail to the motor unit using specific hardware.
Steps for mounting the drive chain onto the sprocket and securing the protective cover.
Procedure for adjusting the chain tension for proper operation and to prevent noise.
Critical safety guidelines to follow during the installation process to prevent injury.
Guides on selecting the correct mounting position for the header bracket based on door type.
Detailed steps for securely mounting the header bracket to the wall or ceiling structure.
Connects the opener rail assembly to the header bracket using a clevis pin and fastener.
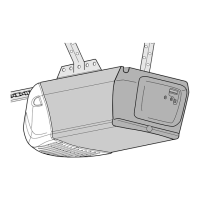
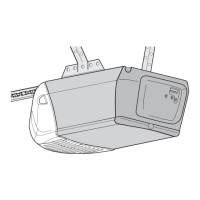
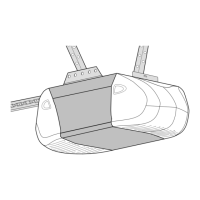
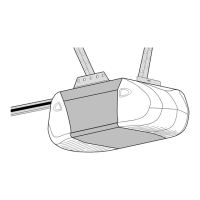
Instructions for correctly placing the opener unit relative to the garage door for optimal operation.
Provides methods for securely mounting the motor unit to the garage structure using hanging brackets.
Steps for wiring and mounting the wall-mounted door control panel safely and correctly.
Guidance on installing the opener's light bulb and lens assembly.
Instructions for attaching the manual release mechanism for safety and emergency use.
Details on power connection, grounding, and wiring compliance with local codes.
Steps for installing the safety reversing sensor system, crucial for door reversal.
Instructions for attaching the bracket to the garage door, with variations for door types.
Guides on connecting the opener's door arm to the trolley mechanism for door movement.
How to set the upper and lower travel points for the garage door to stop automatically.
Procedures for setting the force required to open and close the door for safe operation.
Crucial test to ensure the door reverses upon encountering an obstruction.
Verifies the functionality of the safety reversing sensors by testing their obstruction response.
Critical safety warnings for operating the garage door opener to prevent injury.
Explains how to activate the opener using remotes and the wall-mounted door control.
Details the functions of the push bar, light, and lock buttons on the control panel.
Instructions for disengaging the opener and operating the door by hand in emergencies.
Steps to sync new remotes or re-program existing ones to the opener.
Procedure to delete all previously programmed remotes and keyless entries.
Guides for setting up or modifying the Keyless Entry system PIN for access.
Lists and illustrates components specific to the opener's rail system.
Lists and illustrates various hardware and components used during installation.
Explains how weather conditions can affect opener adjustments and requires re-adjustment.
Provides a schedule for regular checks, lubrication, and safety tests for the opener.
Troubleshooting steps for when the door won't close and indicator lights blink.
Solutions for when the remote control is not operating the door opener.
Addresses issues with unexpected door reversal after adjustments or due to conditions.
Troubleshooting steps for a humming motor unit or a stuck trolley.
A guide to interpreting LED flashes on the motor unit for diagnosing opener issues.
Information on ordering replacement parts and contacting technical support.
Details the limited warranty terms and conditions for the garage door opener product.
| Brand | Chamberlain |
|---|---|
| Model | 3245 1/3 HP |
| Category | Garage Door Opener |
| Language | English |